Novembre 2015

Ok

En poursuivant votre navigation sur ce site, vous acceptez l'utilisation de cookies. Ces derniers assurent le bon fonctionnement de nos services. En savoir plus.

rebel

  • (3) X-1 Vipère Automadon

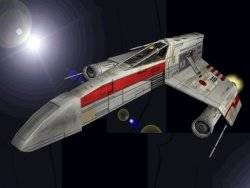
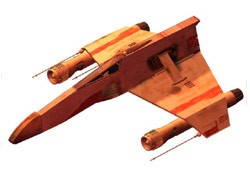
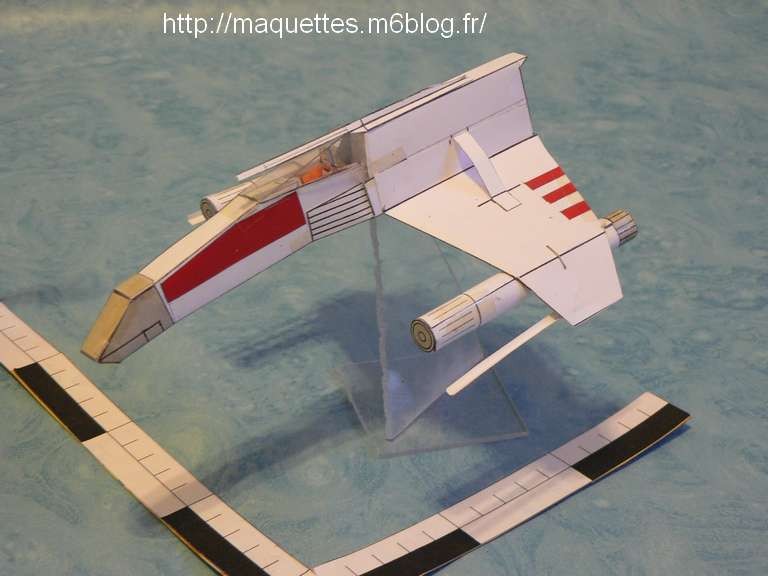
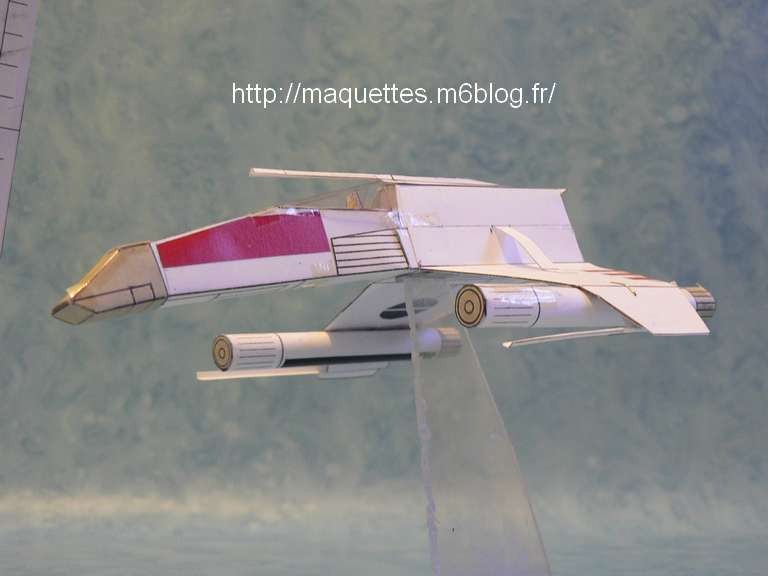
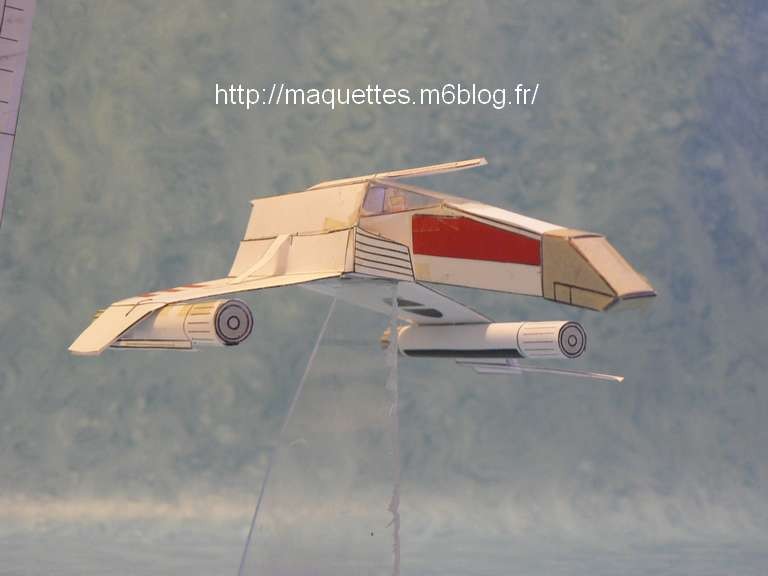
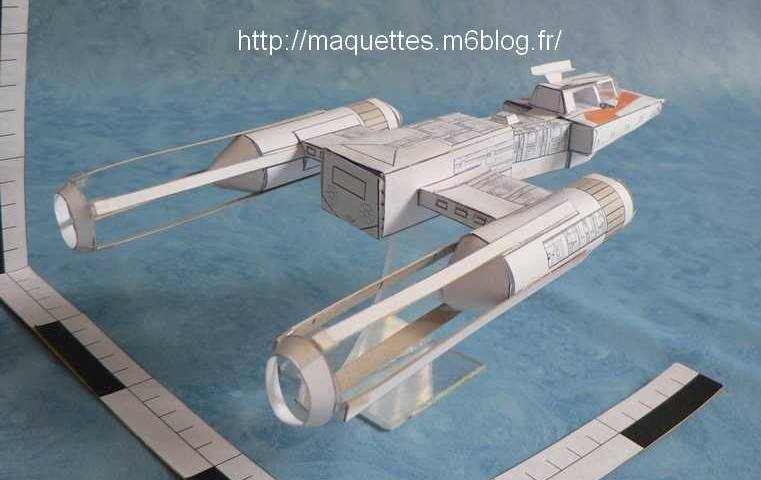
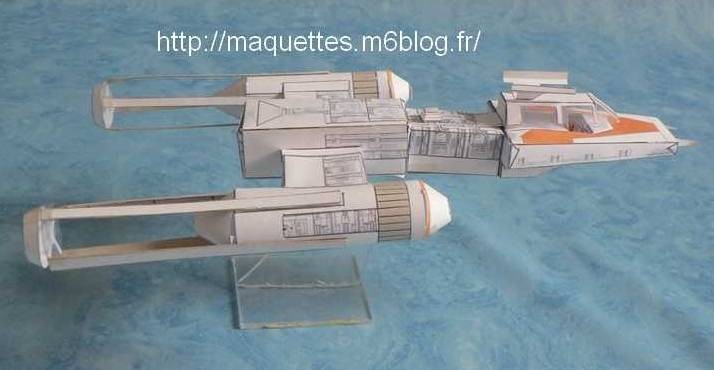
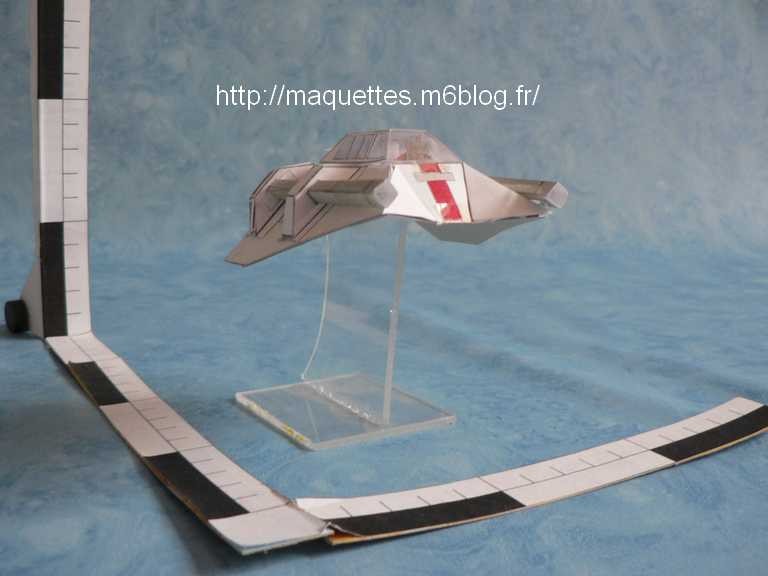
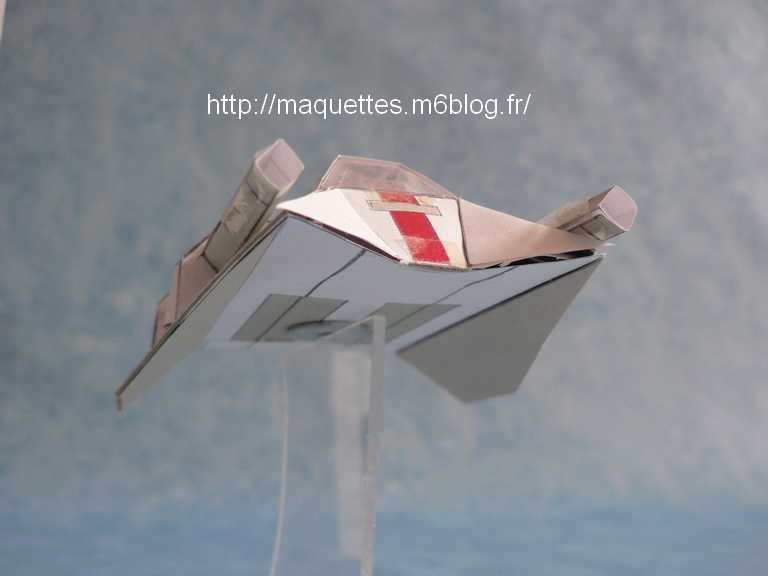
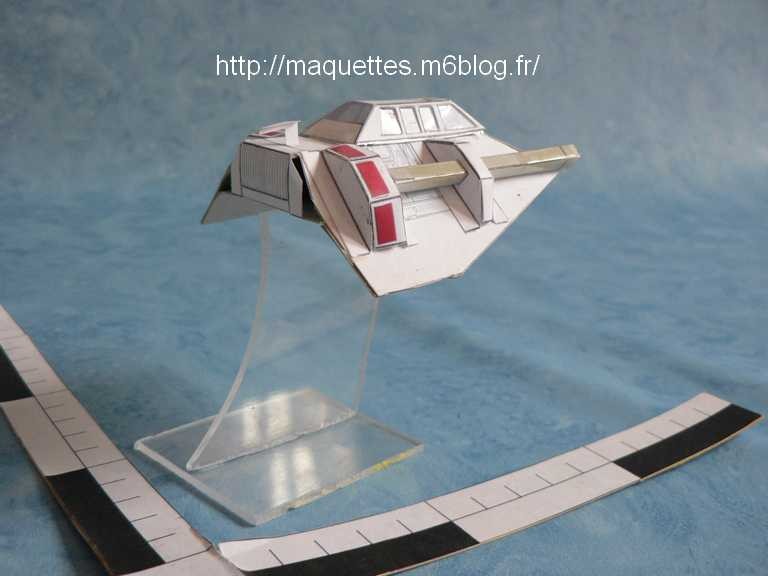
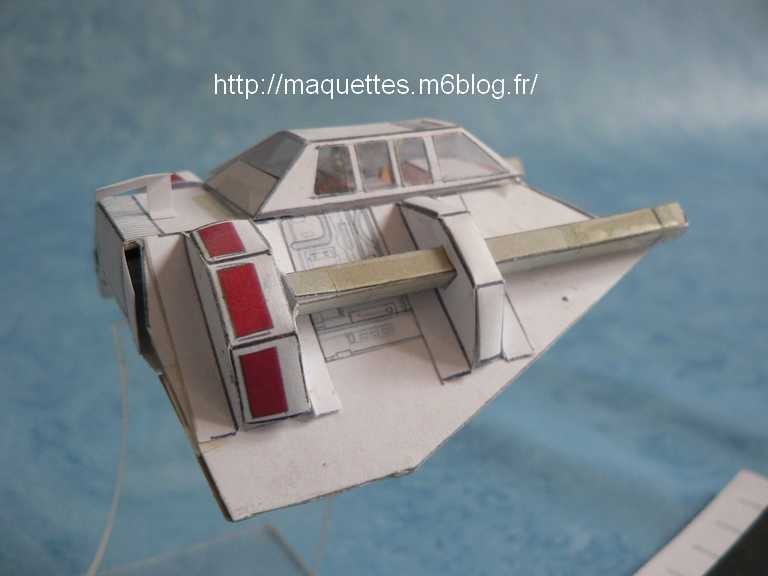
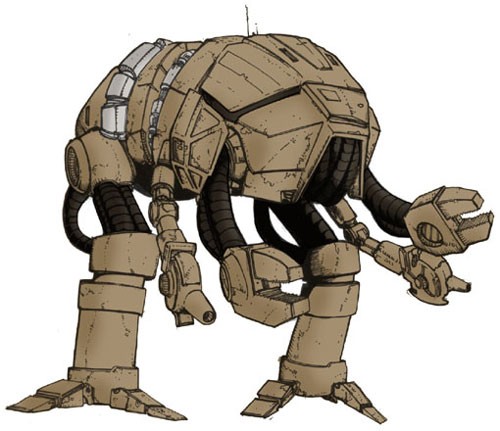
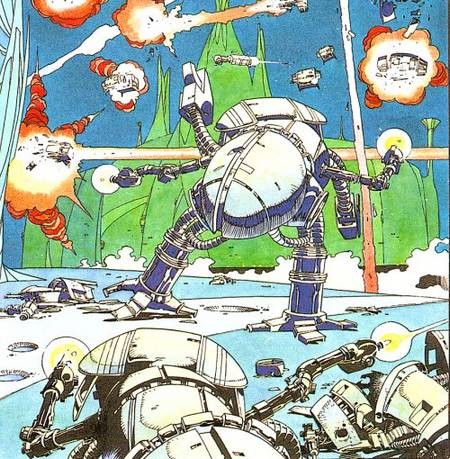
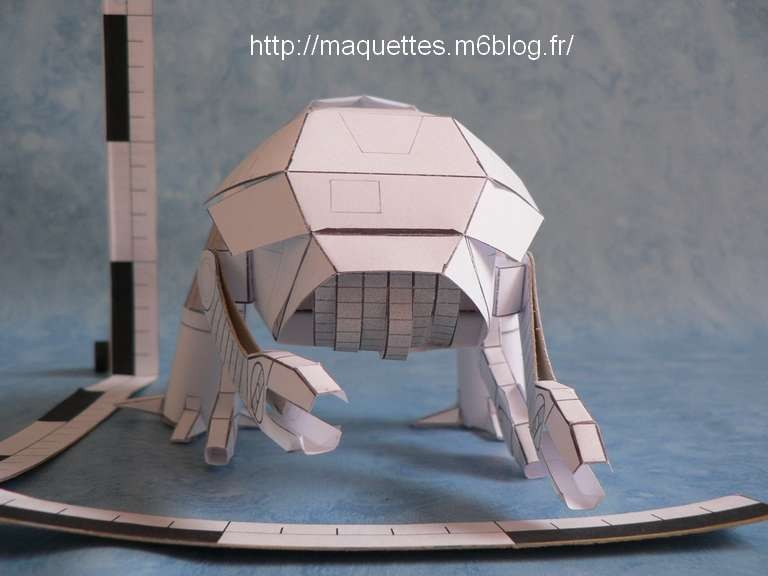
    Droide de combat construit par le gouvenreur beltane sur la planète Balmorra et utilisé par la rebellion pendant l'assaut de la citadelle de l'empereur sur la planète byss ! / Battle droid built by beltane on planet balmorra and used by the rebellion during the assault of the citadel of the emperor on the planet byss!

    vipere automadon-image01.jpg
    vipere automadon-photo01.JPG
    vipere automadon-image02.jpg
    vipere automadon-photo02.JPG
    vipere automadon-image03.jpg
    vipere automadon-photo03.JPG
    vipere automadon-photo04.JPG
    vipere automadon-photo05.JPG
    vipere automadon-photo06.JPG
    vipere automadon-photo07.JPG

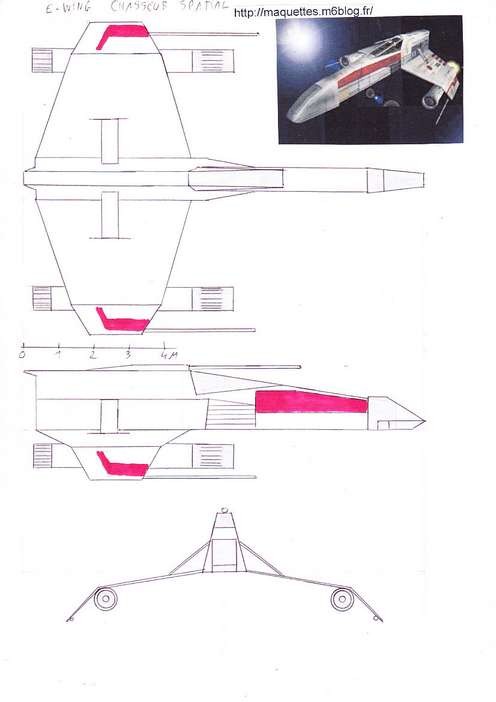
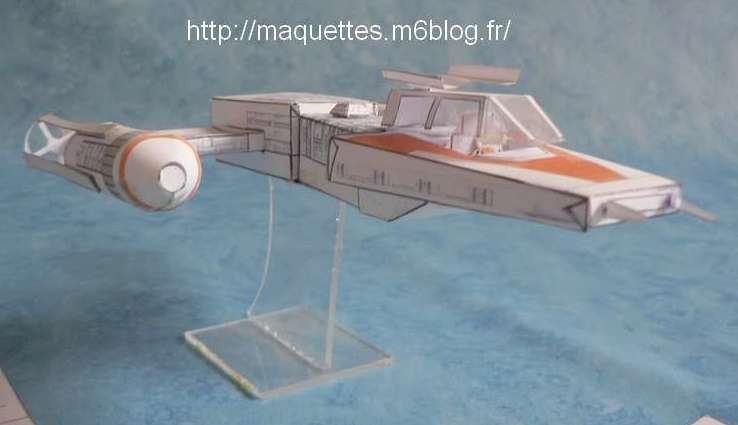
    Pour plus de renseignements sur le X-1 Vipère Automadon, voir le lien / For more information on X-1 Vipère Automadon, follow this link : http://www.starwars-holonet.com/holonet.php?fiche=ship_automadon

    vipere automadon-plan3vues.jpg
    vipere automadon-schéma.jpg
    vipere automadon-pièces1.jpg
    vipere automadon-pièces2.jpg

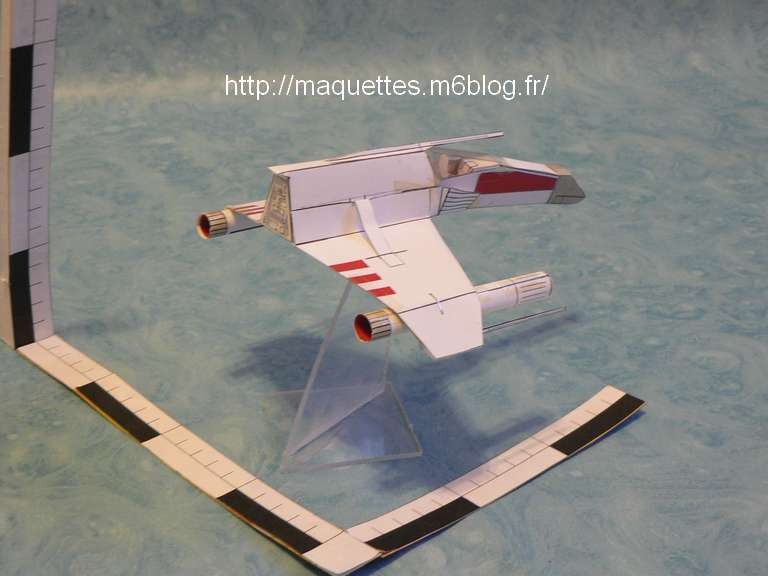
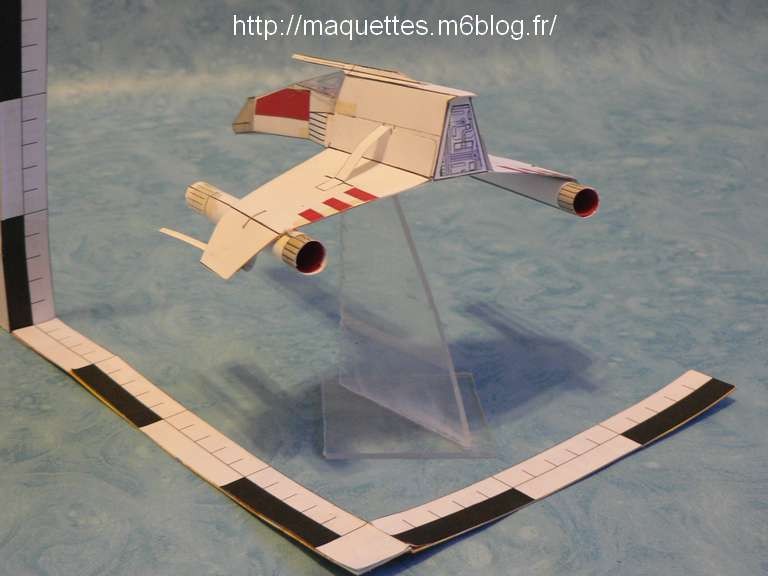
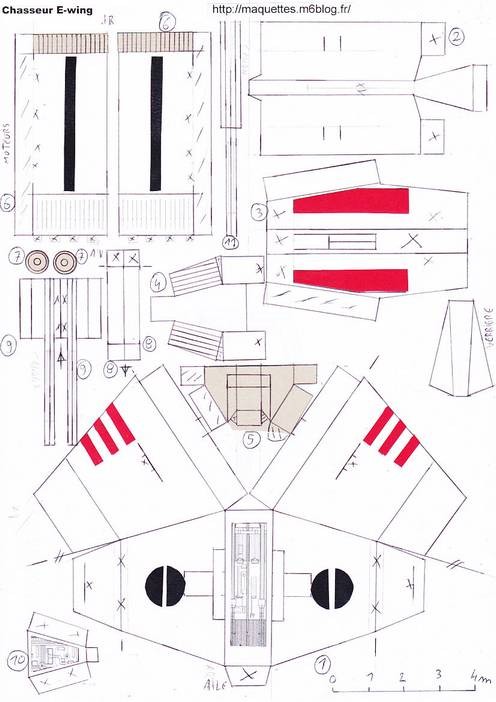
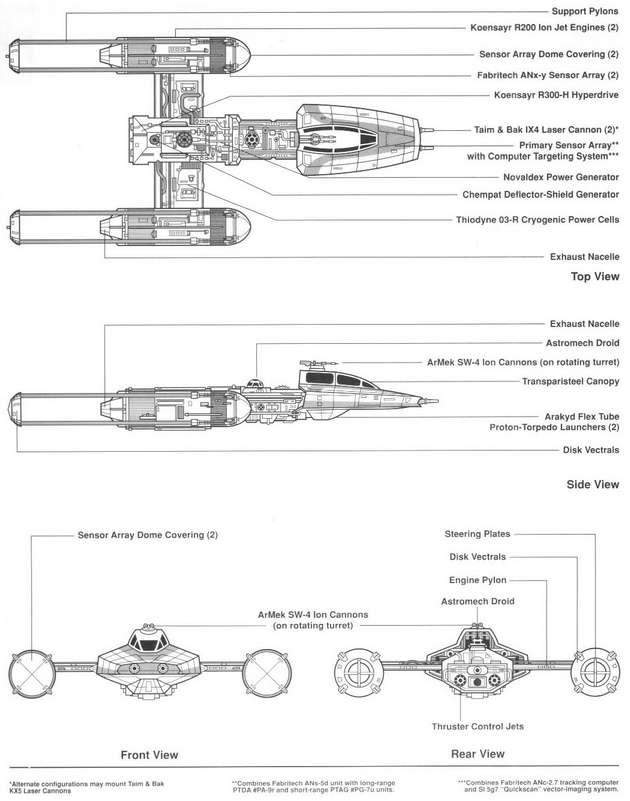
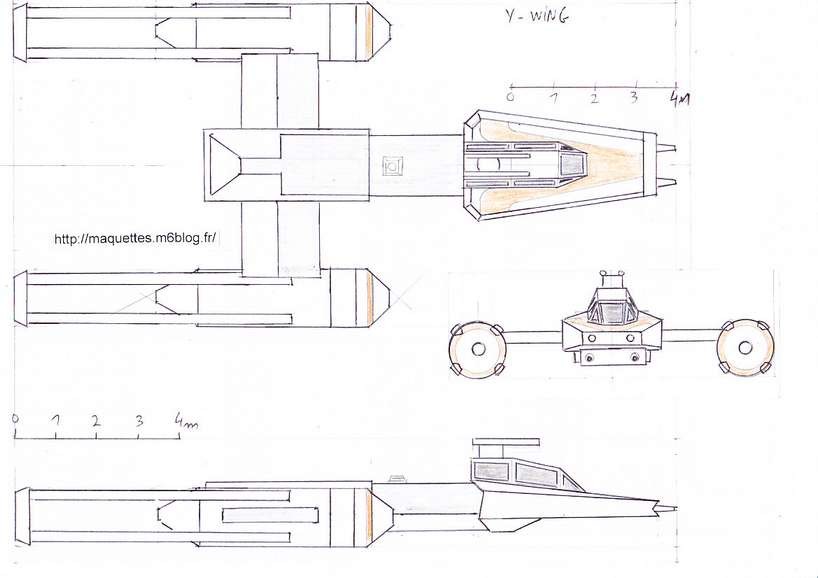
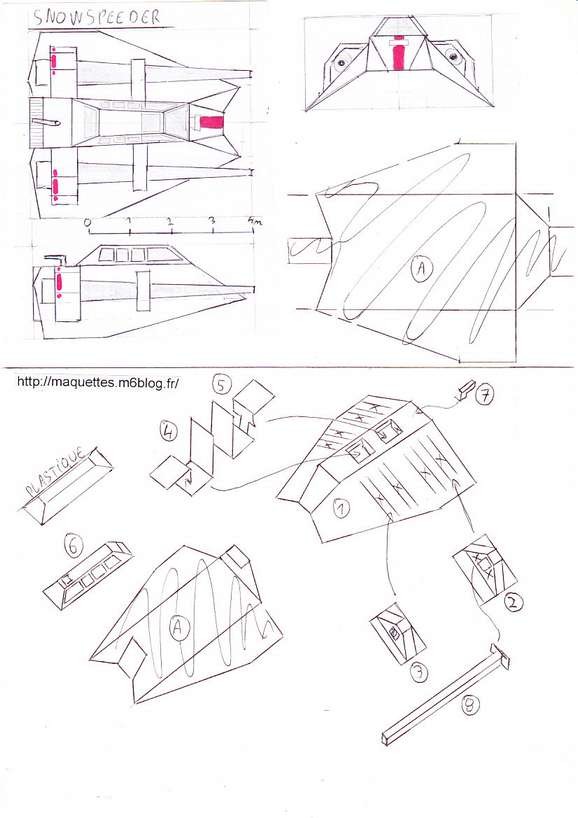
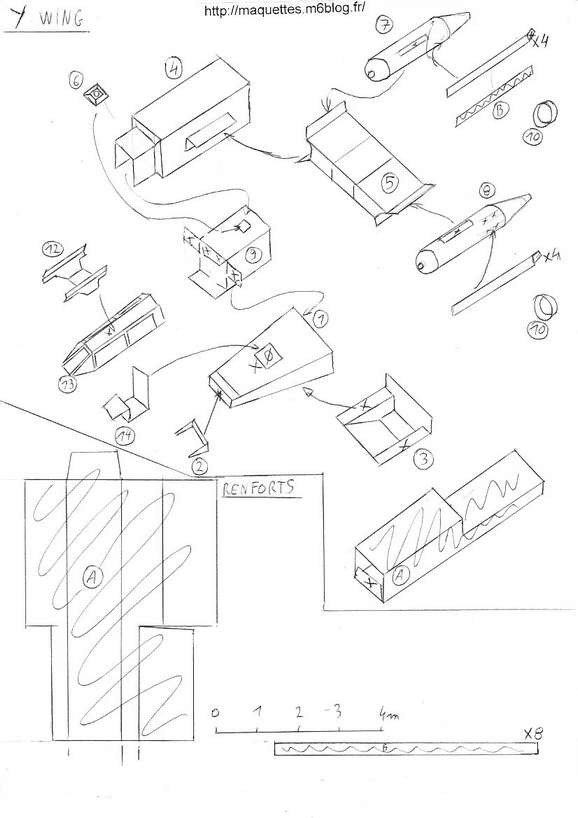
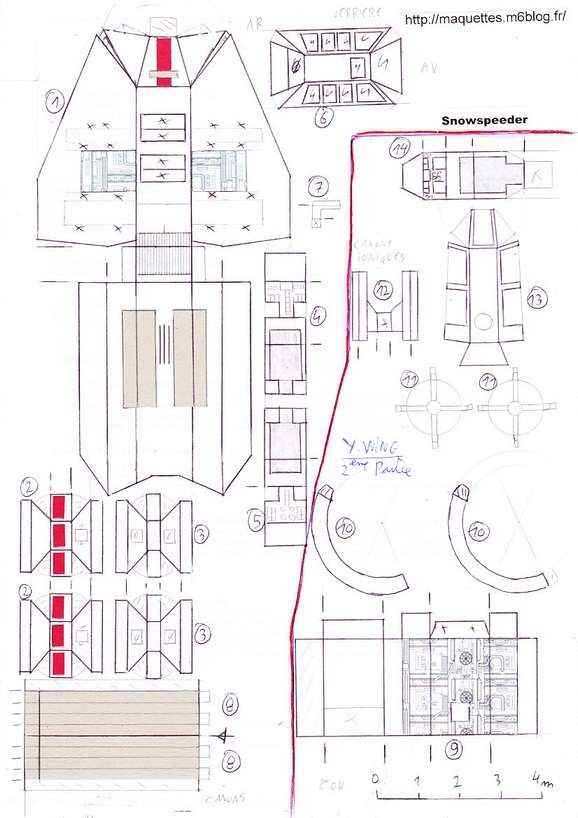
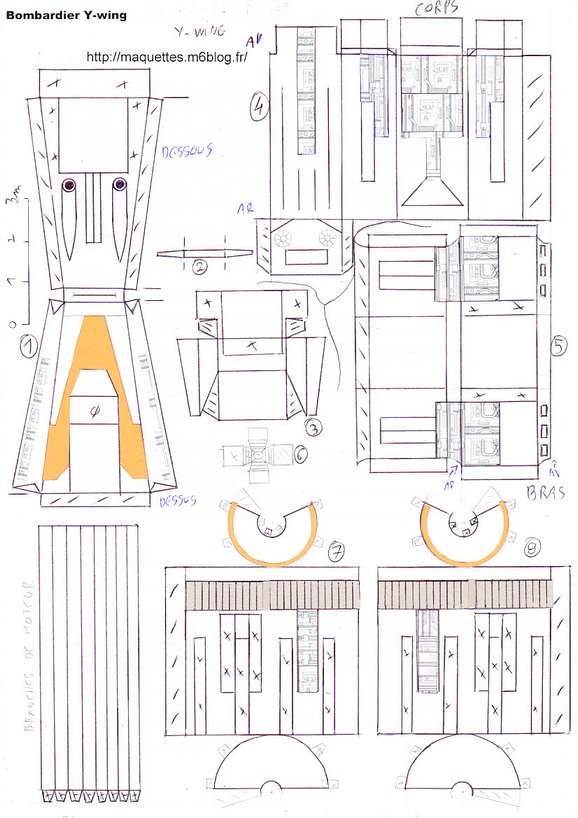
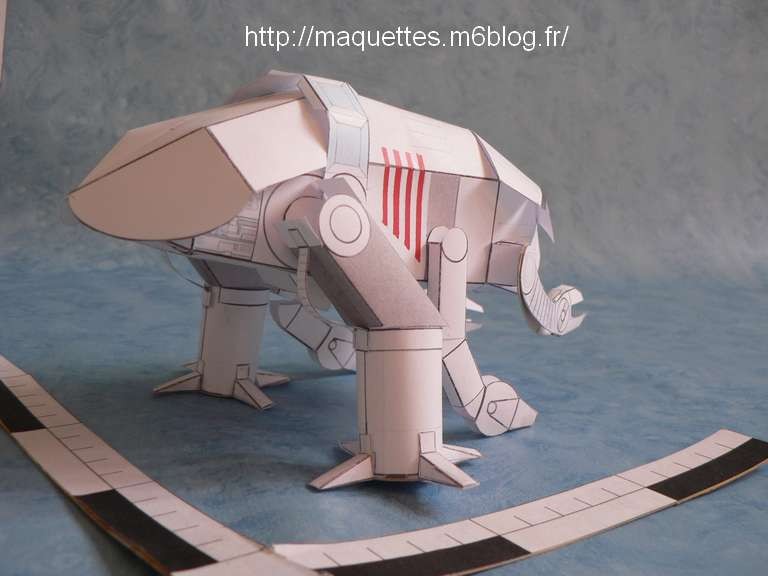
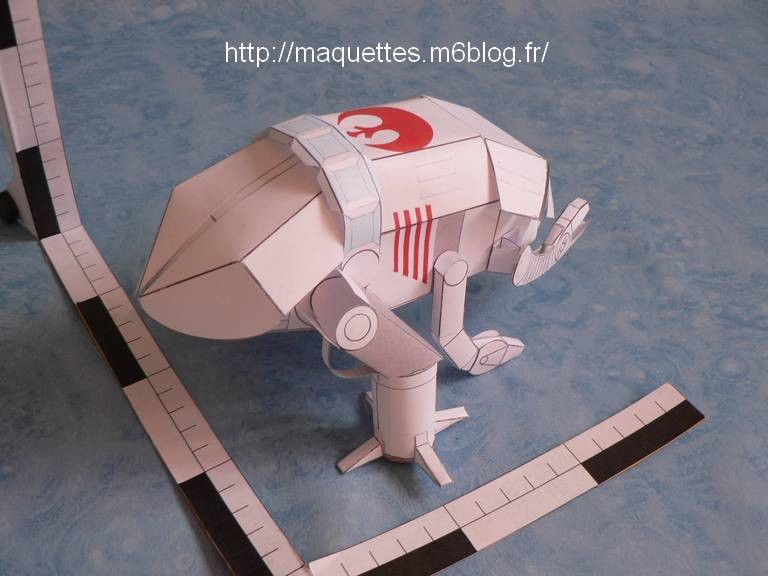
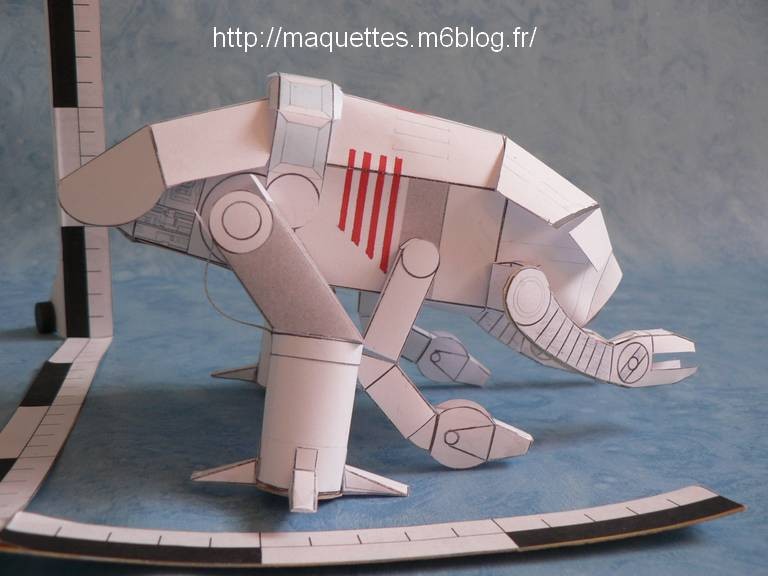
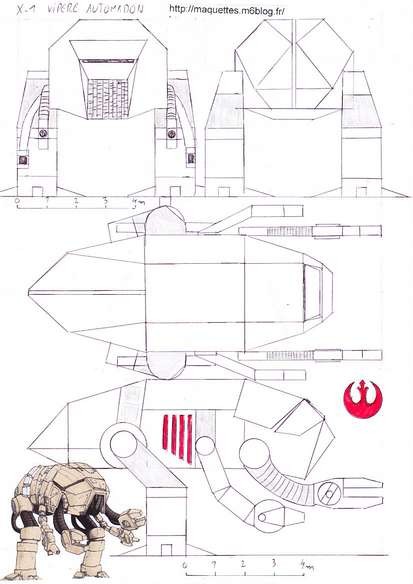
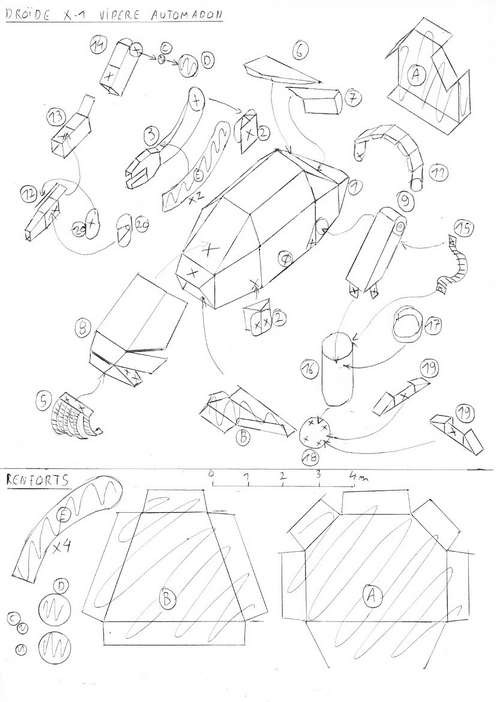
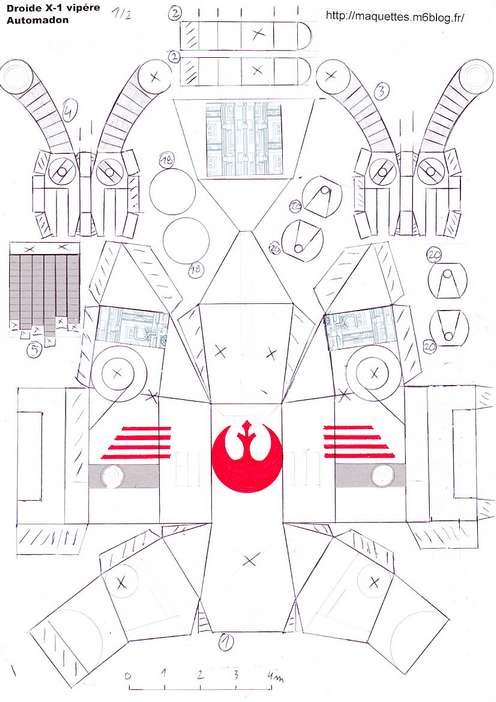
    Pour télécharger le plan 3 vues, plan de pièces et le schéma de montage du X-1 Vipère Automadon au 1/66 en pdf / To download the 3 sights plan in color, and color parts of X-1 Vipère Automadon in 1/66 pdf, CLIQUER ICI

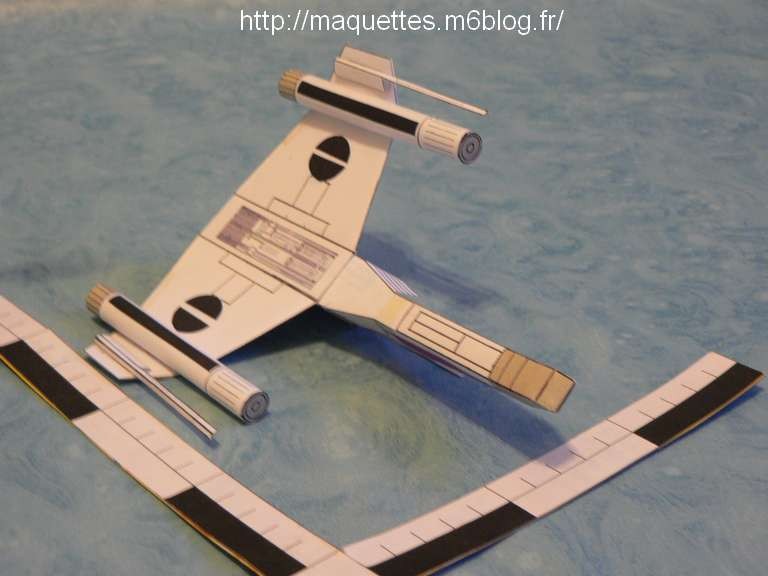
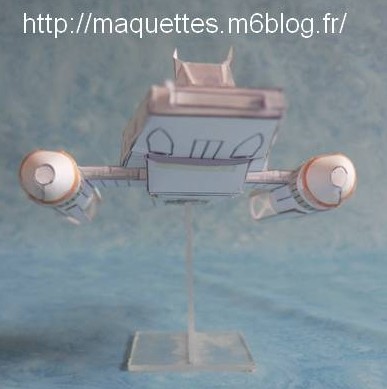
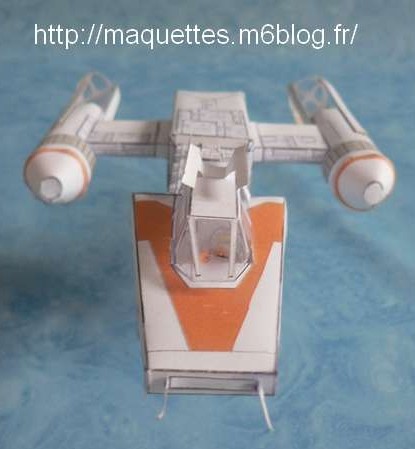
    CONSIGNES DE CONSTRUCTION DU X-1 VIPERE AUTOMADON :
    - Pas de pilote à bord, mais possibilité de charger quelques soldats par le ventre.
    - Les pattes arrières sont fixes.
    - Les bras avants (avec des pinces) pivotent sur les côtés, tandis que les bras arrières (simples canons) pivotent vers le haut.
    - Un poids peut être nécessaire à l'arrière.

    BUILDING INSTRUCTIONS OF X-1 VIPER AUTOMADON :
    - No pilot on board, but possibility of loading some soldiers by the stomach.
    - Legs rear are fixed.
    - Arms fronts (with crowbars) revolve on sides, whereas arms rear ( simple artillery) revolve upward.
    - A weight can be necessary behind.

  • (2) E-wing

    Chasseur spatial E-wing de la nouvelle république. Cet appareil a fait ces premières armes durant la bataille de Mon Clamari face aux dévastateurs.
    Spatial fighter E-wing of the new republic. This device made these first weapons during the battle of Mon Clamari in front of devastating.

    E-wing-image01.jpg
    E-wing-photo01.JPG
    E-wing-image02.jpg
    E-wing-photo02.JPG
    E-wing-photo03.JPG
    E-wing-photo04.JPG
    E-wing-photo05.JPG
    E-wing-photo06.JPG
    E-wing-photo07.JPG
    E-wing-photo08.JPG

    Pour plus de renseignements sur le E-wing, voir le lien / For more information on E-wing, follow this link: http://www.starwars-holonet.com/holonet.php?fiche=ship_ew

    E-wing-plan3vues.jpg
    E-wing-pièces.jpg
    E-wing-schéma.jpg

    Pour télécharger le plan 3 vues, plan de pièces et le schéma de montage du E-Wing au 1/66 en pdf / To download the 3 sights plan in color, and color parts of  E-Wing in 1/66 pdf, CLIQUER ICI

    CONSIGNES DE CONSTRUCTION DU E-WING :
    - Pas de train d'atterrissage
    - Un aimant peut être installé dans le fuselage pour faire tenir la maquette sur un support adapté avec appui en métal.

    BUILDING INSTRUCTIONS OF E-WING:
    - No landing gear
    - A magnet can be installed in the fuselage to make hold the model on a support adapted with support in metal.

  • (3) Y-wing / Snowspeeder

    Chasseur bombardier monoplace Y-wing en fin de carrière durant la bataille de Yavin.
    Chasseur de patrouille et de surveillance à basse altitude Snowspeeder utilisé pour protéger la base écho durant la bataille de Hoth.
    Single fighter-bomber Y-wing at the end of career during the battle of Yavin.
    Fighter of patrol and surveillance at low height Snowspeeder used to protect the echo base during the battle of Hoth.

    Pour plus de renseignements sur le Y-wing, voir le lien / For more information on Y-Wing, follow this link: http://www.starwars-holonet.com/holonet.php?fiche=ship_yw

    Y-wing-image01.jpeg
    Y-wing-photo01.JPG
    Y-wing-image02.jpeg
    Y-wing-photo02.JPG
    Y-wing-image03.jpg
    Y-wing-photo03.JPG
    Y-wing-image04.jpg
    Y-wing-photo04.JPG
    Y-wing-image05.jpg
    Y-wing-photo05.JPG
    Y-wing-photo07.JPG
    Y-wing-photo06.JPG

    Pour plus de renseignements sur le snowspeeder, voir le lien / For more information on Snowspeeder, follow this link: http://www.starwars-holonet.com/holonet.php?fiche=ship_t47

    snowspeeder-image01.jpg
    snowspeeder-photo01.JPG
    snowspeeder-image02.jpeg
    snowspeeder-photo02.JPG
    snowspeeder-image03.jpg
    snowspeeder-photo03.JPG
    snowspeeder-photo06.JPG
    snowspeeder-photo04.JPG
    snowspeeder-photo05.JPG

    Les photos ci-dessus sont celles de maquettes construites en 2005 ! / Photos above are the ones of models built in 2005!

    Y-wing-plan3vues.jpg
    Snowspeeder-plan3vues schéma.jpg
    Y-wing-schéma.jpg
    Y-wing Snowspeeder-pièces2.jpg
    Y-wing Snowspeeder-pièces1.jpg

    Pour télécharger le plan 3 vues, plans de pièces et le schéma de montage du Y-Wing et du Snowspeeder au 1/66 en pdf / To download the 3 sights plan in color, and color parts of Y-wing and Snowspeeder in 1/66 pdf, CLIQUER ICI

    CONSIGNES DE CONSTRUCTION DU Y-WING ET DU SNOWSPEEDER :
    - d'origine, le Snowspeeder n'a pas de train d'atterrissage
    - Je n'ai pas construit de train d'atterrissage pour le Y-Wing.
    - Un aimant peut être installée dans le fuselage pour faire tenir la maquette sur un support adapté avec appui en métal.

    BUILDING INSTRUCTIONS OF Y-WING AND SNOWSPEEDER :
    - Of origin, Snowspeeder has no landing gear
    - I did not build a landing gear for Y-Wing.
    - A magnet can be installed in the fuselage to make hold the model on a support adapted with support in metal.