Attention modèle de catégorie 3 donc , ça commence à être dificile, j'ai mis cette fiche en ligne suite à la demande de Max ( voir les commentaires) !
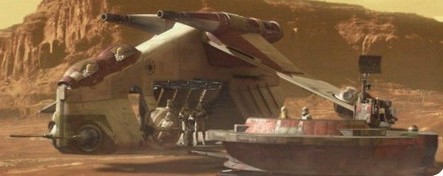
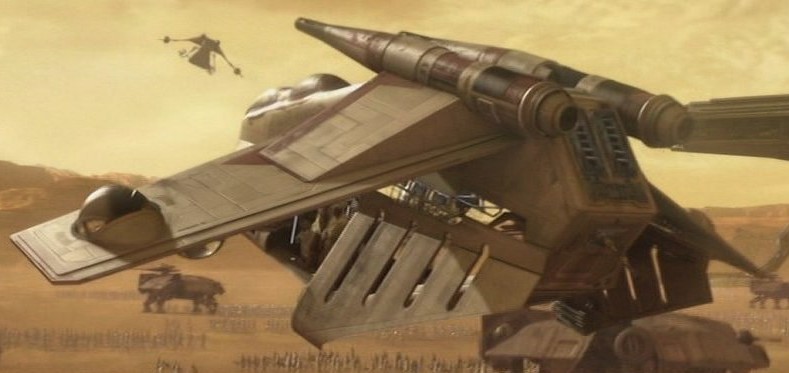
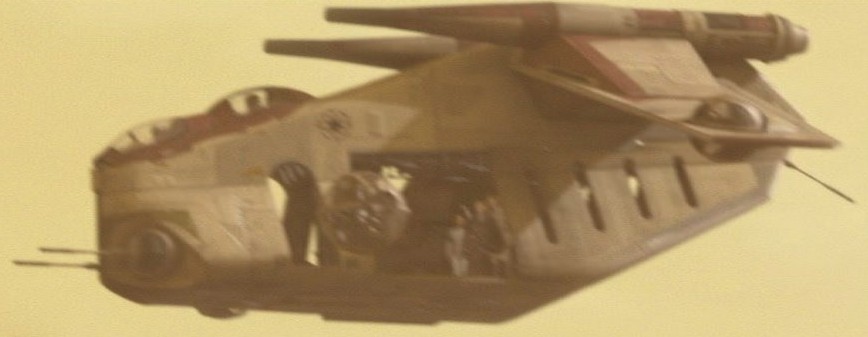
Véhicule d'assaut et de transport standard de l'ancienne république TIO-BA Transport d'infanterie Offensive à Basse Altitude.
Attention models of category 3 thus, that begins to be dificile, I put this on-line index card at the request of Max (see comments)!
Vehicle of assault and standard transport of the old republic TIO-BA transport of Offensive infantry at Low Height.
Pour plus de renseignements, voir le lien / For more information, see the link: http://www.starwars-holonet.com/holonet.php?fiche=ship_canonniere
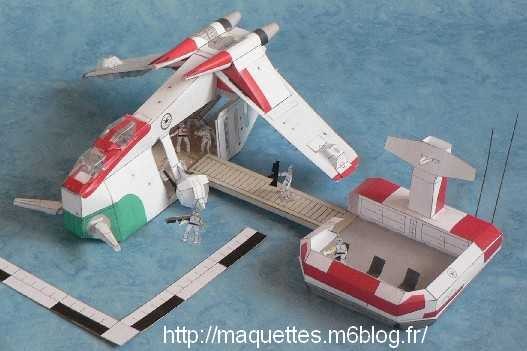
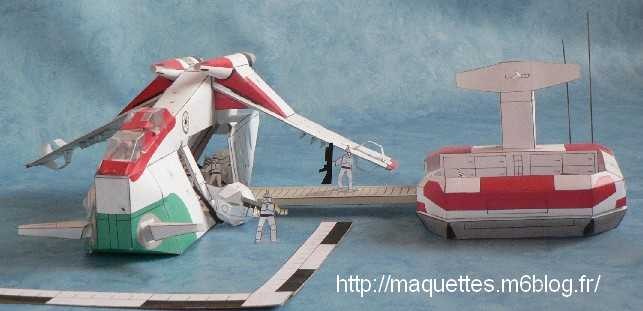
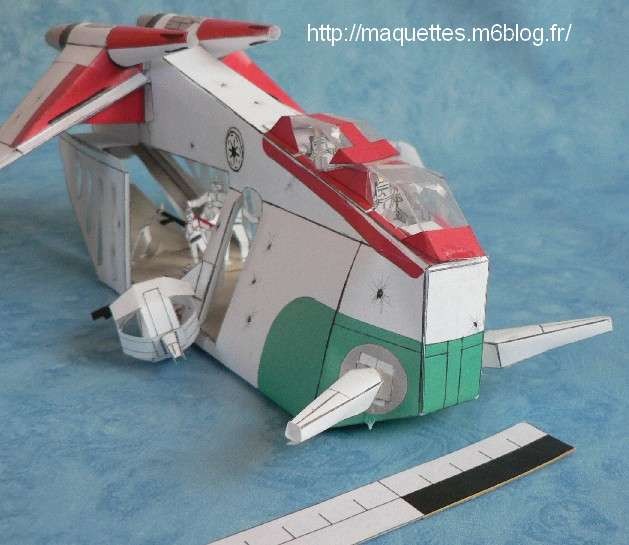
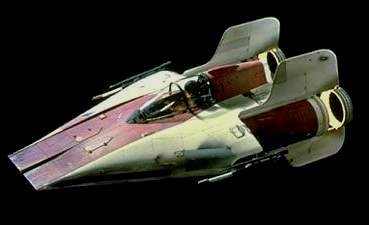
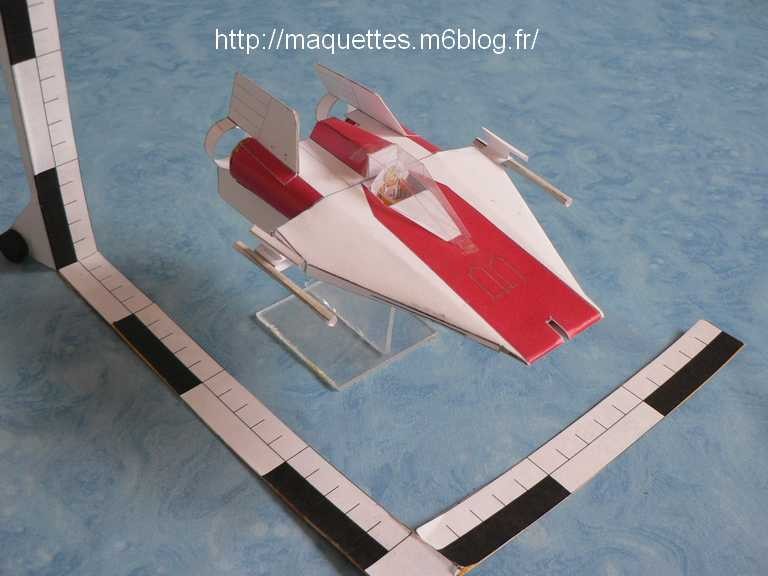
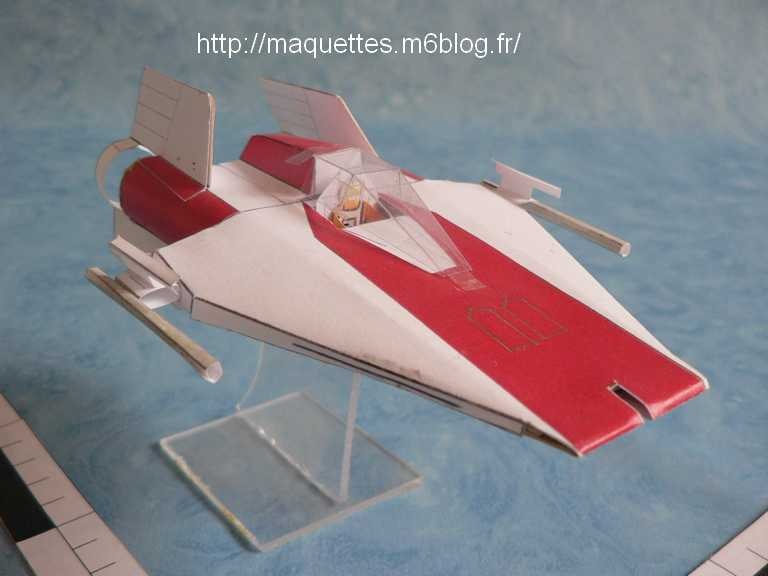
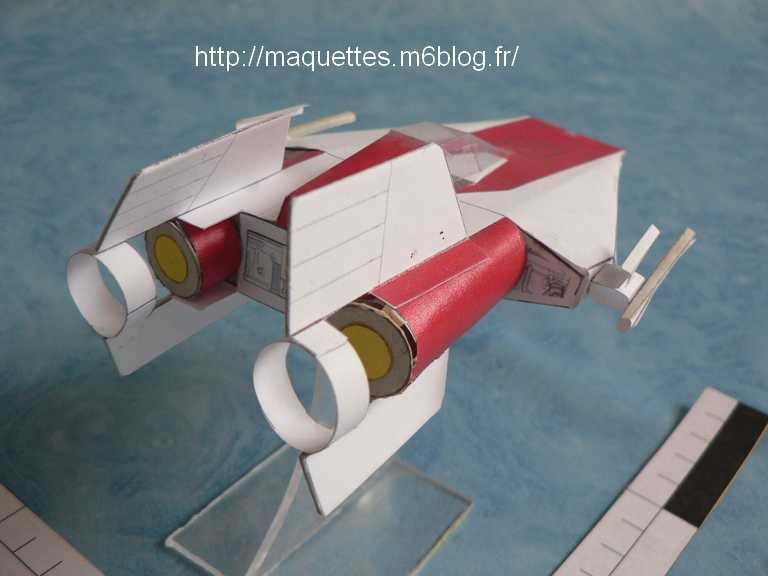
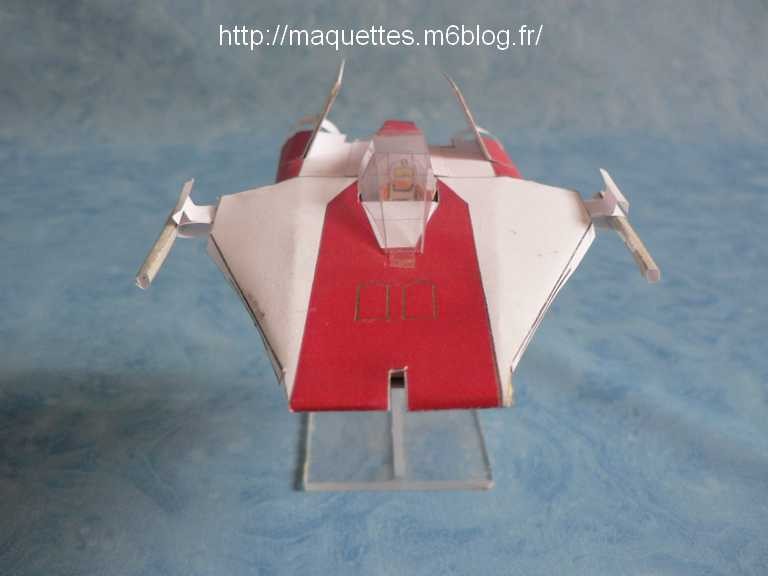
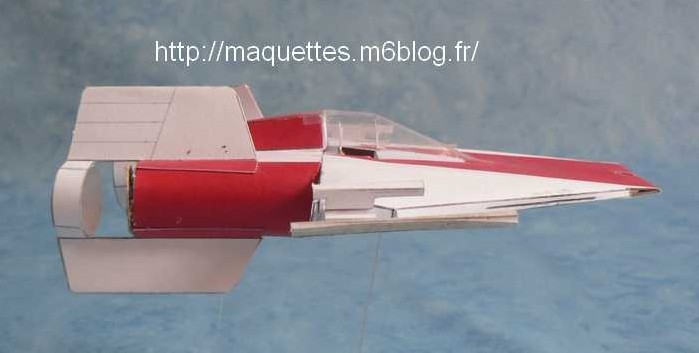
Le modèle ci-dessus a été réalisé en 2004, peu de temps après la sortie du film, à partir de quelques photos.
Il est possible que certaines proportions ne soient pas tout à fait exactes !
L' ésthétique de ce modèle a été amélioré depuis par le changement des emblèmes de l'ancienne république et l'ajout de traces d'impact de lasers !
The model above was realized in 2004, not enough time after the exit of the film, from some photos.
It is possible that certain proportions are not completely exact!
The design of this model was since improved by the change of the emblems of the old republic and the addition of tracks of impact of lasers!
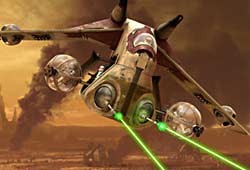
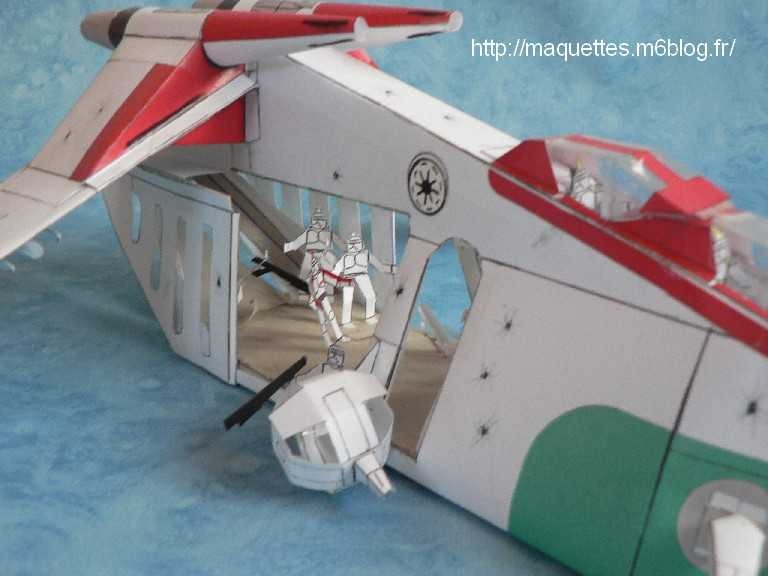
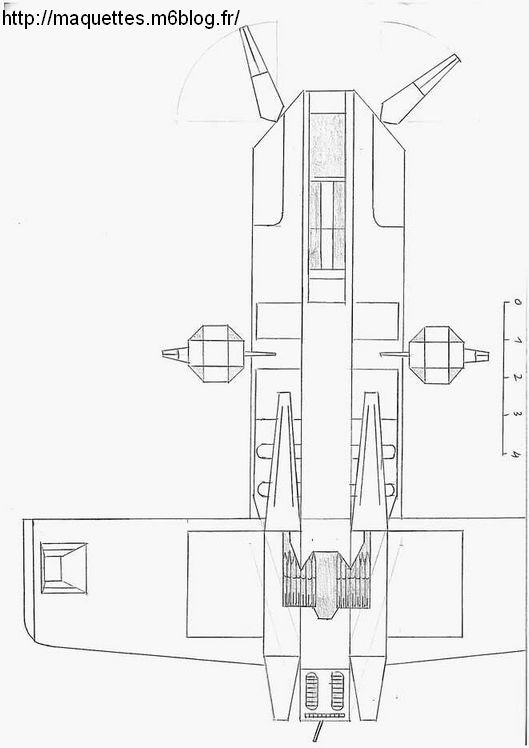
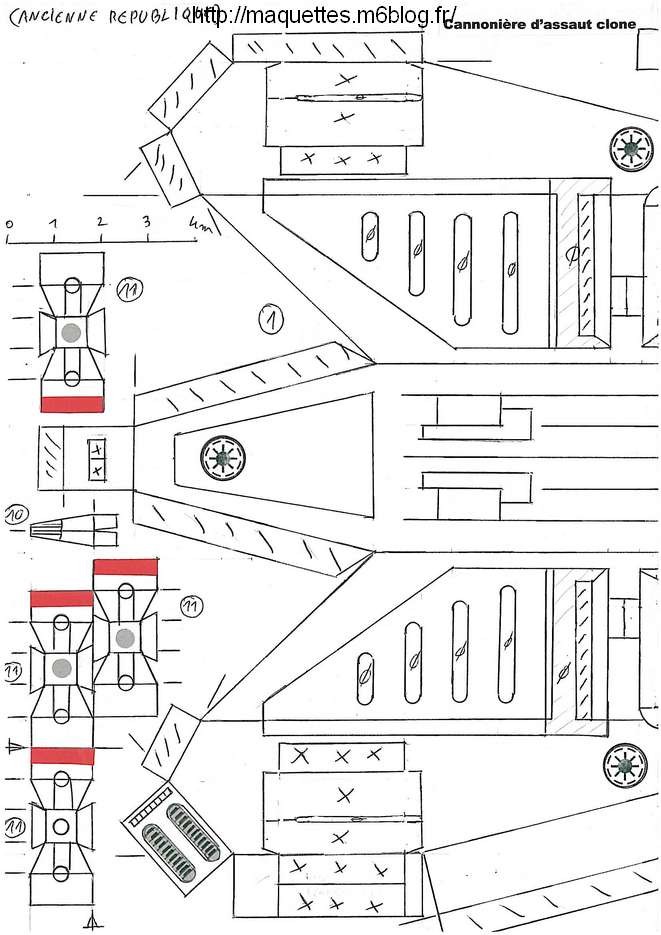
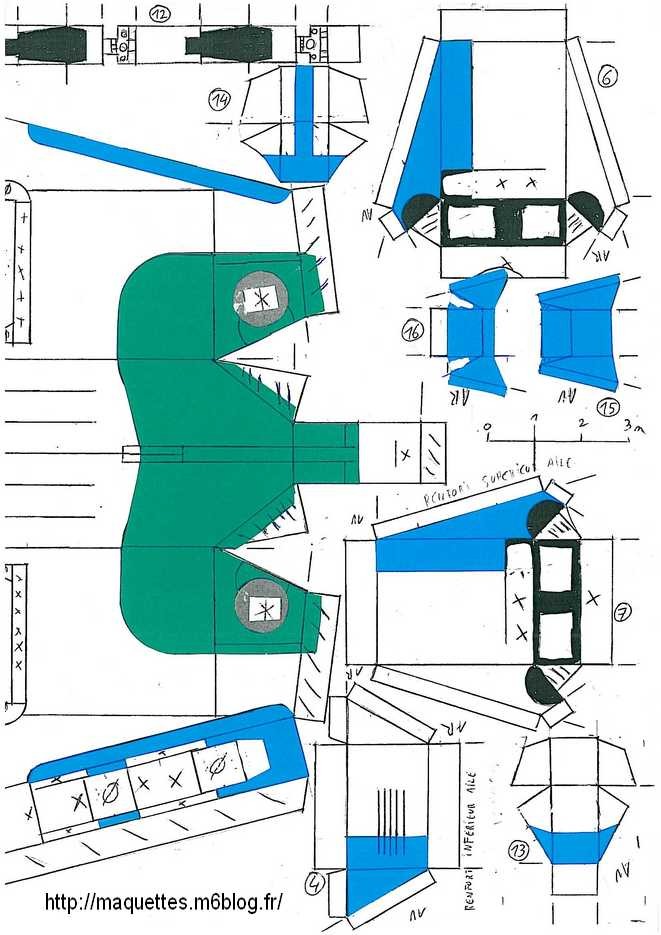
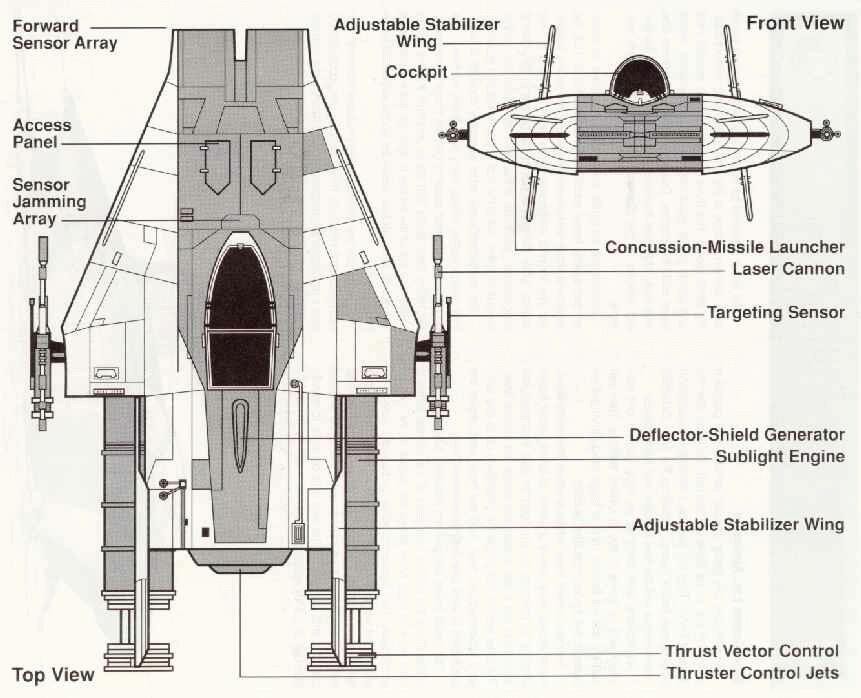
Ce modèle de canonnière de base était le plus répandu dans l'armée clone, idéalement conçu pour le combat et la dépose de soldat au coeur du champ de bataille ! son armement était constitué de 2 canons laser de chaque côté du nez et capable de tirer vers l'avant et sur les côtés, de 2 tourelles (rétractables en cabine) avec un soldat artilleur à son bord, de 1 canon automatique sur chaque face de chaque aile (soit 4 en tout), d'une tourelle automatique à l'arrière juste au dessus de la rampe d'accès arrière, de lances-missiles au dessus des ailes et de 4 roquettes air-air sous chaque aile !
This model of basic gunboat was the most spread in the army clone, ideally conceived for the fight and the removal of soldier in the heart of the battlefield! His armament was established by 2 laser guns on each side of the nose and capable of firing forwards and at sides, of 2 turrets (retractable in cabin) with a soldier artilleryman in its edge, of 1 automatic standard cannon on every face of every wing (that is 4 in everything), of an automatic turret behind just above the back sliproad, above the lances-missiles above wings and above 4 air-air rockets under every wing!
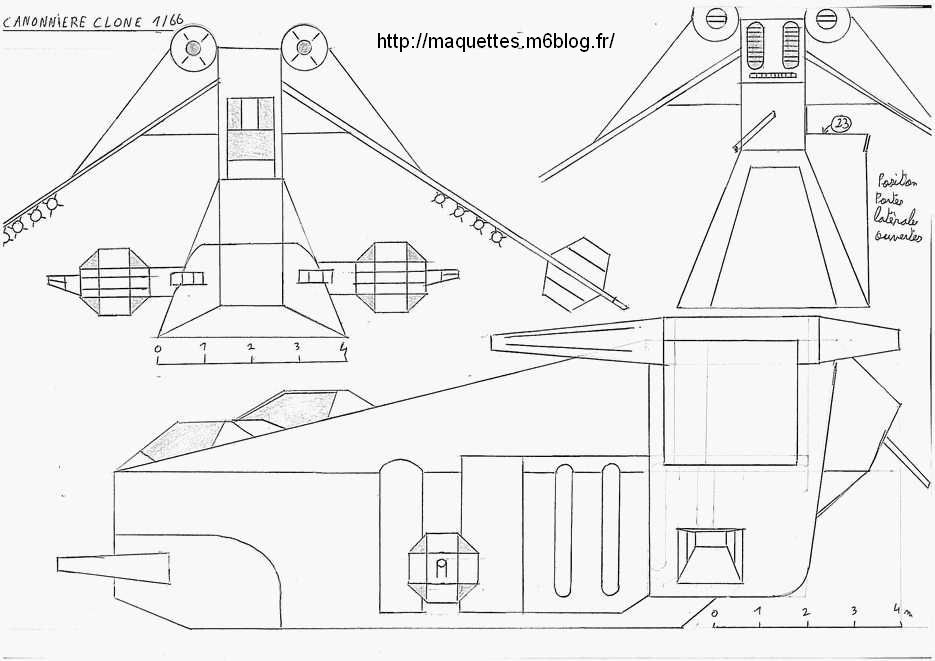
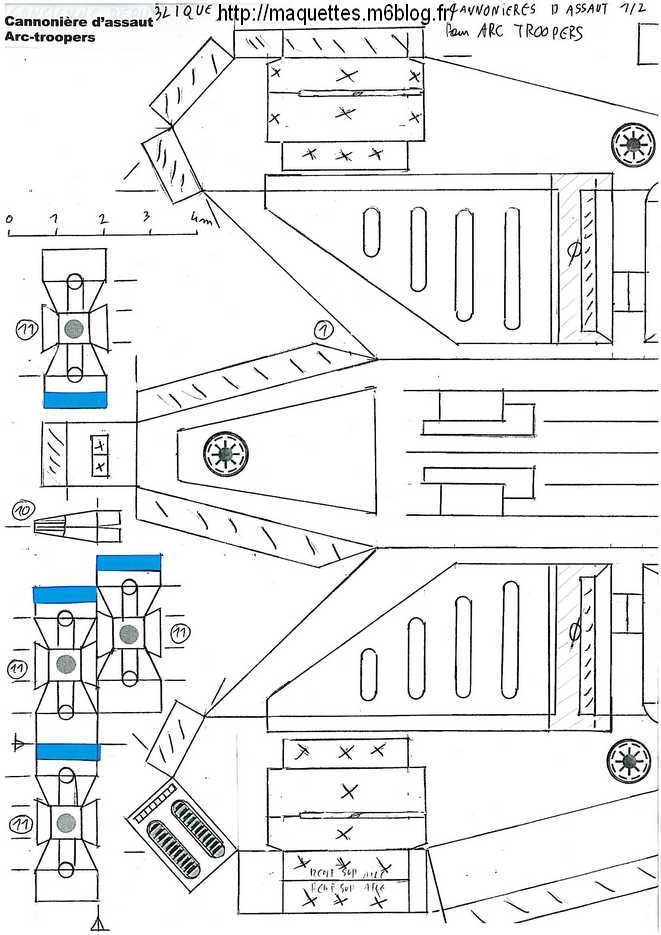
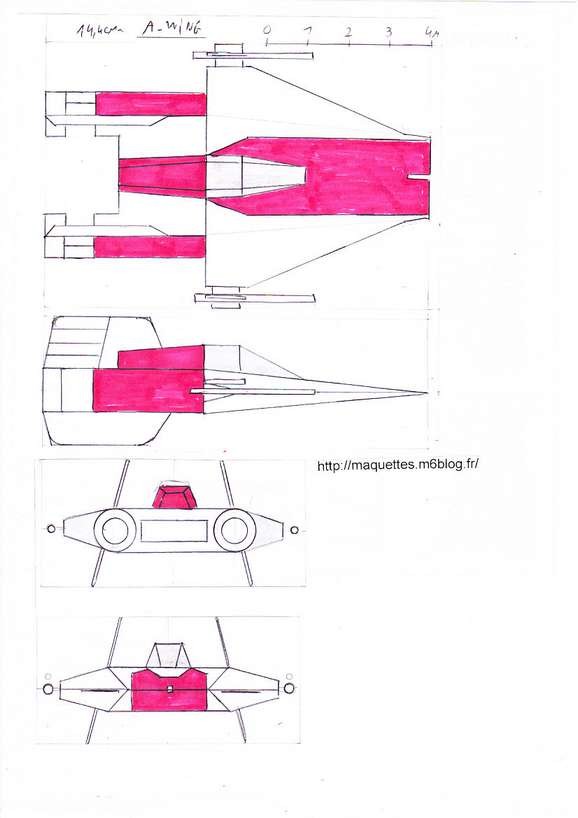
La taille de cette maquette nécessite des plans au format A3 mais vous pouvez vous en sortir avec 2 feuilles A4 recollées ensemble !
The size of this model requires plans in the size A3 but you can take out with 2 sheets A4 there restuck together!
Vous disposez d'une imprimante A3 ou bien, imprimer ces plans en A4 et les faire agrandir au A3.
You have a printer A3 either, to print these plans in A4 and make them enlarge in A3.
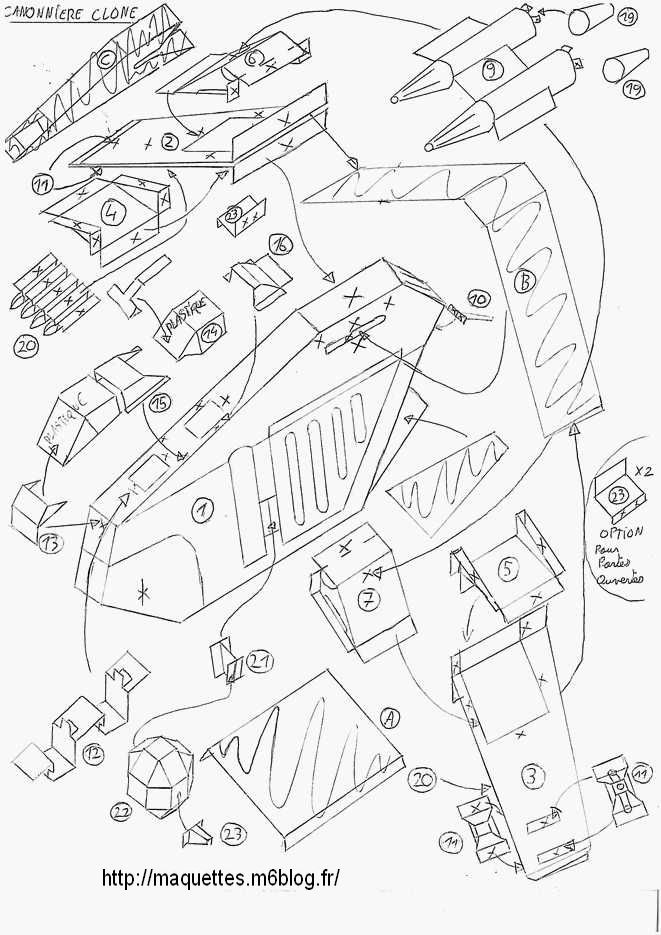
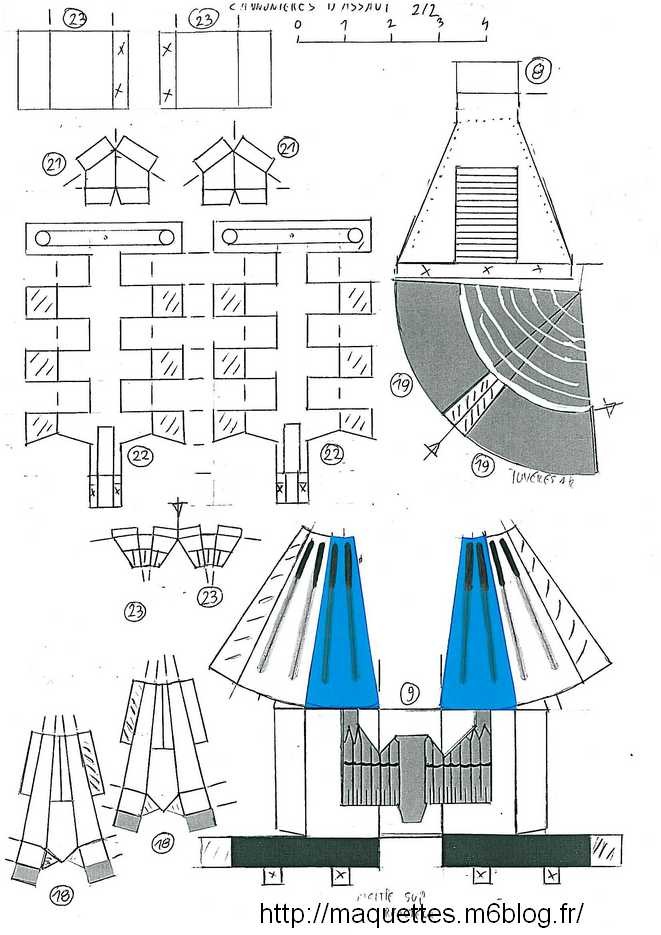
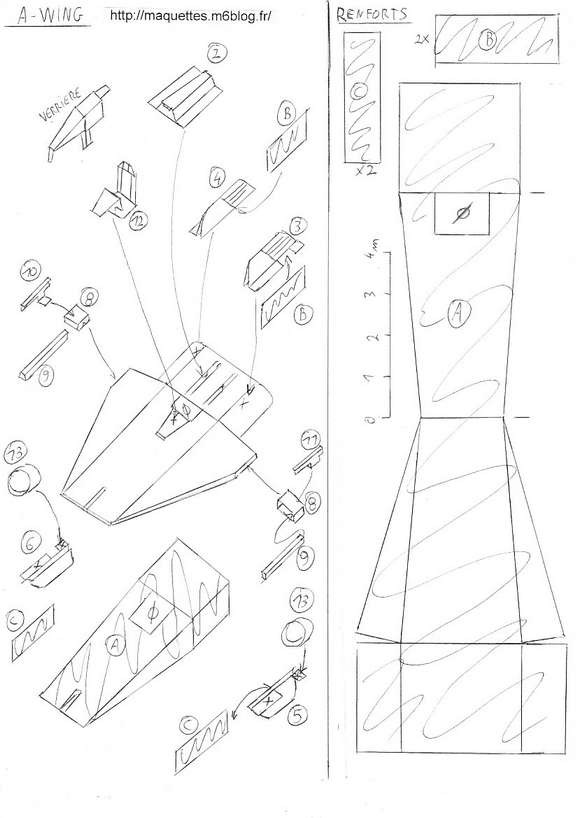
Pour télécharger le schéma de montage et le plan de renforts de la canonnière clone Standard / To download the installation diagram and the plan of reinforcements of the gunboat clones Standard, CLIQUER ICI
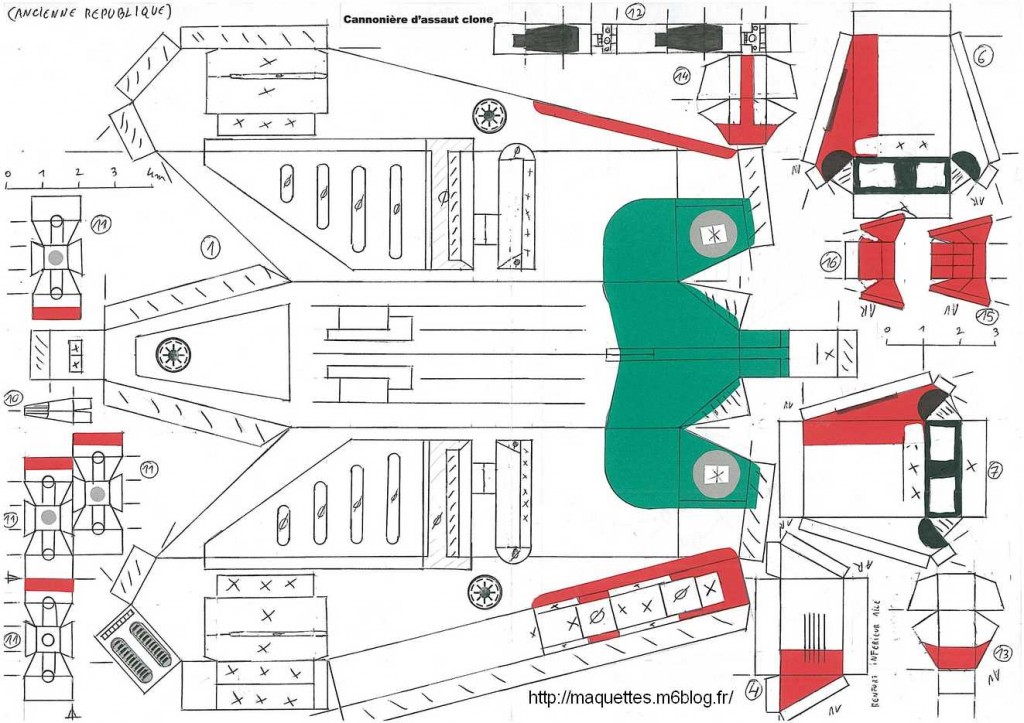
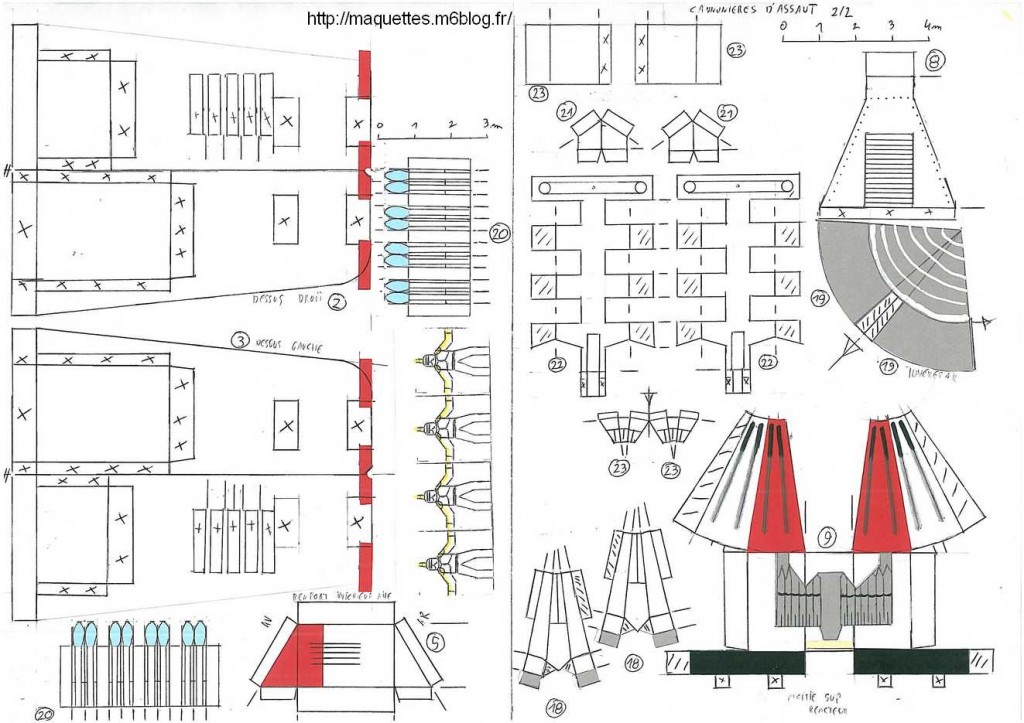
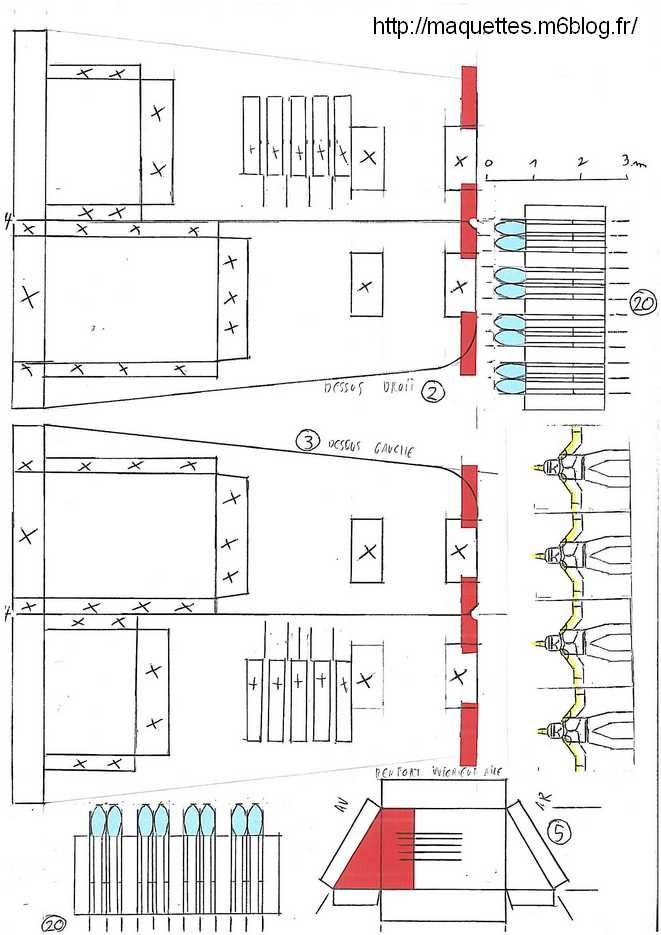
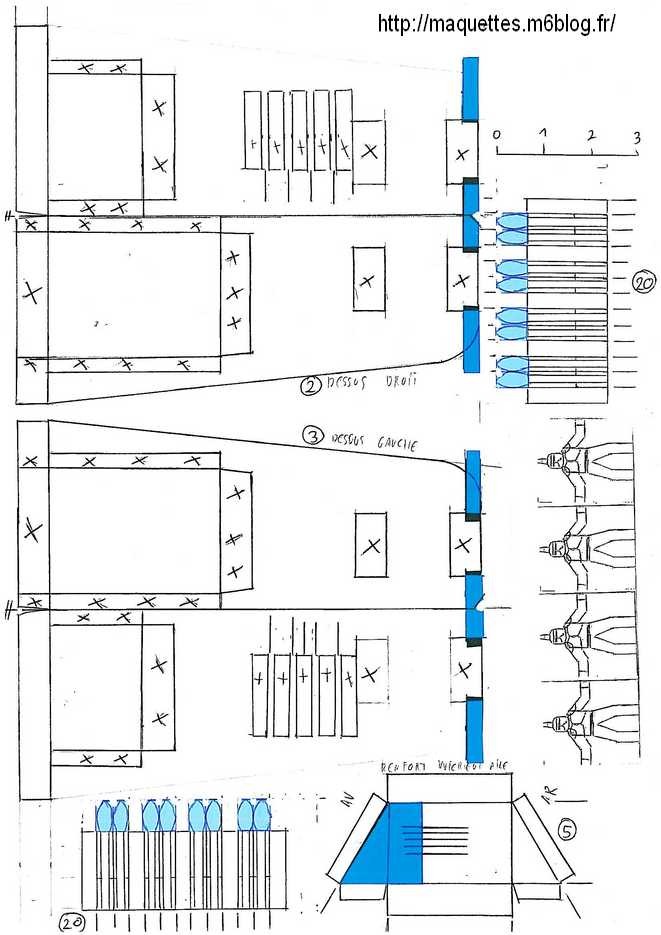
Pour télécharger le plan 3 vues et le plan de pièces (feuilles A4) de la canonnière clone Standard / To download the 3 sights plans and the pieces plans (sheets A4) of the gunboat clones Standard, CLIQUER ICI
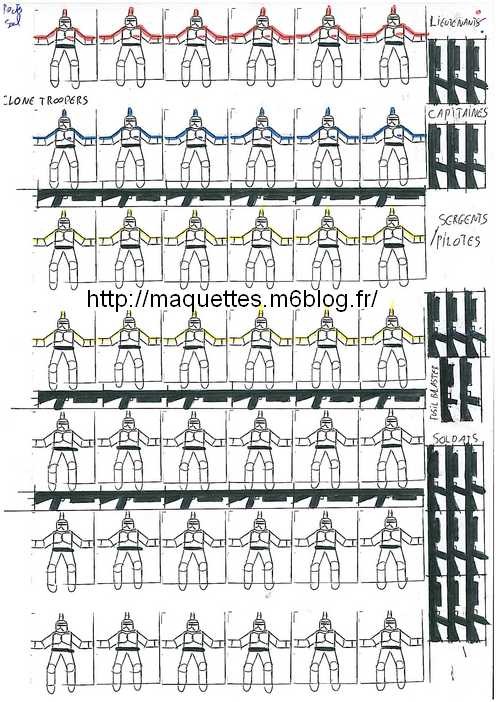
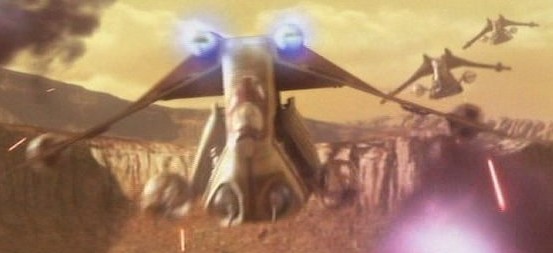
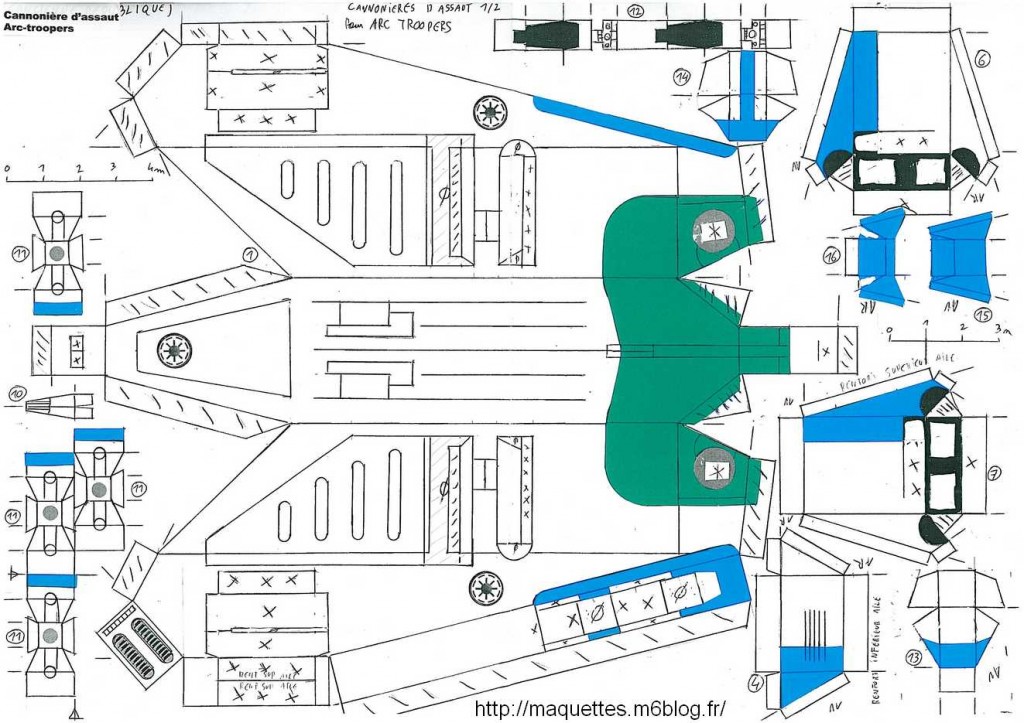
Ci-dessous, les planches de la canonnière ARC Troopers première version, vu au début de la bataille de Muunillist !
Below, the boards of the gunboat ARC TROOPERS first version, seen at the beginning of the battle of Muunillist!
CONSIGNES DE CONSTRUCTION DE LA CANONNIERE CLONE STANDARD:
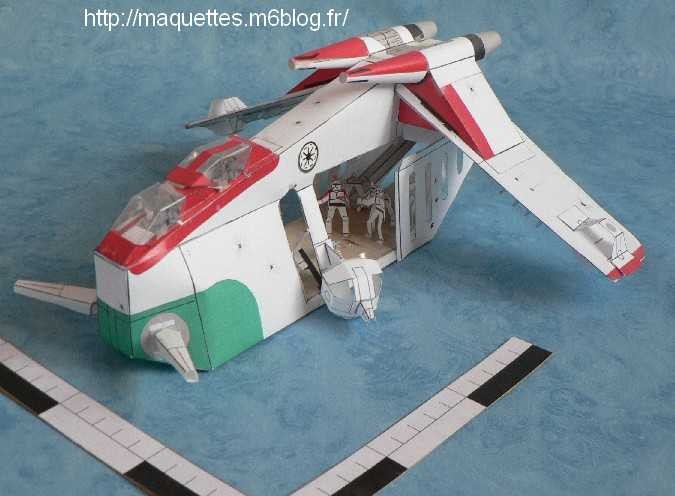
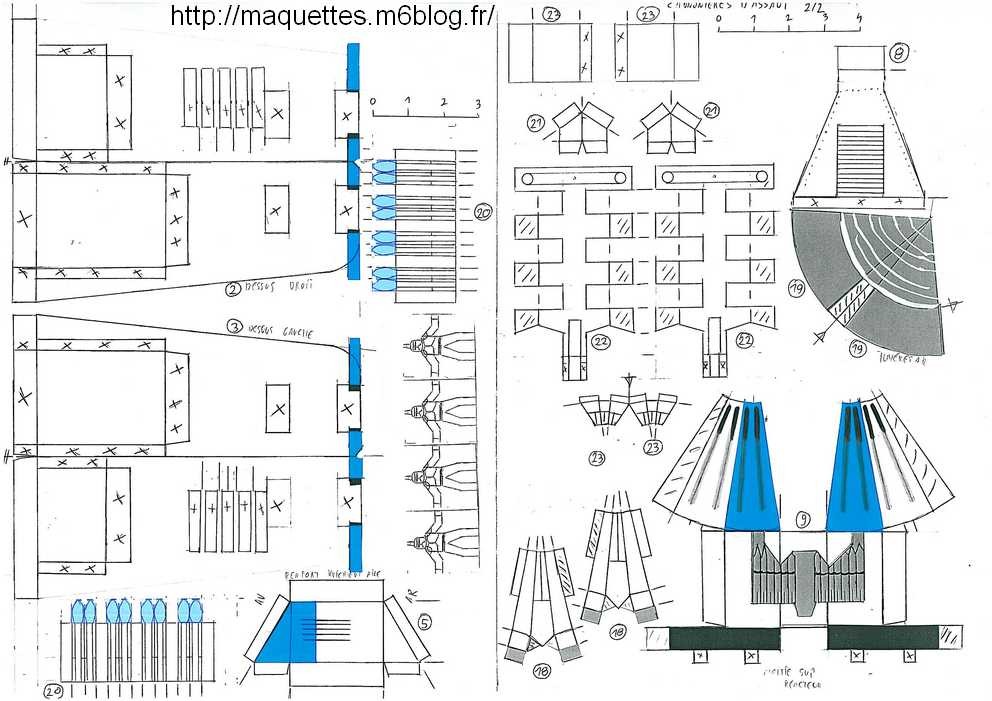
- Je conseille de réaliser d'abord le fuselage pièce 1 (ne pas oublier les découpures pour le passage du renfort B des ailes) puis d'y insérer le renfort C pour durcir la partie supérieure du fuselage. puis insérer le renfort B en carton en travers du fuselage, le centrer, et coller les ailes 2 et 3 sur le renfort !
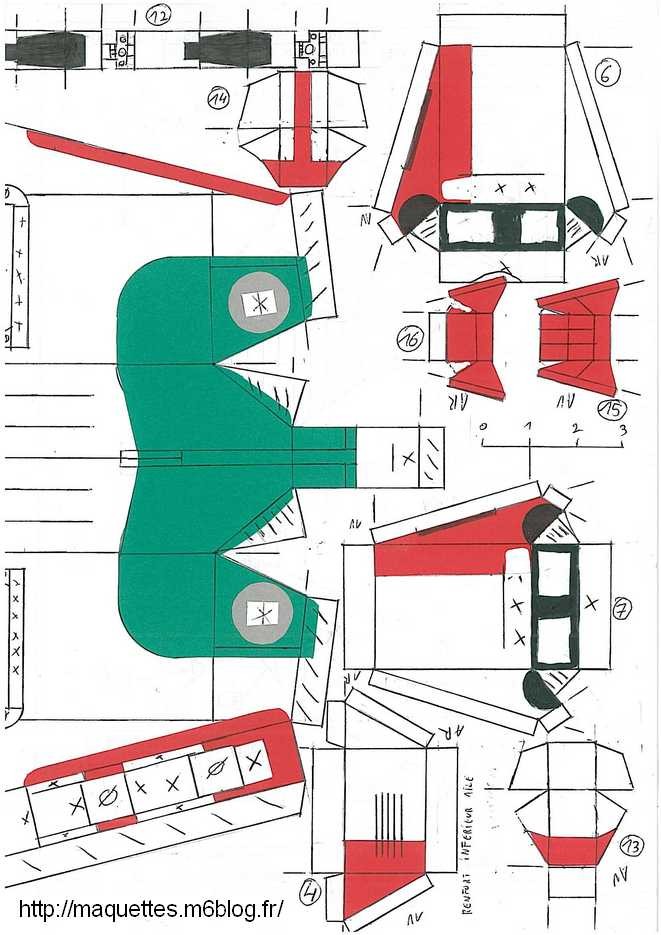
- Je n'ai pas pu créer un système de portes latérales coulissantes! la position des portes sera donc définitive ! ne pas oublier les découpures verticales des portes! puis découper les portes et coller la pièce 23 sur le haut pour écarter les portes du fuselage et en arrière de la position "porte fermée" ! Je conseille également de doubler ces portes le long du haut des portes et entre les ouvertures !
- Le renfort A servira de plancher et est suffisamment long pour se glisser sous la partie avant du fuselage !( attention au sens et à la face du carton qui sera visible au final!) Il y a aussi une face avant et une face arrière sur cette pièce !
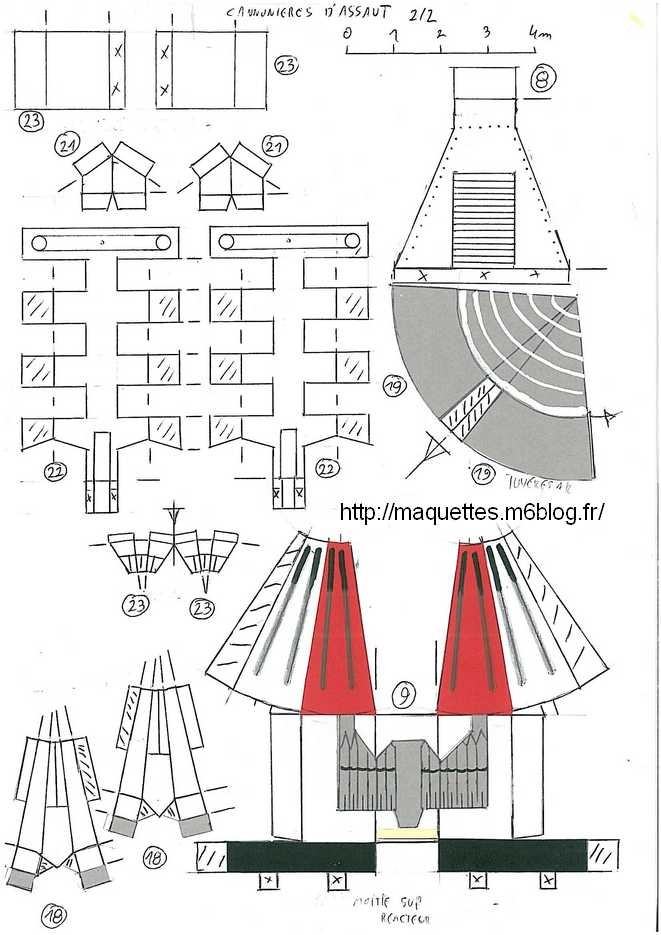
- les tourelles latérales 22 sont en papier, mais pour plus de réalisme, vous pouvez les réaliser en plastique en recopiant en partie le plan des tourelles ( certaines faces ne sont pas nécessaires, car utilisées pour coller les pièces de papier entre elles ! ne pas oublier de coller un soldat clone avant de fermer la tourelle !!
BUILDINGS INSTRUCTIONS OF THE GUNBOAT CLONE STANDARD :
- I advise to realize at first the fuselage piece 1 (do not forget notches for the passage of the reinforcement B wings) then to insert the reinforcement C there to harden the top of the fuselage. Then insert the reinforcement B cardboard across the fuselage, centre him(it), and stick wings 2 and 3 on the reinforcement!
- I was not able to create a system of sliding side doors! The position of doors will be thus definitive! Do not forget the vertical notches of doors! Then cut doors and stick the piece 23 on the height to spread the doors of the fuselage and at the back of the position " closed door "! I also advise to double these doors along the height of doors and between openings!
- The reinforcement A will serve for working and is enough long to skip under the part before of the fuselage! (Attention on the sense and in face of the cardboard which will be visible in the end!) there is also a face before and a face defers on this piece(room)!
- The side turrets 22 are paper, but for more realism, you can realize them plastic by copying out partially the plan(shot) of turrets (certain faces are not necessary, because used to stick the pieces of paper between them! Not forget to stick a soldier clone before closing the turret!!
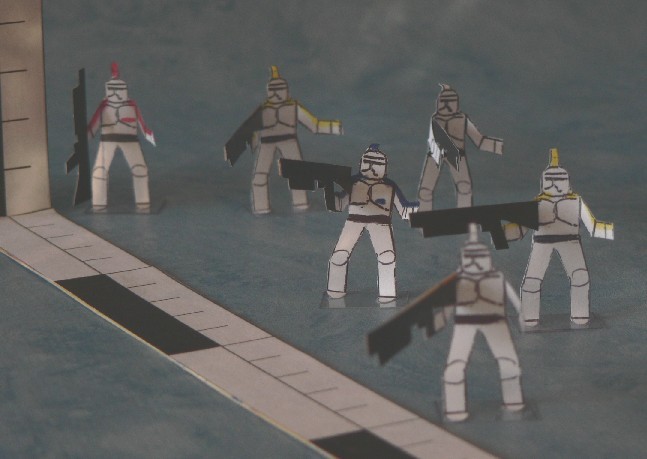
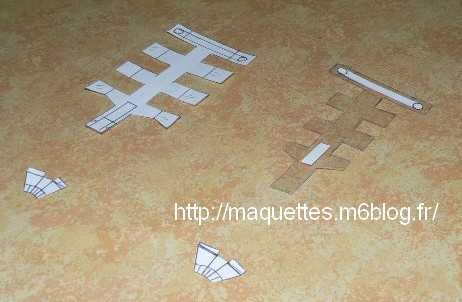
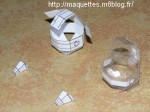
en réponse aux commentaires, je rajoute diverses photos pour détailler la construction des tourelles !
In answer to comments, I add diverse photos to detail the construction of turrets!
tourelle phase 1
à gauche tout en papier
|

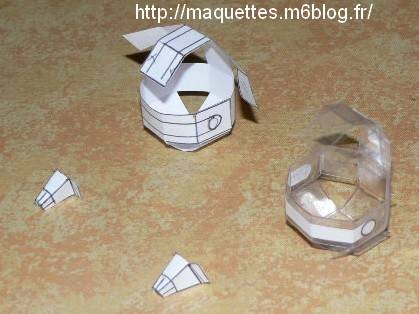
tourelle phase 2
(pré-pliage)
|
 tourelle phase 3
collage de faces
|
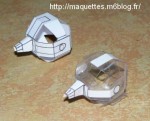
tourelle finie
fermeture de la tourelle
(ne pas oublier le soldat-canonnier et son siège)
|
- Il existe également une rampe d'accès arrière à la cabine ( prévue pour des motojets) Vous n'êtes pas obligée de la réaliser, mais si vous le souhaitez , je vous conseille de doubler cette rampe de carton !
- La partie avant du fuselage est la pièce la plus dure à réaliser car c'est un volume qui ne possède pas de renforts intérieurs, fermer ce volume avec la pièce 8 (qui n'est pas représenté sur le schéma de montage ) au dernier moment, une fois que les canons avant et le cockpit sera mis en place !
- There is also a back sliproad in the cabin (planned for motojets) You are not grateful to realize it, but if you wish it, I advise you to double this cardboard banister!
- The part before of the fuselage is the hardest piece to be realized because it is the volume which does not possess internal reinforcements, to close this volume with the piece 8 (which is not represented on the installation diagram) at the last moment, when artillery before and the cockpit will be set up!
De cette version de base, seront dérivées de nombreuses autres versions :
- Une version de transport de RT-TT dépourvu de cabine arrière nommée TLO-BA !
- Une première version pour les soldats ARC de reconnaissance ( vu dans clone wars Volume 1).
- Une seconde version pour les soldats ARC de reconnaissance ( vu au début de clone wars Volume 2 ) et plus adapté à leurs besoins.
Of this basic version, will be diverted the other numerous versions:
- A version of transport of RT-TT devoid of cabin named TLO-BA !
- A first version for the soldiers BOW of recognition (seen in clone wars Volume 1).
- A second version for the soldiers BOW of recognition (seen at the beginning of clone wars Volume 2) and more adapted to their needs.