Novembre 2015

Ok

En poursuivant votre navigation sur ce site, vous acceptez l'utilisation de cookies. Ces derniers assurent le bon fonctionnement de nos services. En savoir plus.

coruscant

  • (2) trichasseur droide

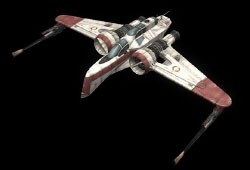
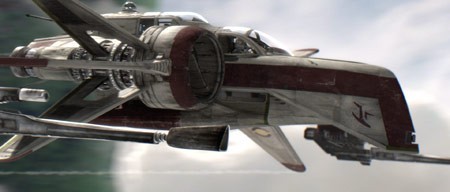
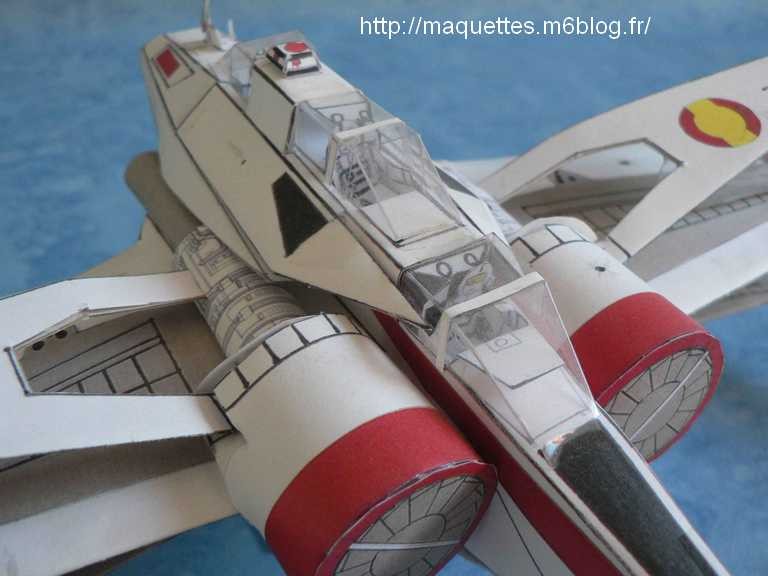
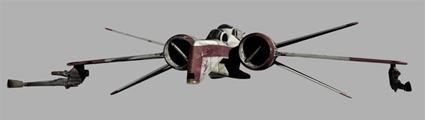
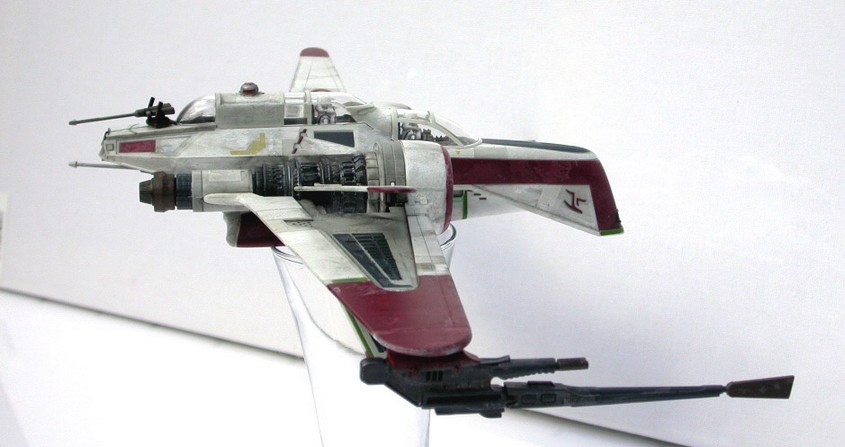
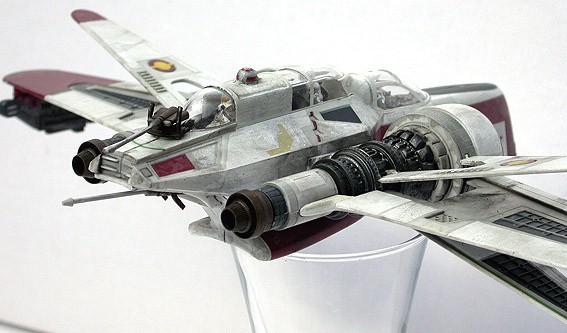
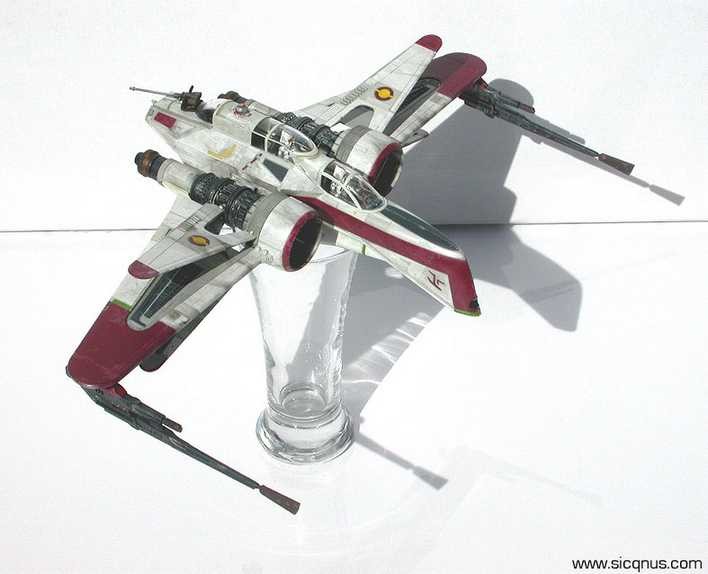
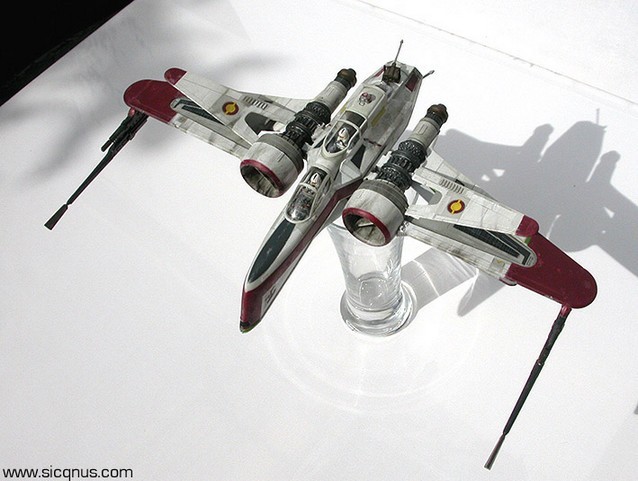
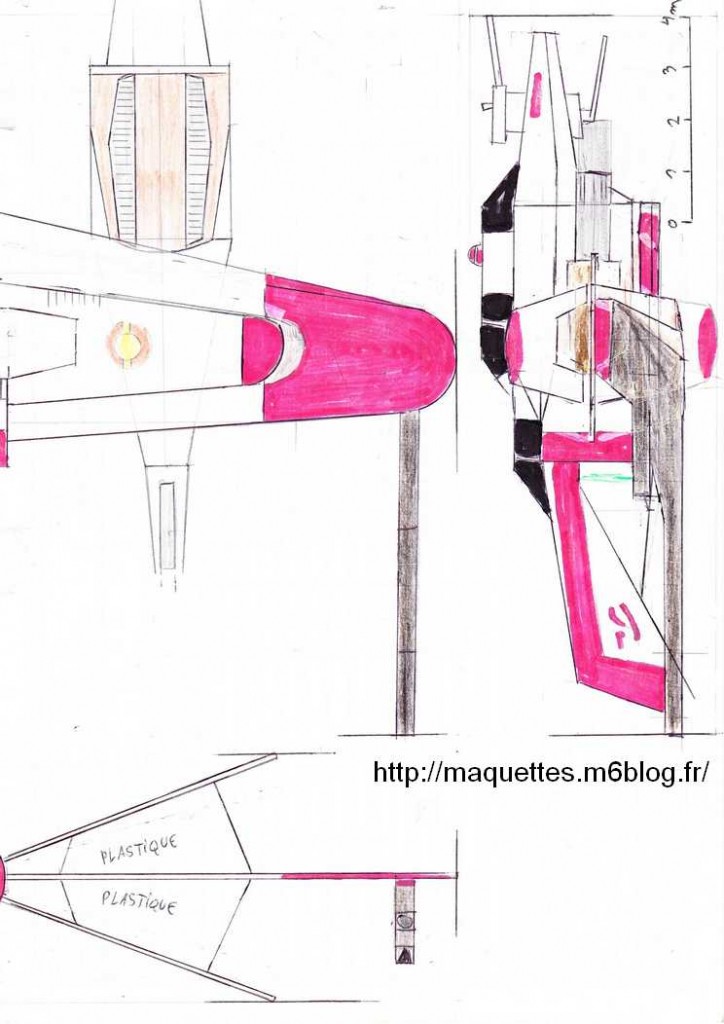
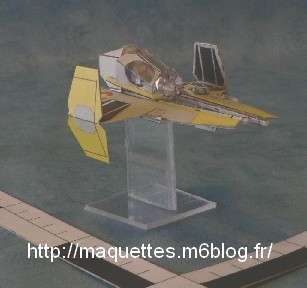
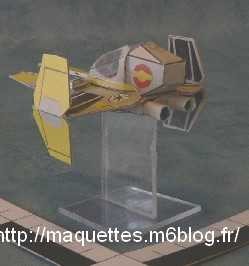
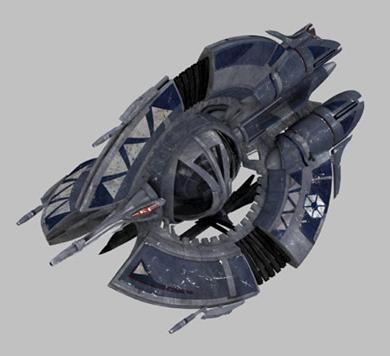
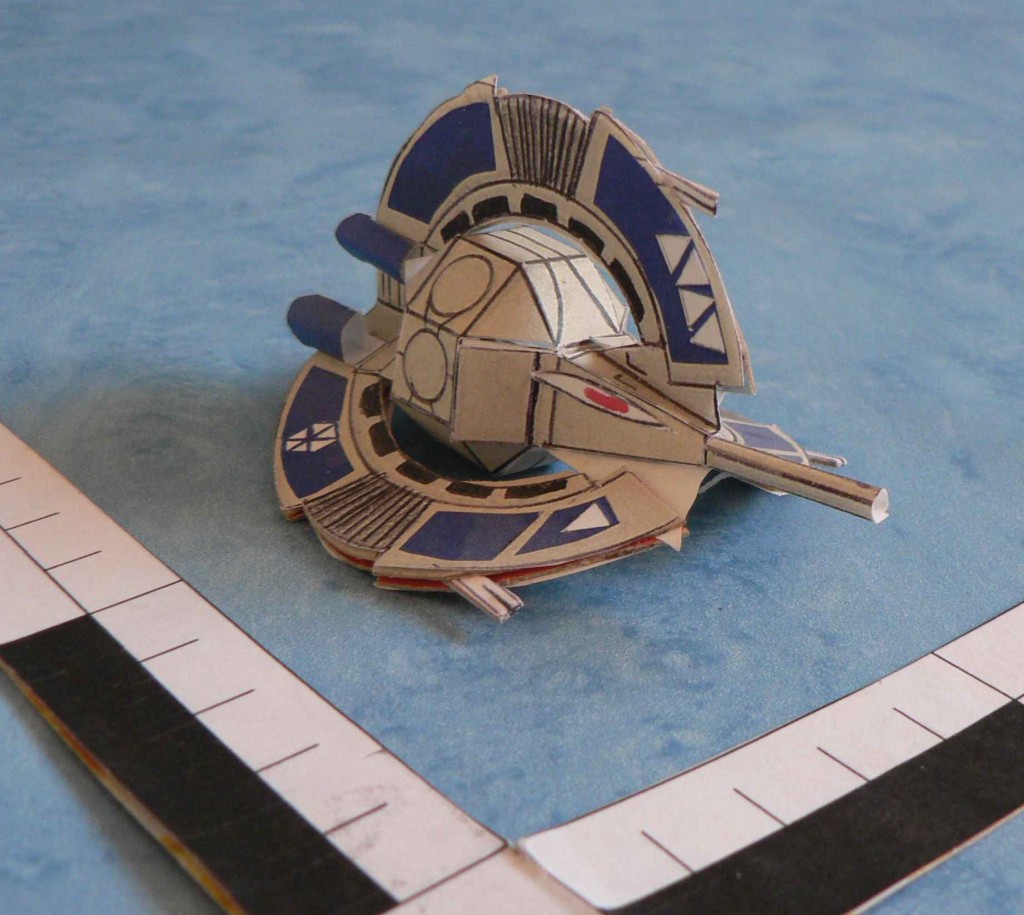
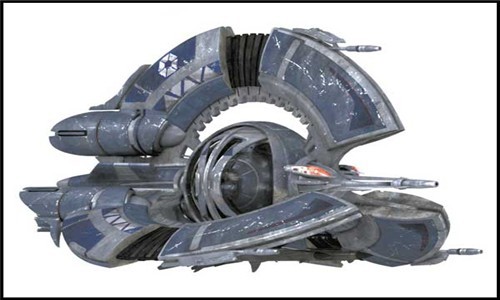
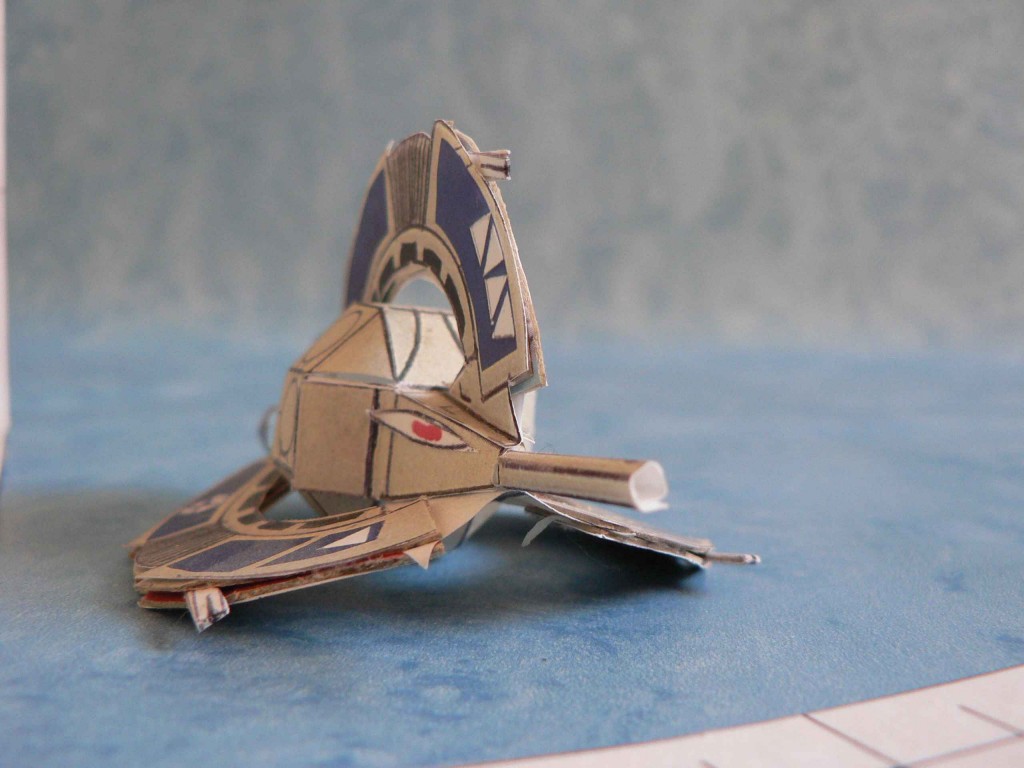
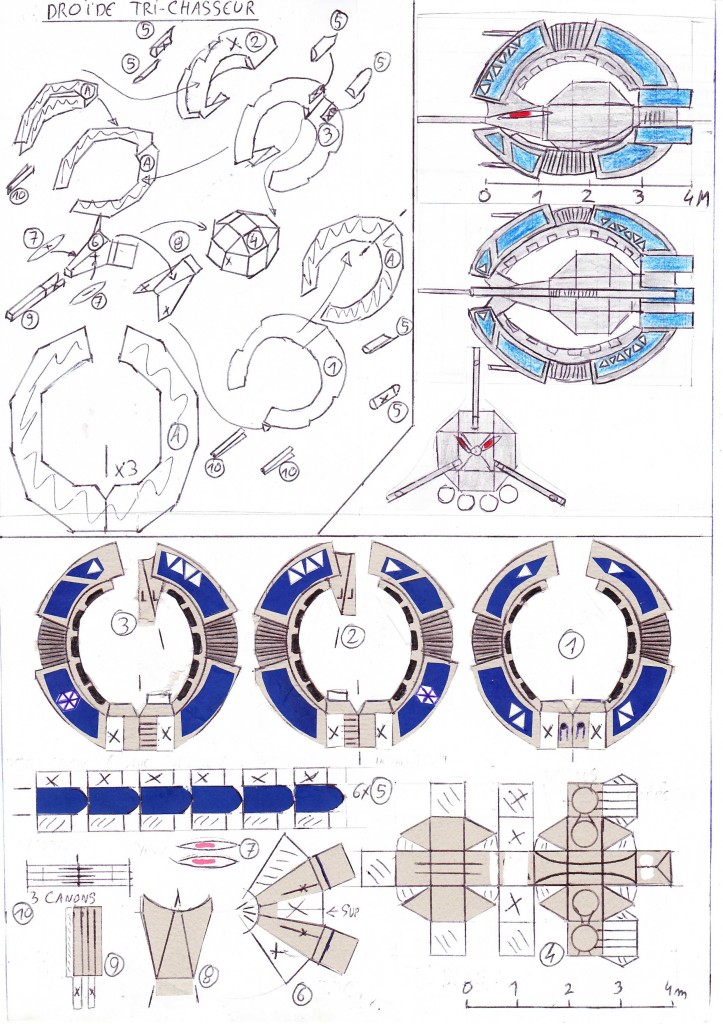
    Trichasseur spatial droide (sans équipage) utilisé par la confédération de ssystèmes indépendants pendant la guerre des clones !
    Ayant pour armement 3 canons laser légers, un canon moyen dans le nez et la possibilité d'emporter 4 missiles porteurs de droides buzz saboteurs !
    Spatial droide (without crew) used by the confederacy of ssystèmes independents during the war of clones!
    Having for armament 3 light laser guns, an average cannon in the nose and the possibility of taking 4 carrier missiles of droides buzz botchers!

    chasseur tridroide-image1.jpeg
    chasseur tridroide-photo01.JPG
    chasseur tridroide-image2.jpg
    chasseur tridroide-photo02.JPG
    chasseur tridroide-image3.jpg
    chasseur tridroide-photo03.JPG
    chasseur tridroide-photo04.JPG
    chasseur tridroide-photo05.JPG

    Pour plus de renseignements, voir le lien / For more information, see the link: http://www.starwars-holonet.com/holonet.php?fiche=ship_trichasseur

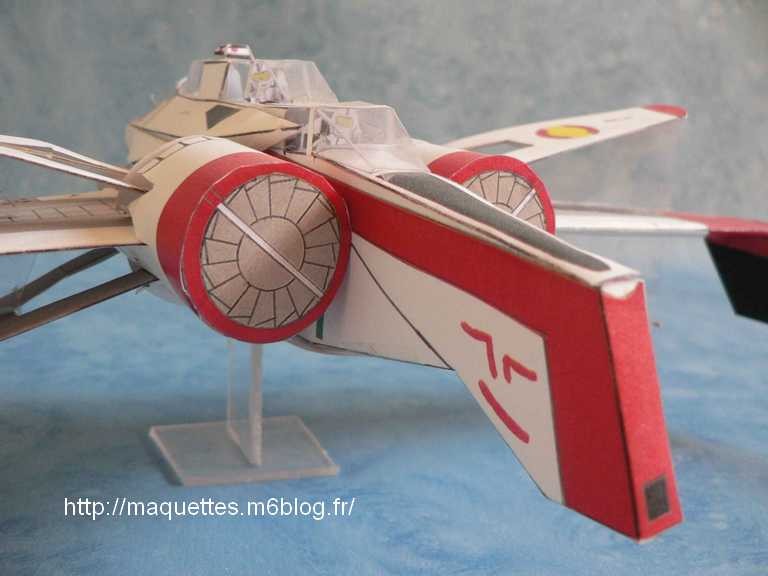
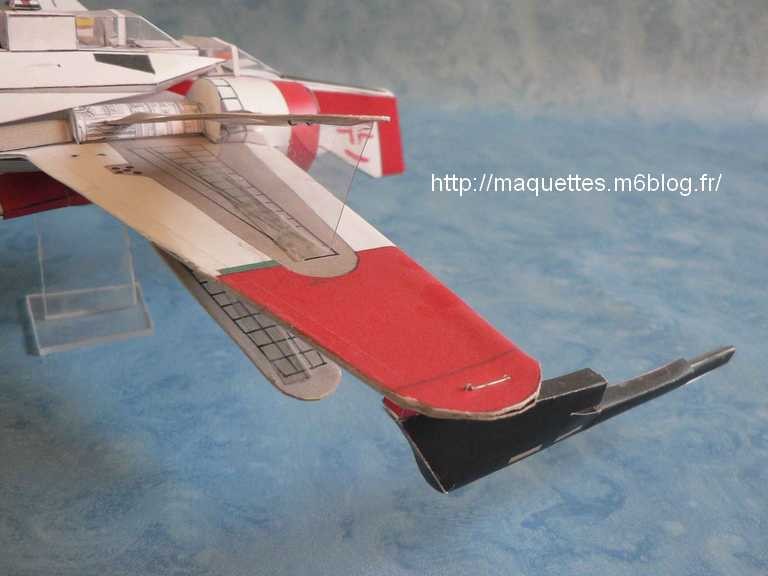
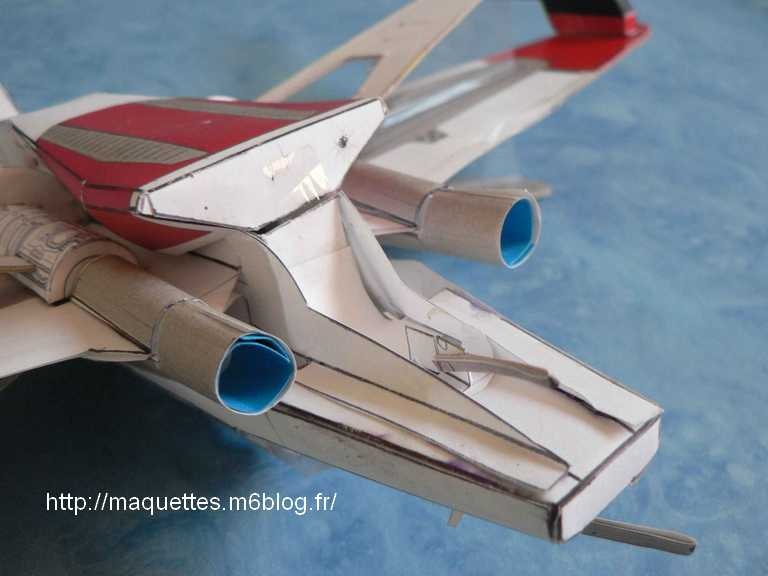
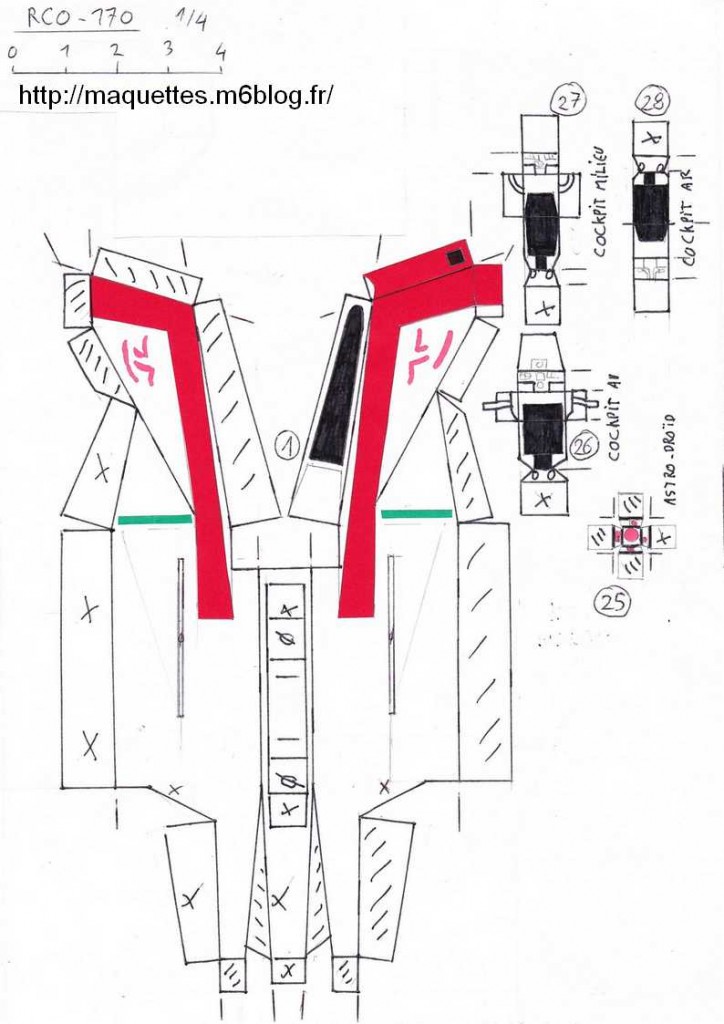
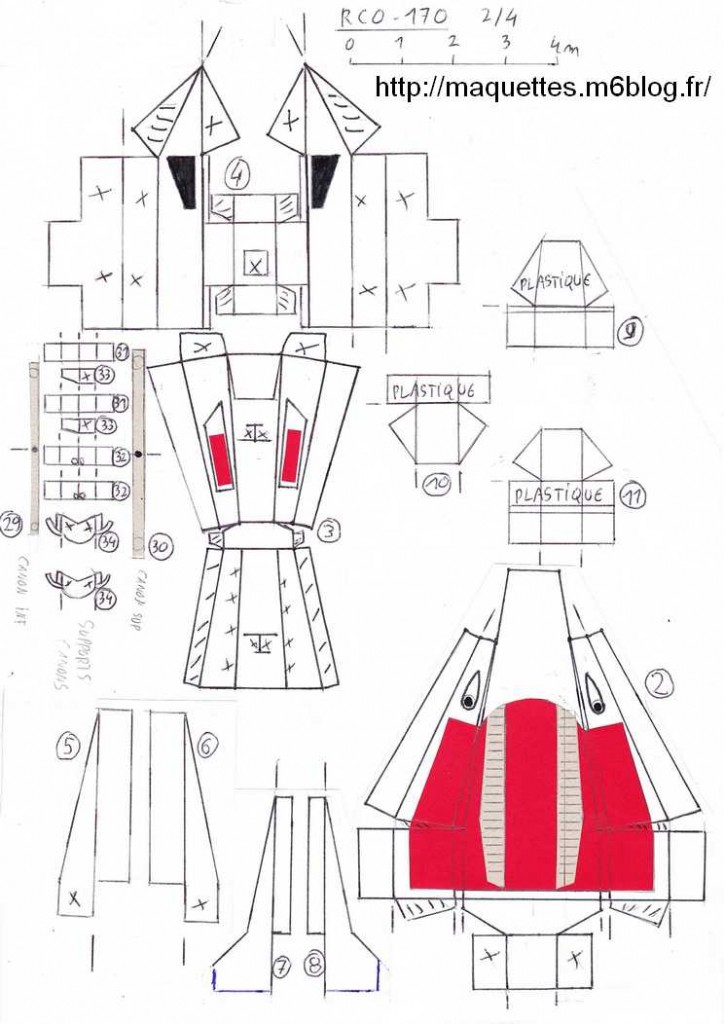
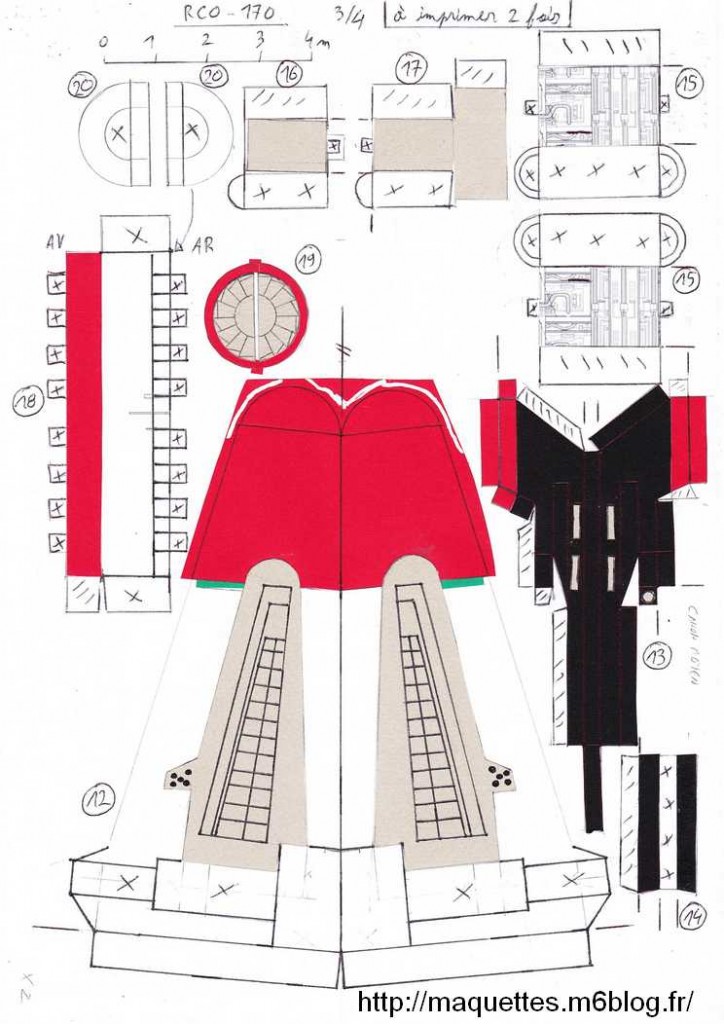
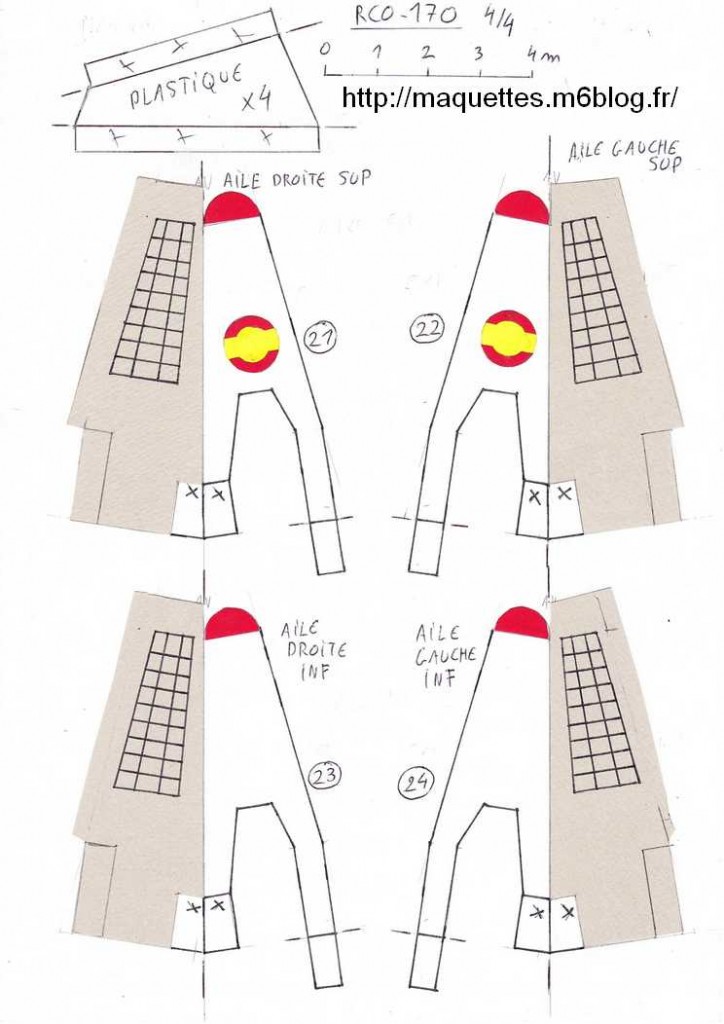
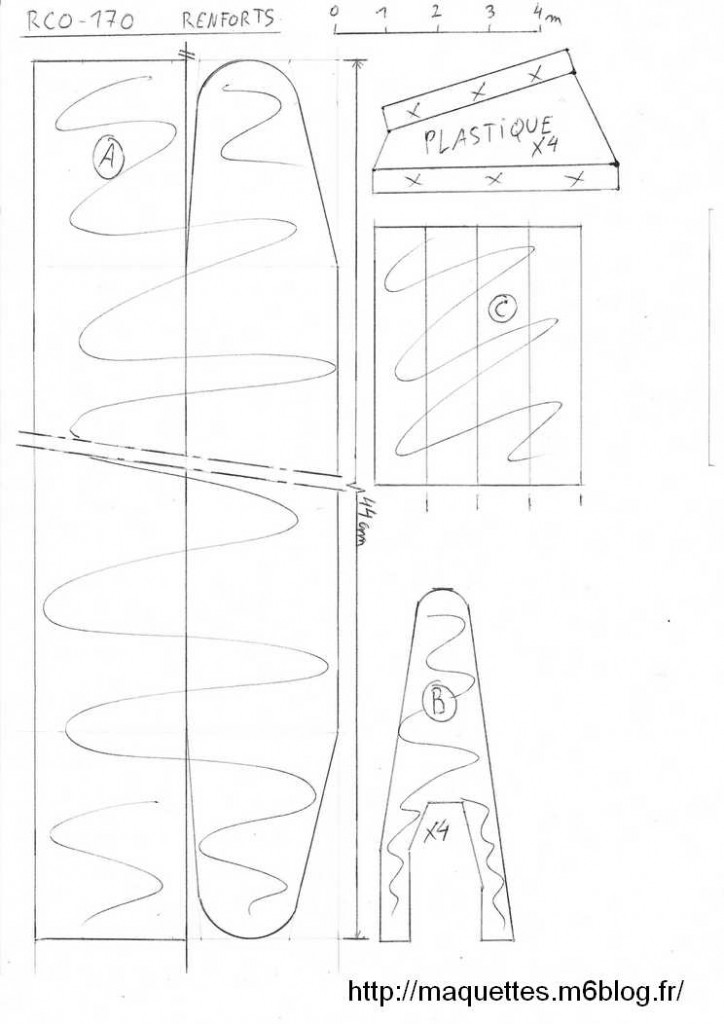
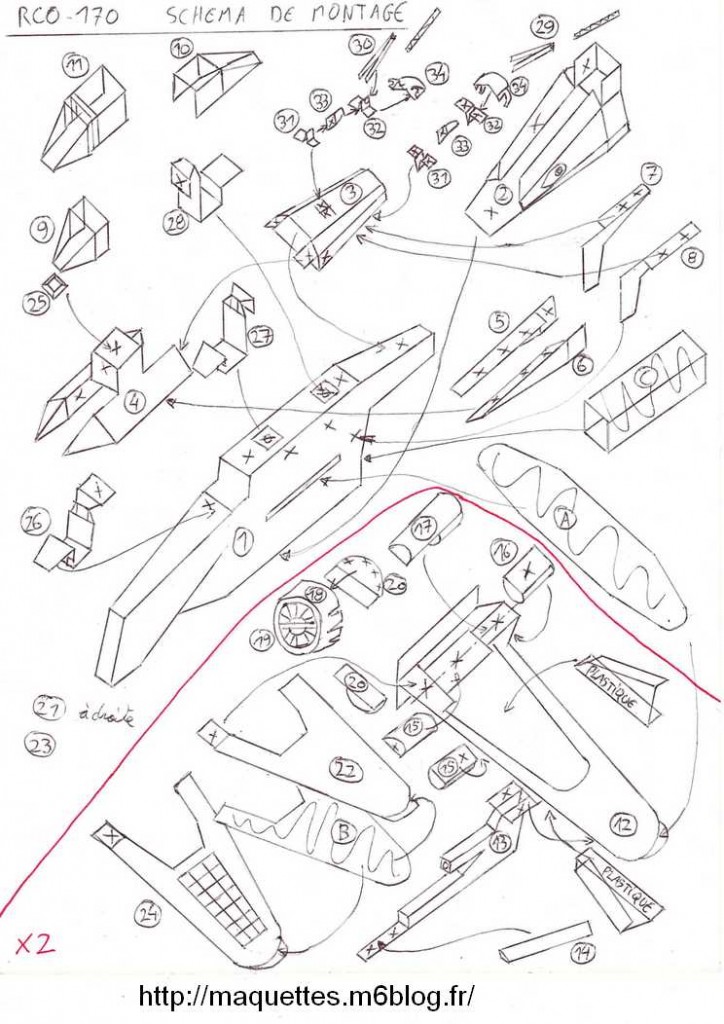
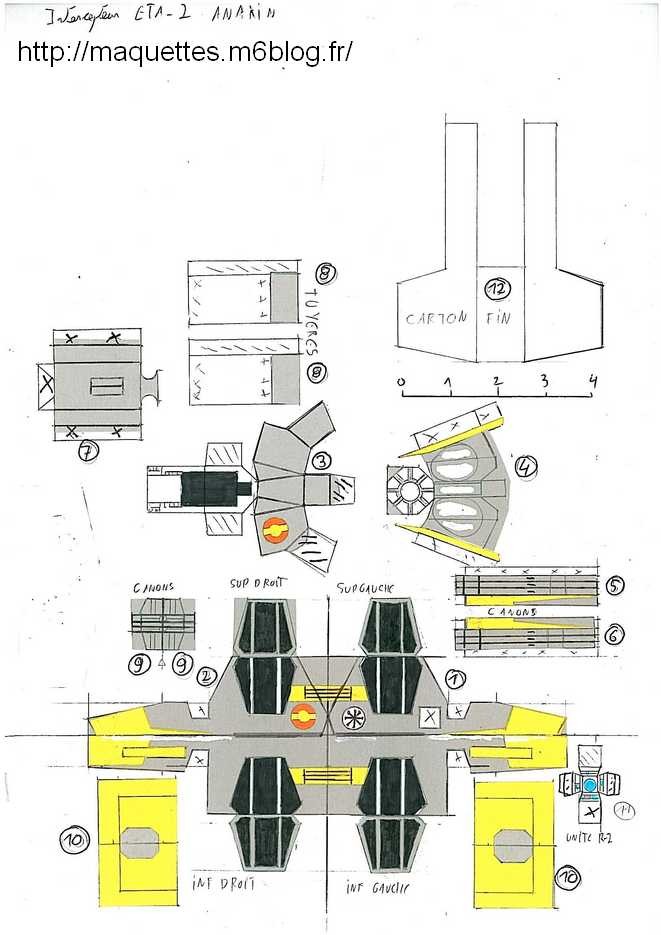
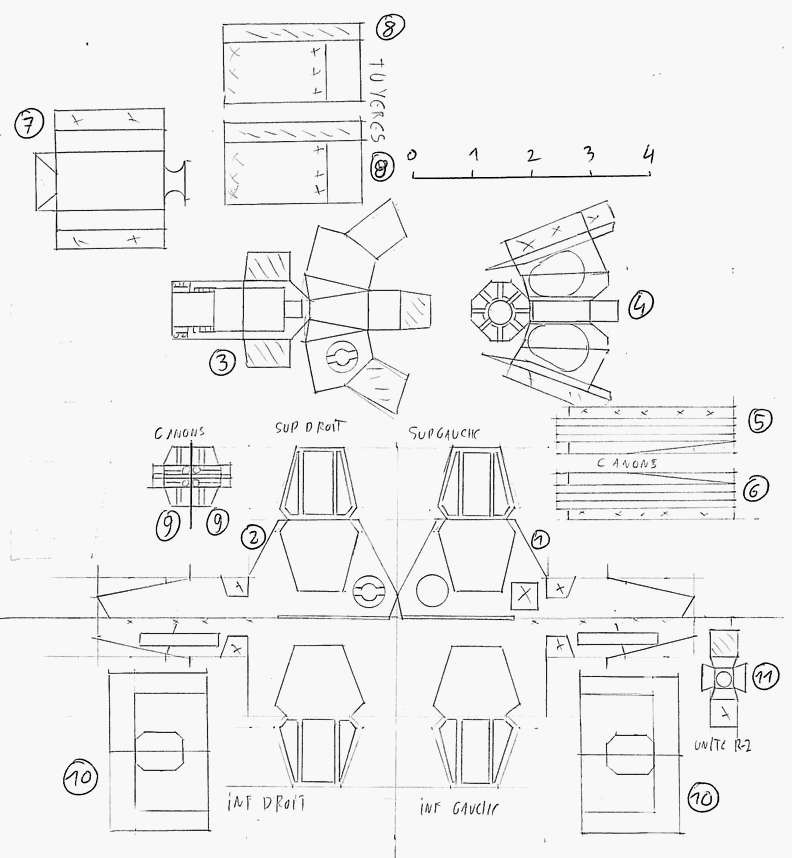
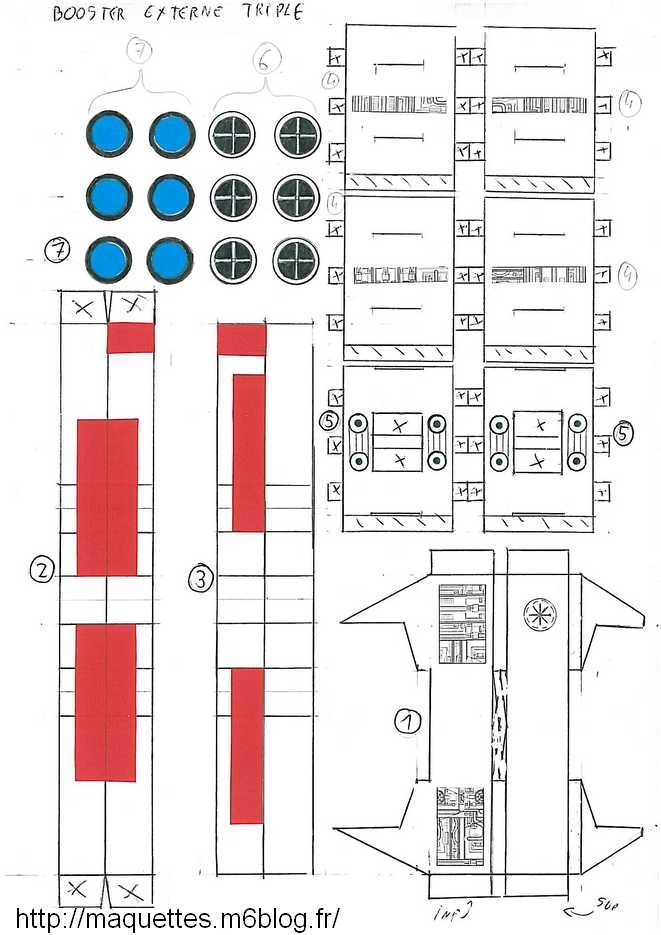
    En raison de sa petite taille, le plan 3 vues, le plan de renforts, le plan de pièces et le schéma de montage sont tous sur la même planche !
    Because of his small size, the 3 sights plan, the plan of reinforcements, the plan of pieces and the installation diagram are all on the same board!

    chasseur tridroide-plan.jpg

    Pour télécharger le plan du chasseur tridroide au 1/66 en pdf / To download the plan of the fighter tridroide in 1/66 pdf, CLIQUEZ ICI

    CONSIGNES DE CONSTRUCTION DU TRICHASSEUR DROIDE :
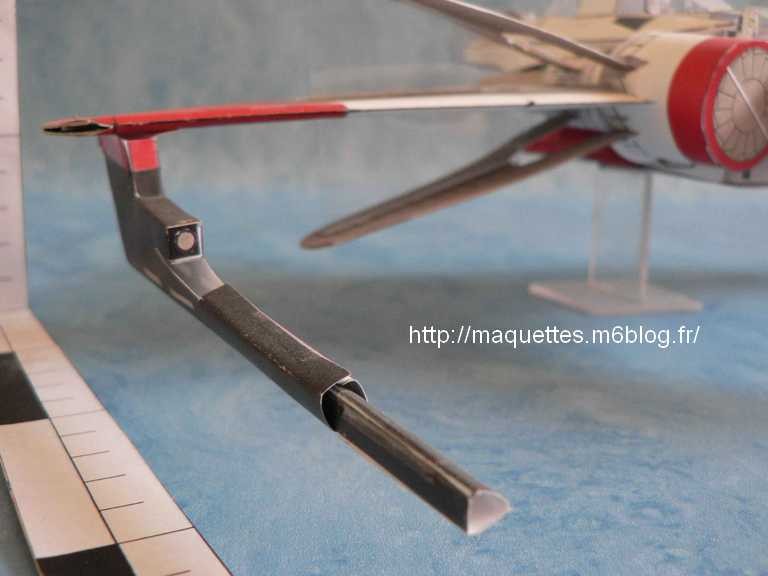
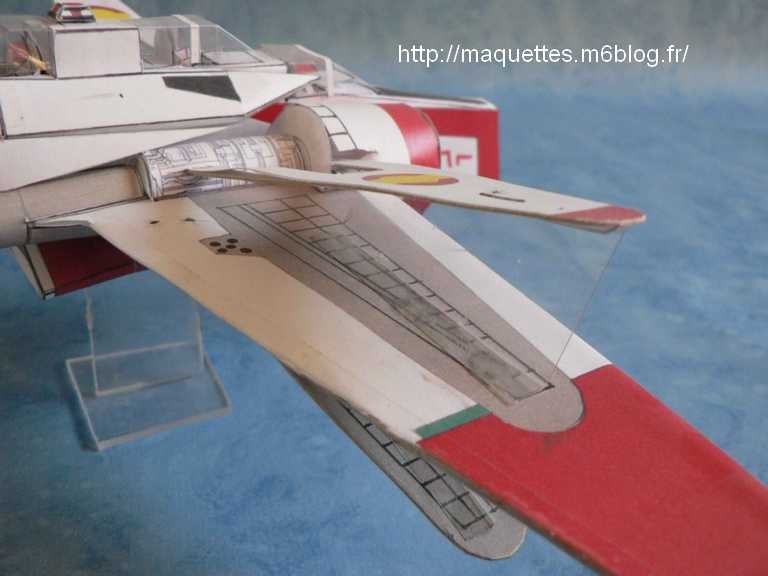
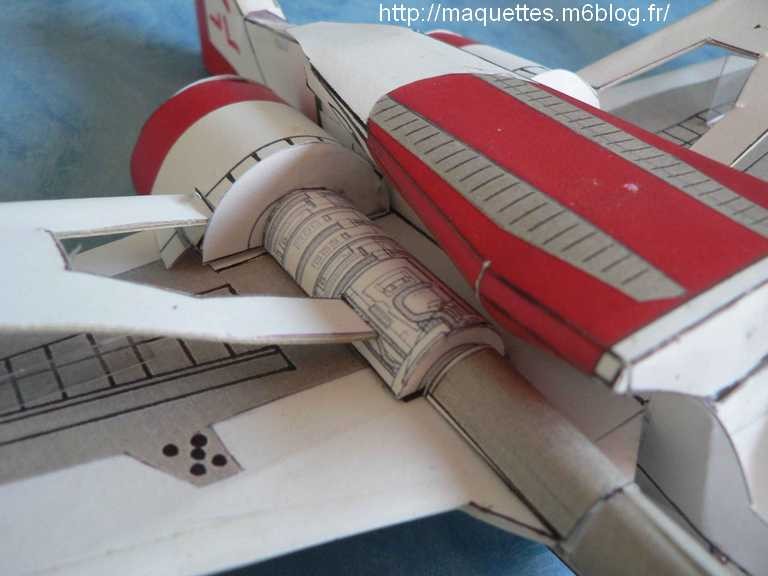
    - Ce modèle est un tout petit peu diffile à construire car , ce modèle a de gros bras, donc j'ai joué sur une double épaisseur de carton !
    - J'ai utilisé des agrafes disposés en travers du pliage, puis j'ai ensuite plié cette agrafe pour que les cartons soient bien à 120° les uns des autres !
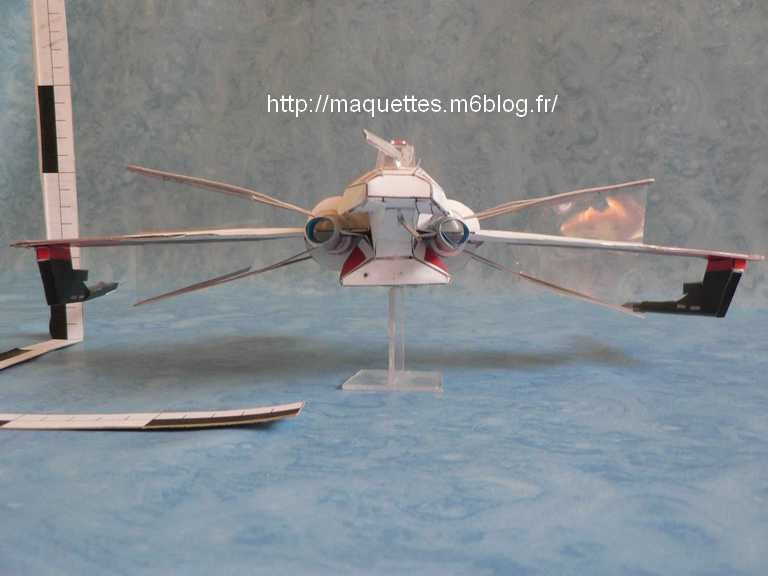
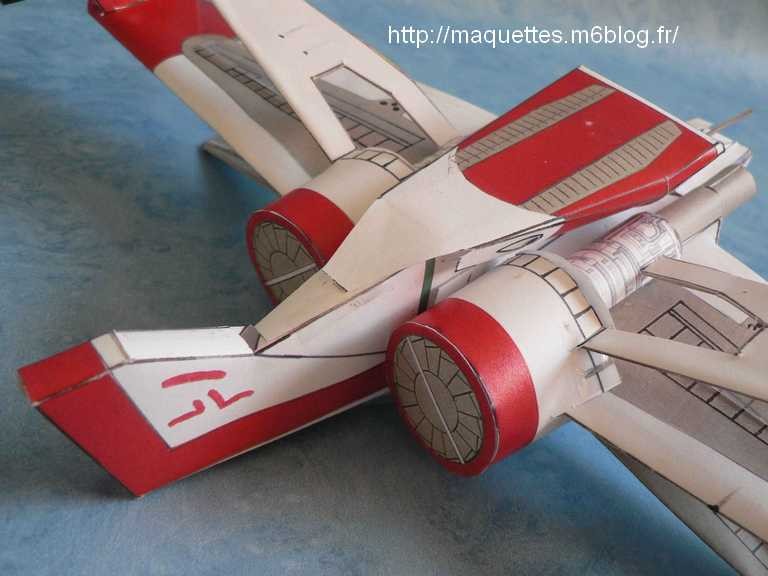
    - Vous disposez installer un aimant à l'intérieur de la "tête du droide" pour pouvoir plus tard l'installer sur un support en fil de fer, étant donné qu'il ne dispose pas de train d'atterrissage ( comme nombre de véhicules STAR WARS!) ou alors utiliser un support en plastique transparent plié en U, pour le poser en "lévitation" au dessus du sol !!

    BUILDINGS INSTRUCTIONS OF SPACE TRIDROID :
    - This model is any young little diffile to be built because, this model has of big arm, thus I played on a double cardboard thickness!
    - I used hooks arranged across the folding, then I then folded this hook so that cardboards are indeed 120 ° some of the others!
    - You incline to install a magnet inside the " head of the droid " to be later able to install him on a support in wire, given that have no landing gear (as number of vehicles STAR WARS!) or then use a transparent plastic support folded there U, to put him( in "levitation" above the ground!!

  • (4) RCO-170

    Chasseur spatial d'attaque et de reconnaissance à long rayon d'action RCO-170 ou également appelé ARC-170, utilisé par l'ancienne république pendant la guerre des clone ! Appareil manoeuvré par un équipage de 3 clones, extremment bien armé avec 2 gros canons lasers moyens, 2 canons laser léger en tourelle arrière, et par 2 tubes lances-torpilles à protons !!
    Spatial fighter of attack and recognition with long scope RCO-170 or also called ARC-170, used by the old republic during the clones wars! Device maneuvered by 3 clones crew, very well armed with 2 big average laser guns, 2 laser guns light in back turret, and by 2 protons lances-torpedoes !!

    RCO 170-image0 1.jpg
    RCO 170-photo01.JPG
    RCO 170-image02.jpg
    RCO 170-photo02.JPG
    détail sur les canons moyens latéraux
    RCO 170-image03.jpeg
    RCO 170-photo03.JPG
    détail du nez
    RCO 170-image04.jpeg
    RCO 170-photo04.JPG
    RCO 170-image05.jpeg
    RCO 170-photo05.JPG
    RCO 170-image06.jpg
    RCO 170-photo06.JPG
    RCO 170-image07.jpg
    RCO 170-photo07.JPG
    zoom sur les moteurs
    RCO 170-image08.jpg
    RCO 170-photo08.JPG
    RCO 170-image09.jpg
    RCO 170-photo09.JPG
    RCO 170-image10.jpg
    RCO 170-photo10.JPG
    vue de dessous de l'arrière
    RCO 170-image11.jpg
    RCO 170-photo11.JPG
    vue de dessous des moteurs
    .
    RCO 170-photo12.JPG
    vue de dessous du fuselage

    Pour plus de renseignements sur le RCO-170, voir le lien / For more information on the RCO-170, see the link: http://www.starwars-holonet.com/holonet.php?fiche=ship_arc170

    RCO 170-plan3vues1.jpg
    RCO 170-plan3vues2.jpg
    RCO 170-pièces1.jpg

    RCO 170-pièces2.jpg
    RCO 170-pièces3.jpg
    RCO 170-pièces4.jpg
    RCO 170-renforts.jpg
    RCO 170-schéma.jpg

    Pour télécharger le plan 3 vues, les plans de pièces, schéma de montage et plans de renforts du RCO-170 / To download the 3 sights plan, the plans of pieces, installation diagram and plans of reinforcements of the RCO-170, CLIQUER ICI

    Pour télécharger le schéma de montage et plans de renforts du RCO-170 / To download the installation diagram and the plans(shots) of reinforcements of the RCO-170, CLIQUER ICI

    CONSIGNES DE CONSTRUCTION DU CHASSEUR RCO-170 :
    -  Ce modèle est de catégorie 4, car il y a de nombreuses pièces à assembler , des renforts en carton et un agencement de pièces en plastique et en carton !
    - Le renfort A passe en travers des ailes et fait toute la largeur du vaisseau, soit 44 cm ! pour éviter que les ailes ne se gondolent avec le temps,vous pouvez insérer de la corde à piano dans ce renfort pour garder les ailes droites !!
    - Un aimant peut être coller à l'intérieur du renfort C pour pouvoir poser ensuite la maquette sur un support, étant donné qu'il est dépourvu de trains d'atterrissage !!
    - Les canons arrières sont dessinés pour pouvoir pivoter sur les côtés !!
    - Attention au montage des canons d'ailes qui peuvent avoir tendance à vriller !

    BUILDINGS INSTRUCTIONS OF RCO-170 :
    - This model is of category 4, because there is numerous rooms to be assembled, cardboard reinforcements and organization of plastic and cardboard pieces!
    - The reinforcement A passes across wings and made all the width of the vessel, that is 44 cms! To avoid that wings crinkle in time, you can insert of the piano wire into this reinforcement to keep right wings!!
    - A magnet can be to stick inside the reinforcement C to be able to put then the model on a support, given that it lacks landing gears!!
    - Artillery rear are drawn to be able to revolve on sides!!
    - Attention on the assembly of the artillery of wings which can tend to drill !

  • (1) Intercepteur jedi eta-2

    Intercepteur eta-2 utilisé exclusivement par les chevaliers Jedi vers la fin de la guerre des clones !
    Interceptor eta-2 used exclusively by the knights Jedi towards the end of the clones wars!

    Pour plus de renseignements, voir le lien / For more informations, see the link: http://www.starwars-holonet.com/holonet.php?fiche=ship_eta2 

    eta-2-image1.jpg
    eta-2-photo1.jpg
    eta-2-photo2.jpg
    eta-2-photo3.jpg
    eta-2-photo4.jpg


    eta-2-plan.jpg
    eta-2-anakin-piéces.jpg
    eta-2-obiwan-piéces.jpg
    eta-2-piéces.jpg
    eta-2 + Booster externe-schéma.jpg
    Booster triple-piéces.jpg

    Pour télécharger les plans 3 vues, de pièces, schémas de montage et de renforts et du chasseur eta-2 et de son booster externe triple / To download plans(shots) 3 sights, of pieces(rooms), diagrams of assembly(editing) and reinforcements and the hunter(fighter) eta-2 and of its triple external booster CLIQUER ICI

    CONSIGNES DE CONSTRUCTION DU CHASSEUR JEDI ETA-2 :
    - Ne pas oublier de reporter les dimensions de la verrière sur une feuille plastique, puis d'y coller les renforts de la verrière, puis coller le tout sur la maquette ( attention découpe délicate).
    BUILDING INSTRUCTIONS OF JEDI ETA-2 FIGHTER :
    - Do not forget to put back the dimensions of the window on a plastic sheet, then to fix the reinforcements of the window, then stick the whole on the model (attention cuts delicate). 

    CONSIGNES DE CONSTRUCTION DE CONSTRUCTION DE L'ANNEAU D'HYPERDRIVE :
    - Il est conseillé de doubler l'anneau d'hyperdrive de carton fin sur le cercle et au moins une épaisseur au niveau de l a partie centrale.
    - ORDRE DE MONTAGE :il faut découper les ouvertures dans les 6 moteurs, puis les refermer
    - Faire glisser 3 moteurs dans chacune des 2 bandes, puis refermer l'anneau, positionner les moteurs suivant le plan, puis les coller et enfin fixer la partie centrale sur entre les 2 moteurs du milieu.
    BUILDING INSTRUCTIONS OF HYPERDRIVE BOOSTER :
    - It is advised to double the ring of hyperdrive of fine cardboard(box) on the circle and at least a thickness at the level of l left power plant.
    - ORDER OF ASSEMBLY : you must cut openings from 6 engines, then to close them
    - Make slide 3 engines in each of 2 bands(strips), then close the ring, position engines following the plan, then stick them and finally fix the central part on between 2 engines of the middle.