Novembre 2015

Ok

En poursuivant votre navigation sur ce site, vous acceptez l'utilisation de cookies. Ces derniers assurent le bon fonctionnement de nos services. En savoir plus.

  • (3) Fokker Dr-1

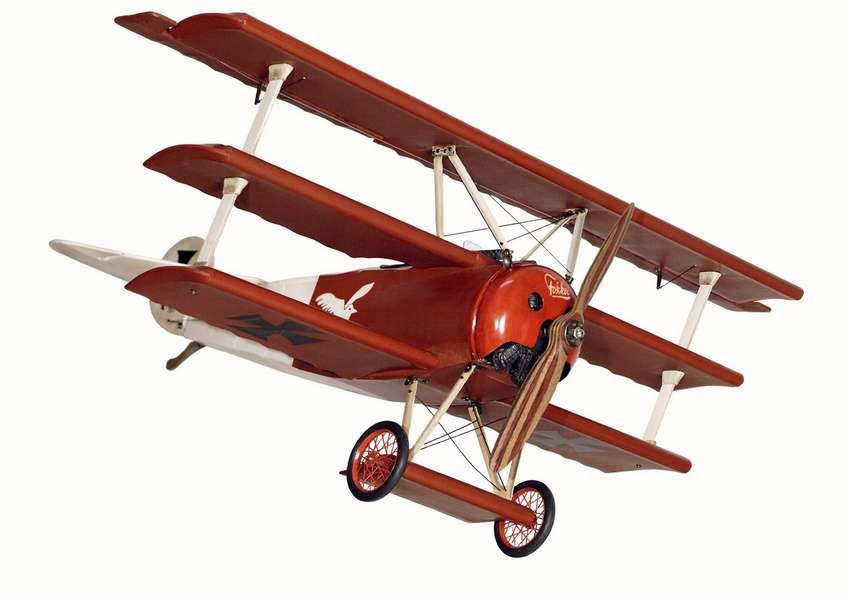
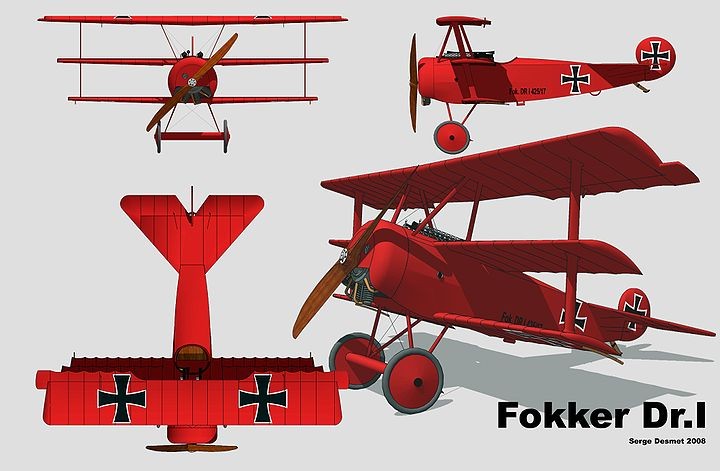
    Suprêmement agile, le Fokker Dr-1 se révela un redoutable instrument de combat aux mains de pilotes allemands, comme le célèbre Baron von richthofen, alias le baron rouge !
    Véritable terreur des aviateurs alliés du front occidental pendant la première guerre mondiale, cet appareil préleva sur eux un très lourd tribut et domina le ciel pendant des mois. Mais il ne conserva son titre que quelques mois seulement à cause de la mise en évidence du manque de robustesse de ses ailes !
    Supremely agile, Fokker Dr-1 révela a redoubtable instrument of fight in the hands of German pilots, as the famous Baron von richthofen, alias the red baron!
    Real terror of the allied airmen of the western front during the first world war, this device took from them a very heavy toll and dominated the sky during months. But he kept his title only some months only because of the revealing of the lack of robustness of his wings!

    Pour plus d'infos sur cet appareil voir le lien / For more information about this device see the link: http://fr.wikipedia.org/wiki/Fokker_Triplan_Dr1

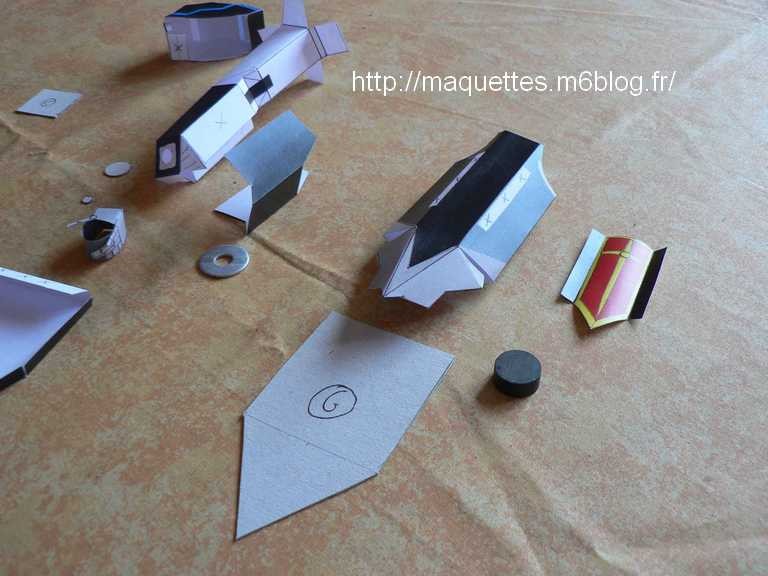
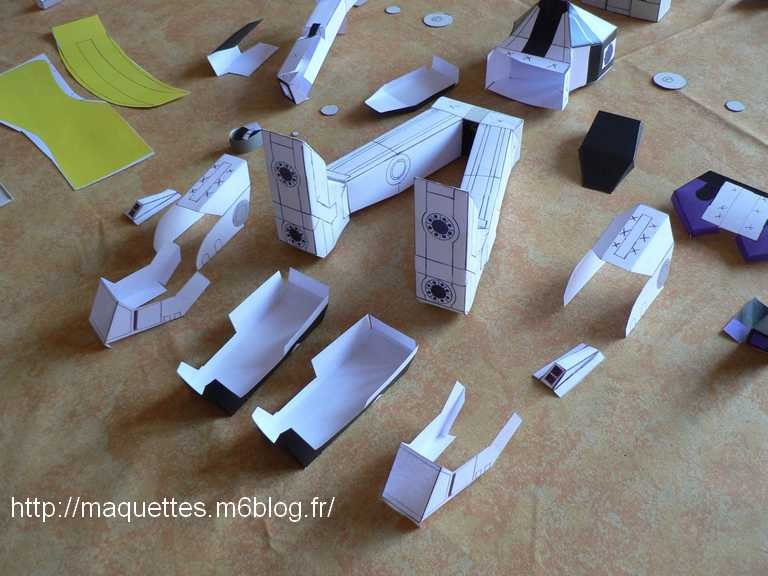
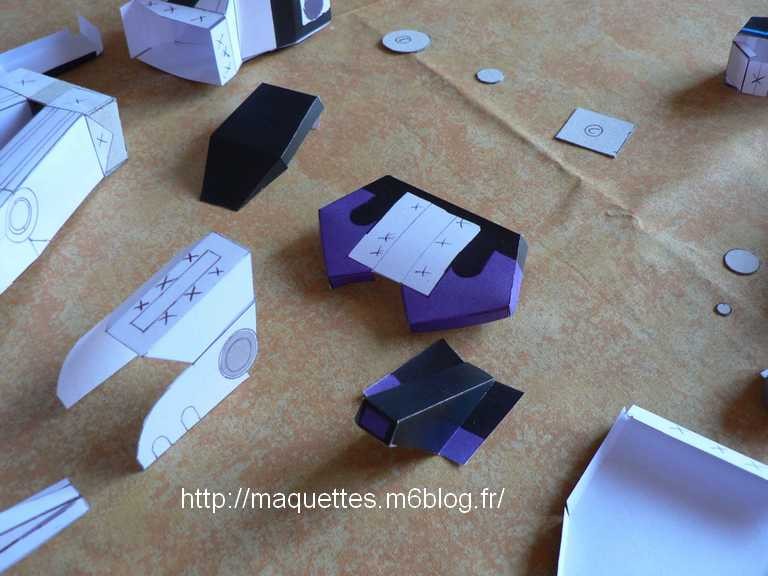
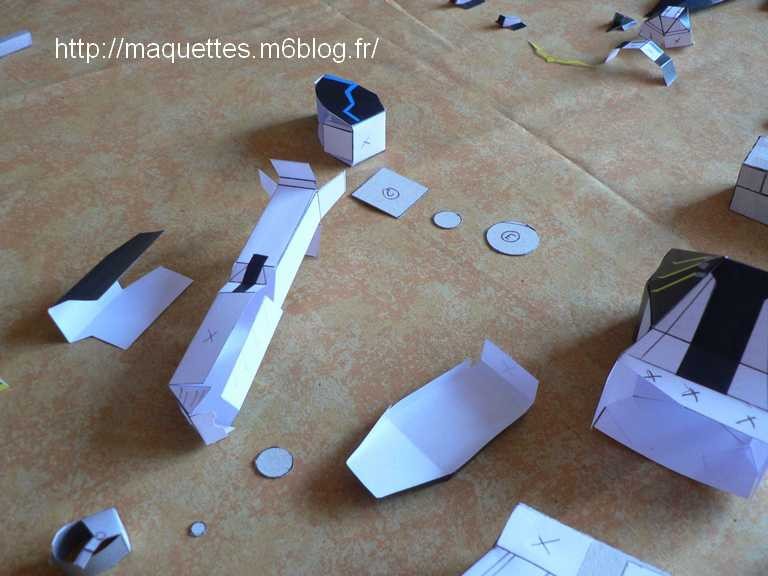
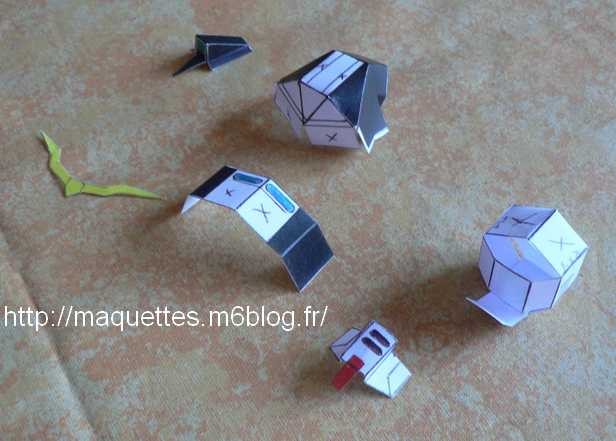
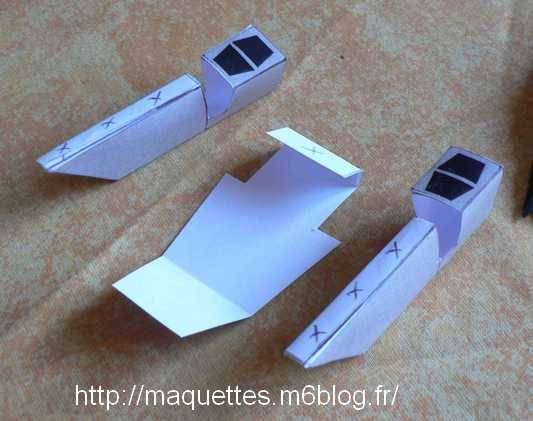
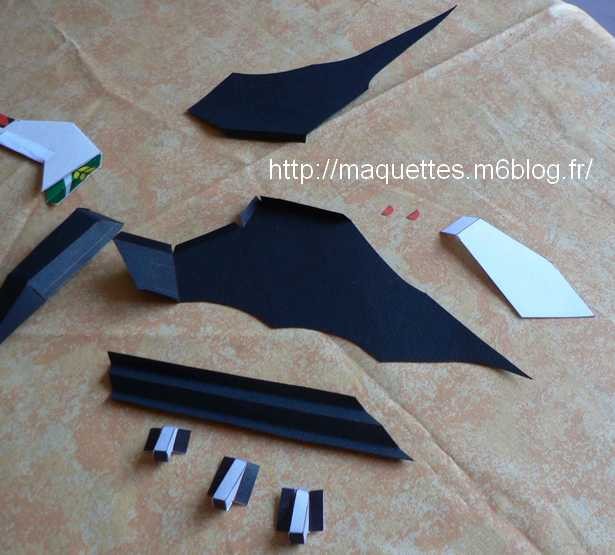
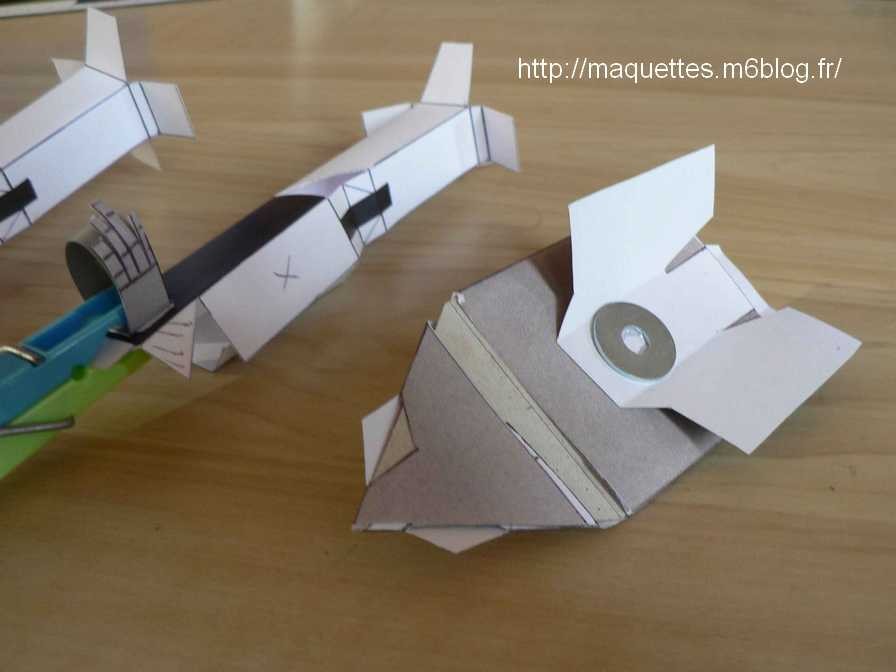
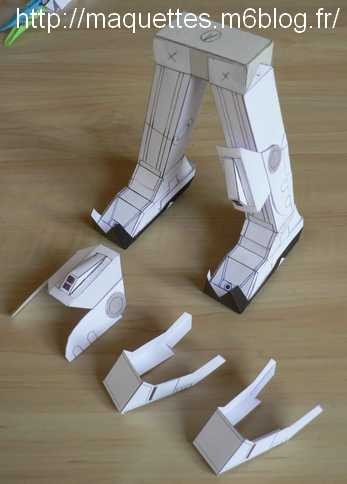
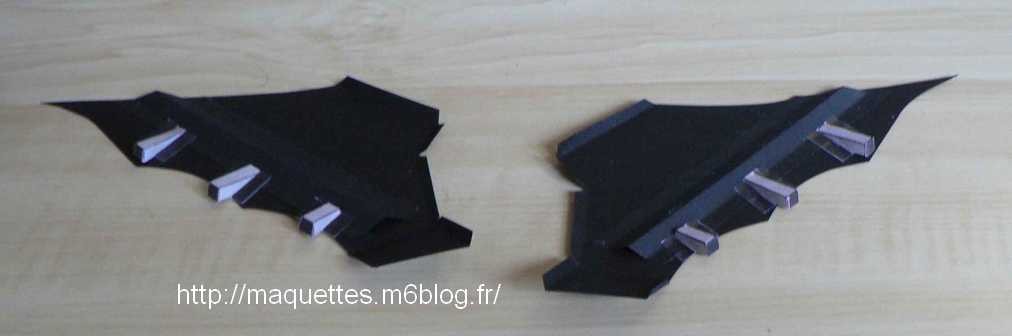
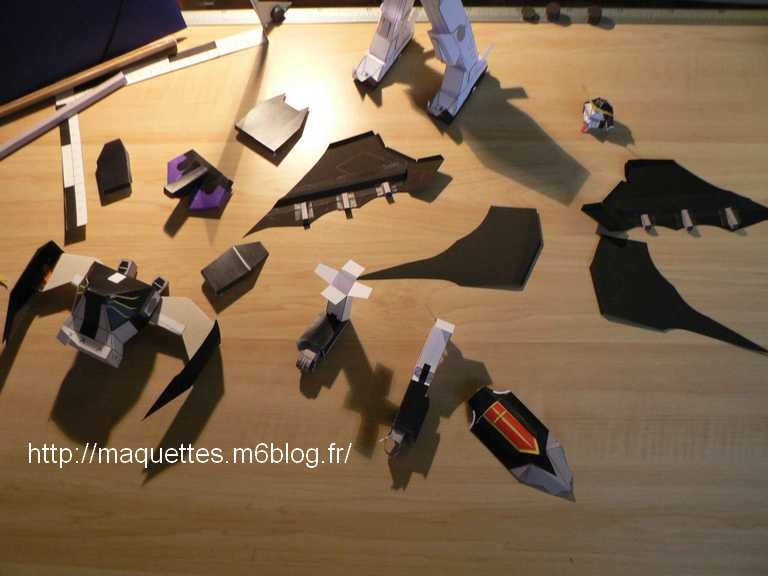
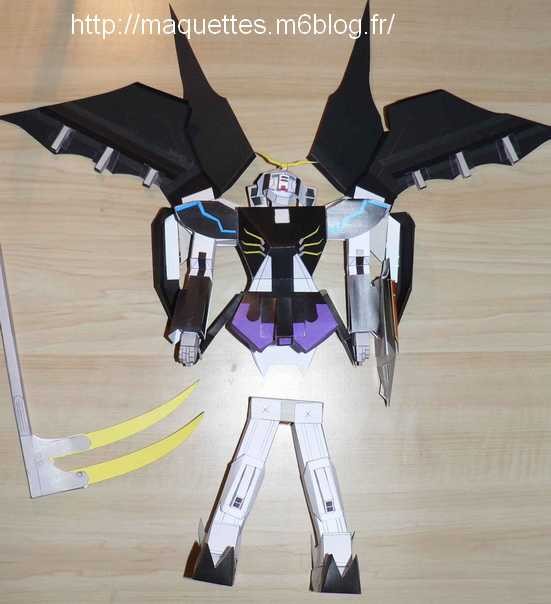
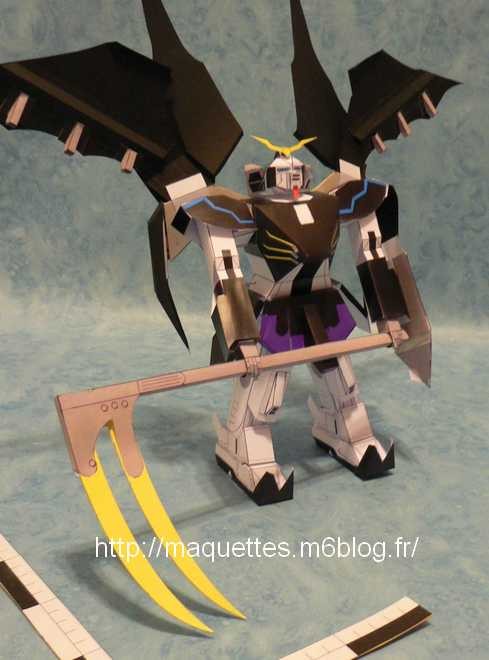
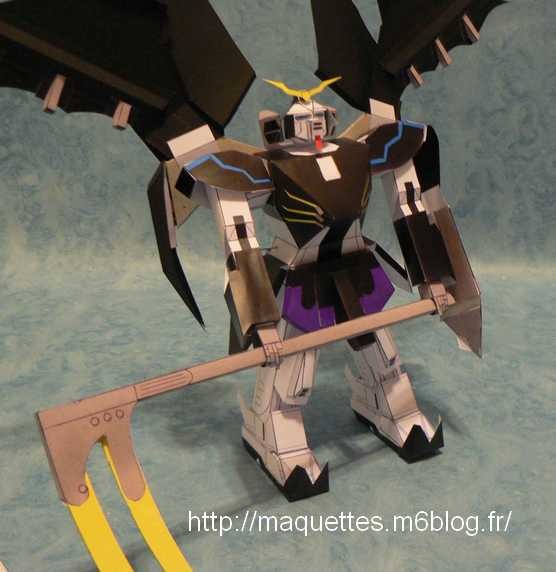
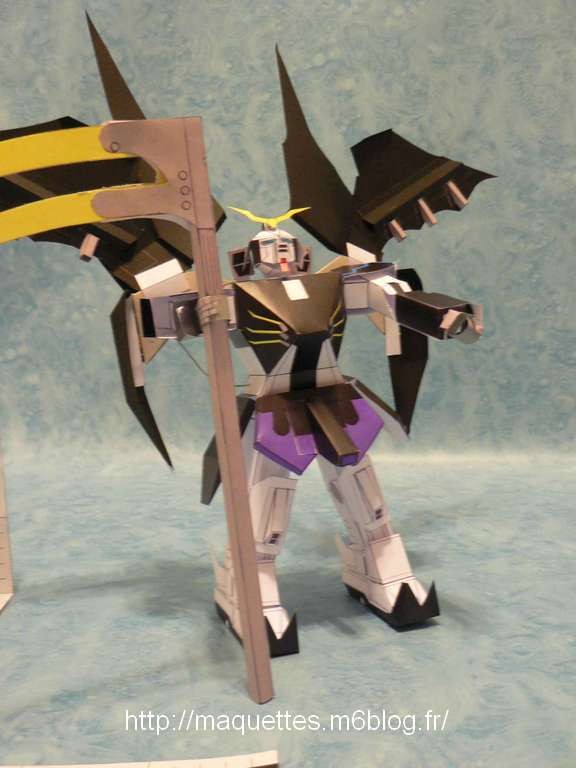
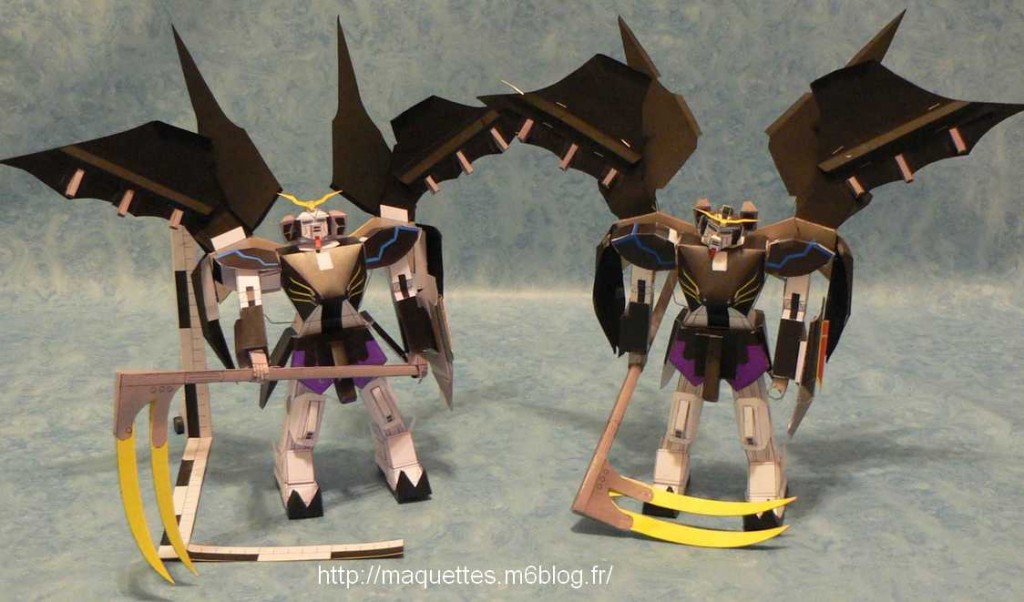
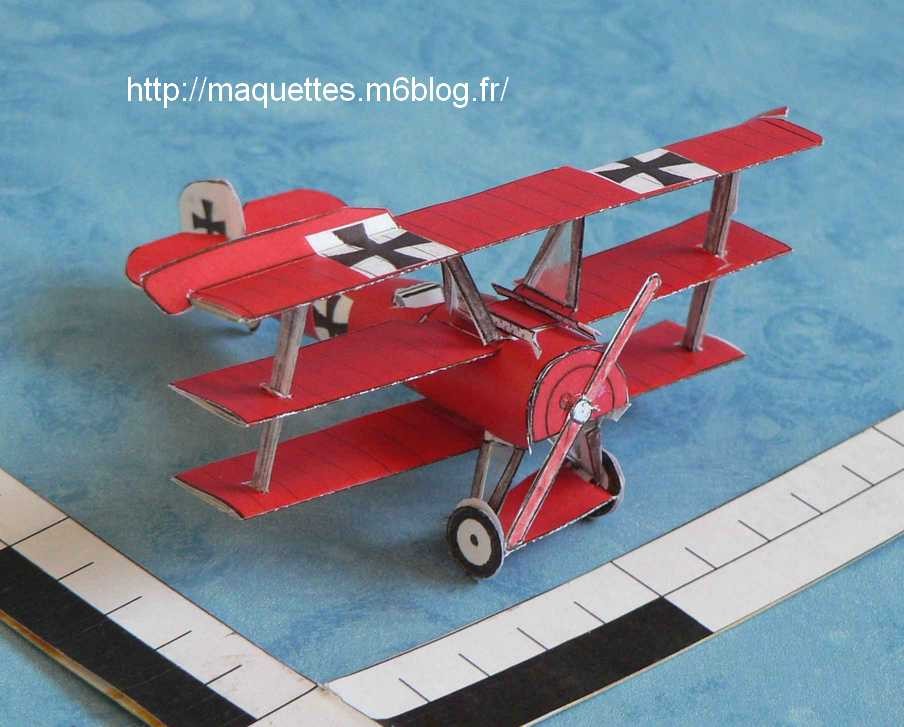
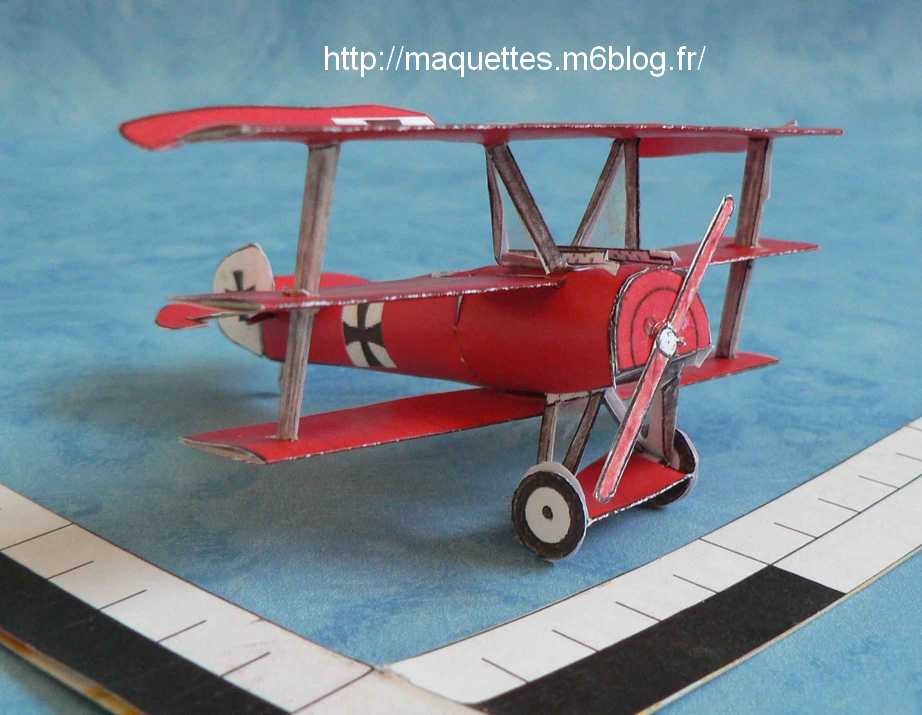
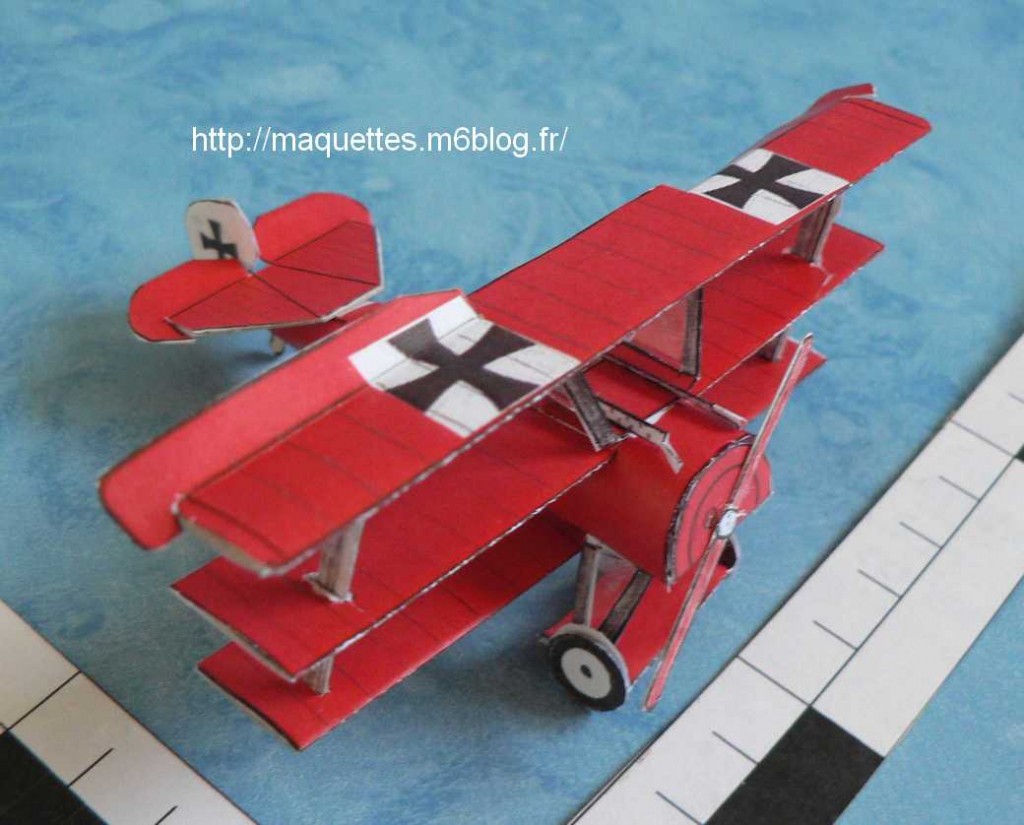
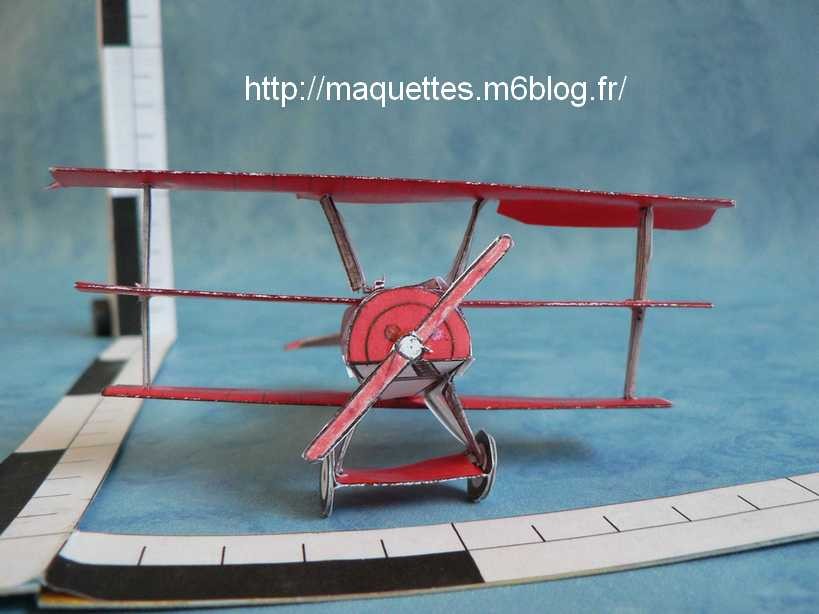
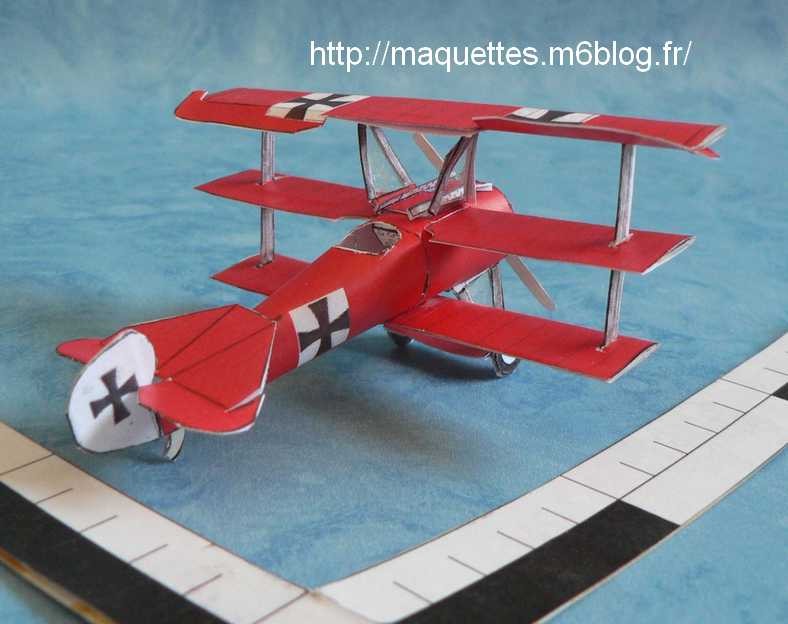
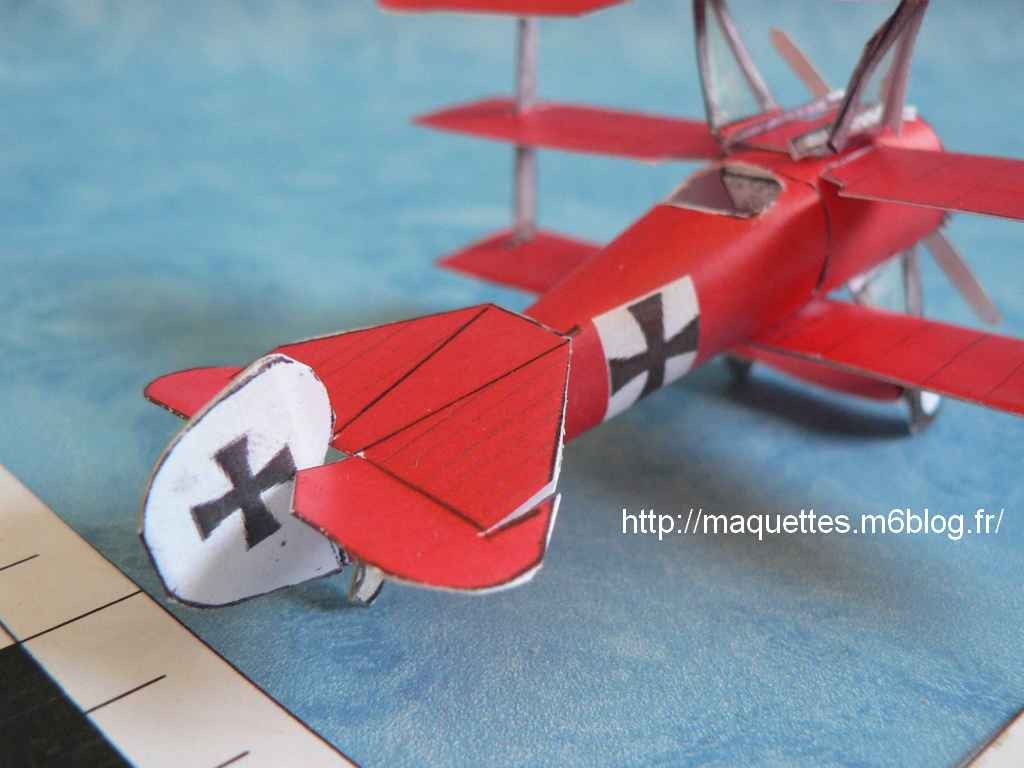
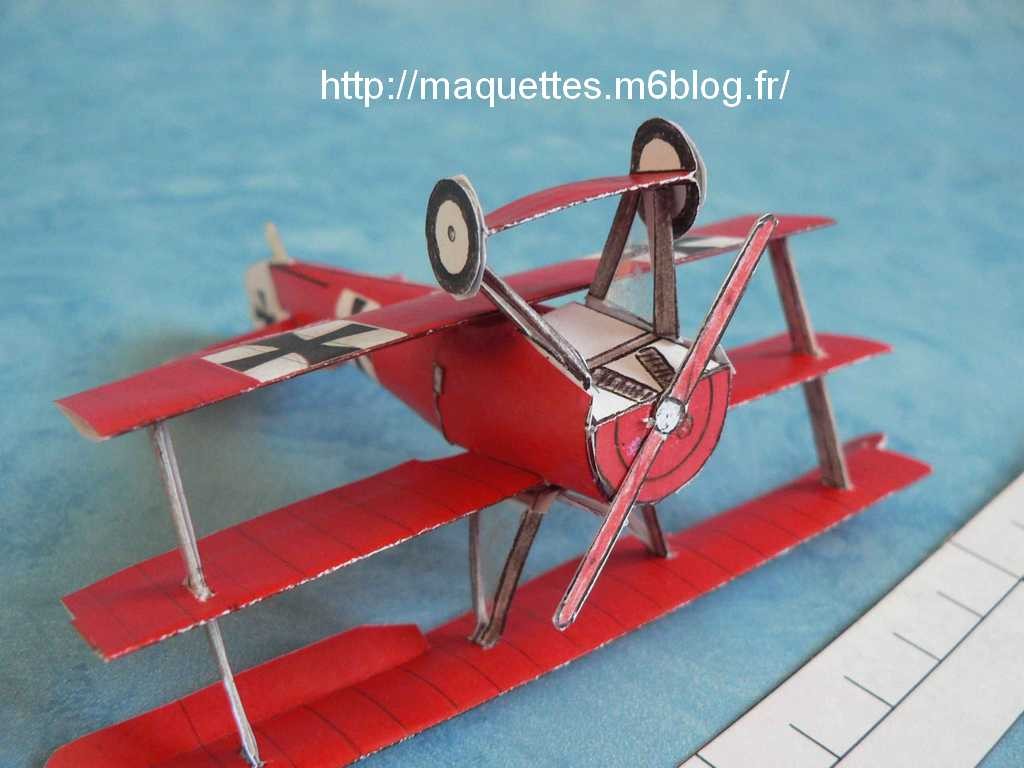
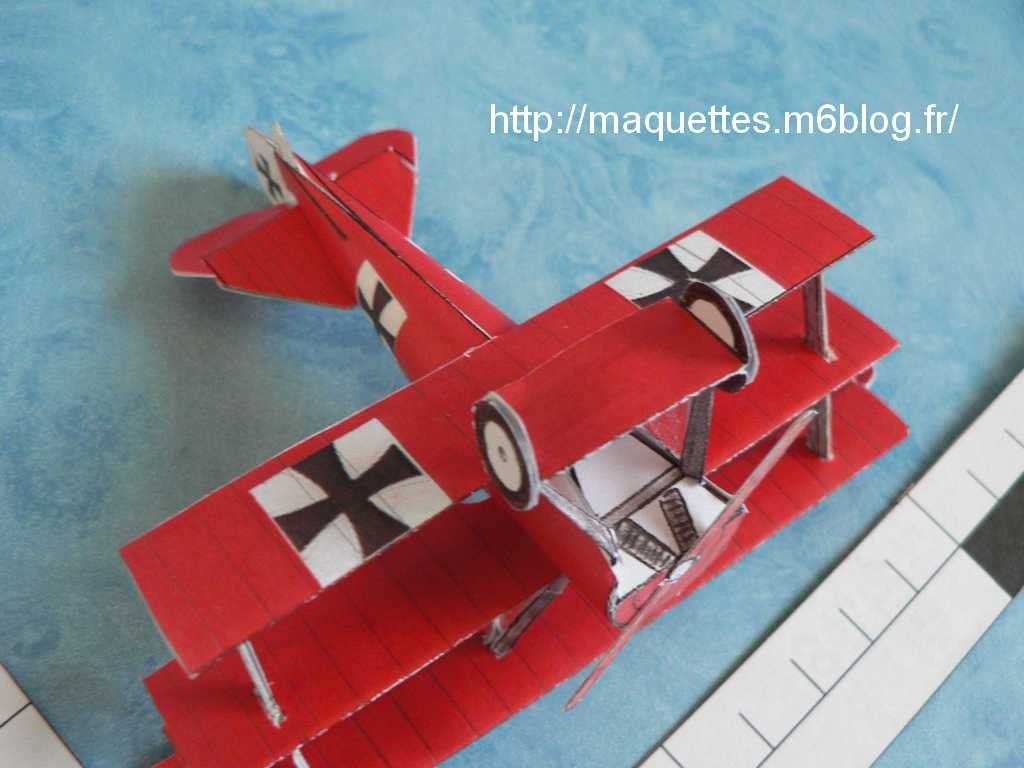
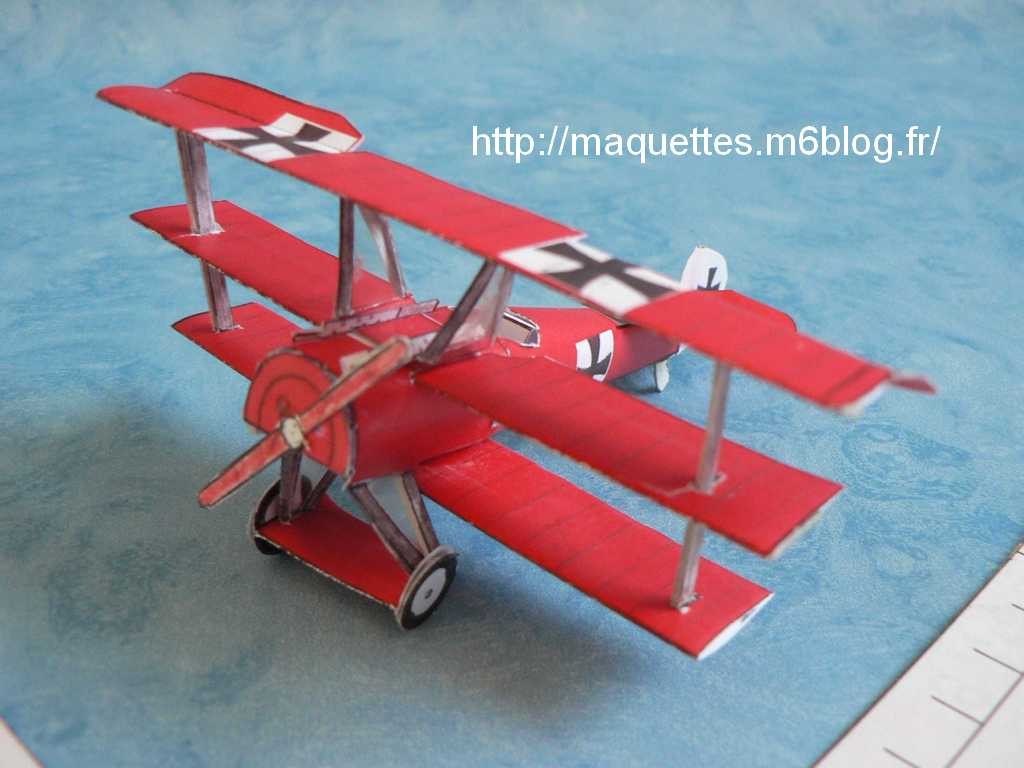
    Photos ci-dessous d'une maquette construite en février 2009 !
    (cette maquette sert d'essai pour construire également un Sopwith Camel et passer ensuite aux appareils de la seconde guerre mondiale )
    Photos below of a model built in February, 2009!
    ( This model serves as try to build also Sopwith Camel and pass then in the devices of the second world war)

    Fokker DR1-image01.jpg
    Fokker baron rouge-photo01.JPG
    Fokker DR1-image02.jpg
    Fokker baron rouge-photo02.JPG
    Fokker DR1-image03.jpg
    Fokker baron rouge-photo03.JPG
    Fokker DR1-image04.jpg
    Fokker baron rouge-photo04.JPG
    Fokker baron rouge-photo05.JPG
    Fokker baron rouge-photo06.JPG
    Fokker baron rouge-photo07.JPG
    Fokker baron rouge-photo08.JPG
    Fokker baron rouge-photo09.JPG
    Fokker baron rouge-photo10.JPG

    Fokker DR1-plan+pièces.jpg
    Fokker DR1-schéma+renforts.jpg
    Pour télécharger le plan 3 vues, des pièces noir et blanc et le schéma de montage du Fokker Dr1 au 1/66 en pdf / To download the 3 sights plan, black and white pieces and the installation diagram of Fokker Dr1 in 1/66 pdf, CLIQUER ICI
    Fokker baron rouge-plan+pièces.jpg

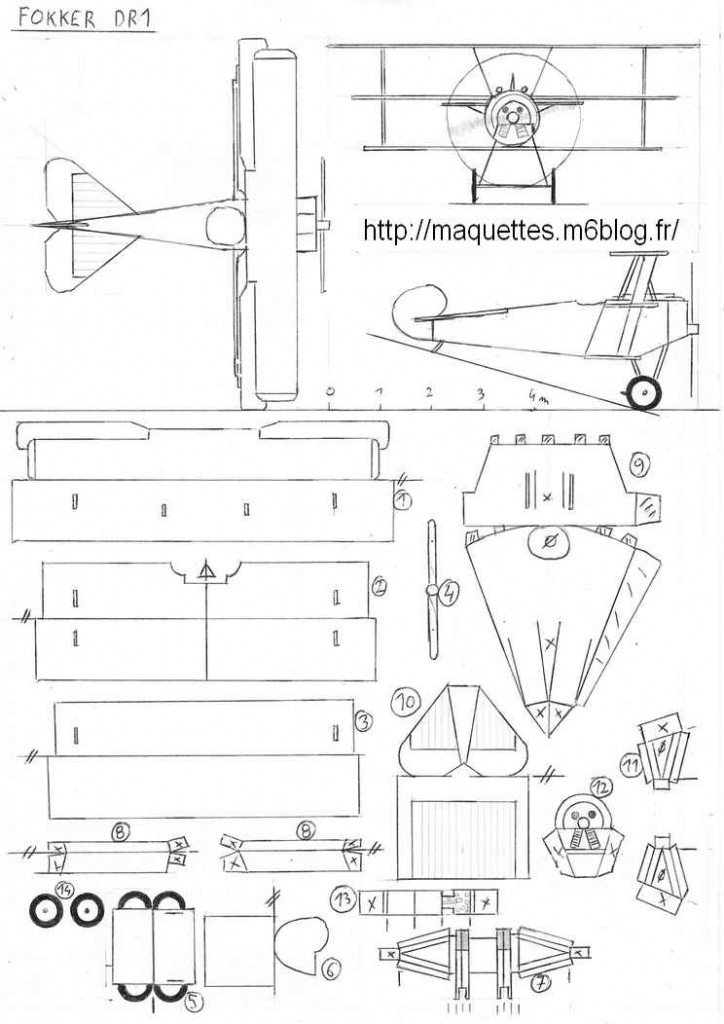
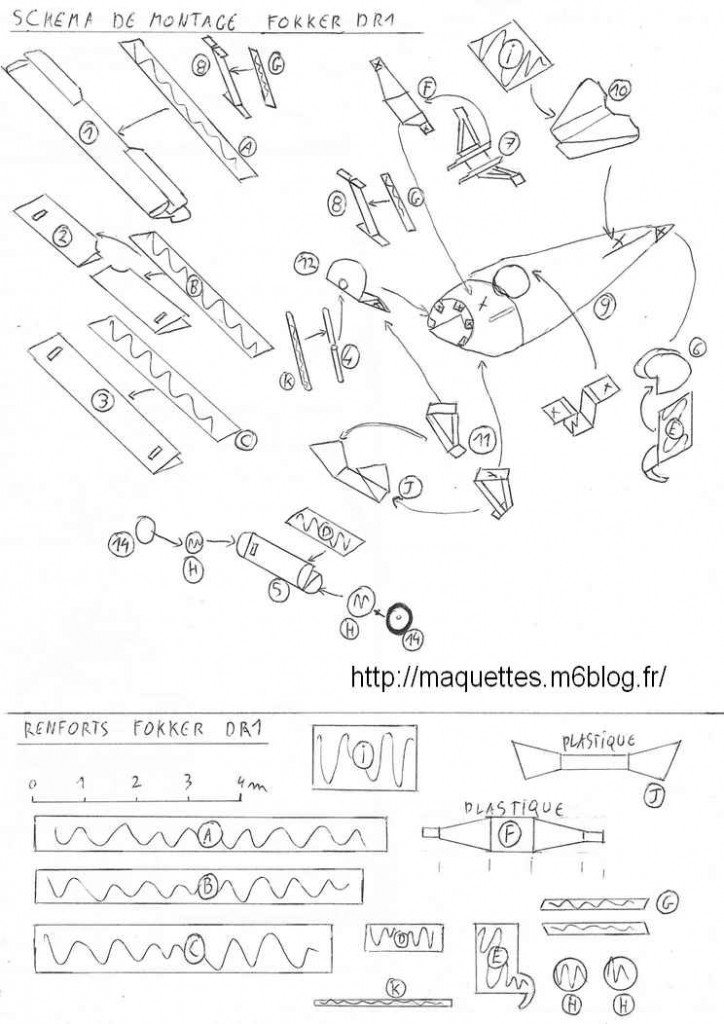
    Pour télécharger le plan 3 vues et de pièces en couleur du Fokker Dr1 de Mandrefd Von Richthofen au 1/66 en pdf / To download the 3 sights plan and of color pieces of the Fokker Dr1 de Mandrefd Von Richthofen in 1/66 pdfCLIQUER ICI

    CONSIGNES DE CONSTRUCTION :
    - Le plan de voilure milieu doit être percé de part en part (papier et carton) à chaque extrémité pour laisser passer les haubans !
    - Les haubans de voilure, au milieu et les haunbans support de train d'atterrissage doivent être fait avec de la feuille plastique !
    - Je suggère d'assembler les pièces 5, 7, 11 et 12 et leurs renforts associé ensemble d'un côté et toutes les autres pièces du fokker de l'autre !
    - Ainsi pour finir la maquette, il n'y aura que 2 grands ensembles à assembler, puis de boucher le fuselage avec le capot avant (support d'hélice) puis de venir coller l'hélice (doublé de carton ou de plastique ) !

    BUILDINGS INSTRUCTIONS :
    - The plan of buckle middle must be drilled throughout (paper and cardboard) in every extremity to allow to pass shrouds!
    - The shrouds of buckle, in the middle and the haunbans support of landing gear must be made with the plastic sheet!
    - I suggest to assemble pieces 5, 7, 11 and 12 and their reinforcements partner together on one side and all other pieces of the fokker of the other one!
    - So to stop the model, there will be only 2 complexes to be assembled, then blocking the fuselage with the hood before (support of helix) then coming to stick the helix (doubled by cardboard or by plastic)!

  • principe de montage

    Ensemble de photos prises au cours de la construction d'un deathscythe hell ! / Set photos taken during the construction of a deathscythe hell!

    1ère partie : Ensembles des pièces à assembler ! ( environ 3h pour toutes le spièces papier et tracer/découper les pièces cartons )
    en supplément, il est possible de faire des poignets pivotants ! c'est plus pratique pour tous les modèles qui utilisent des armes à la main !
    1st part : all the pieces to be assembled! (Approximately 3 hours for all the paper spièces and draw / cut pieces cardboards) in supplement, it is possible to make swivelling wrists! It is more practical for all the models which use weapons in the hand!

    montage-01.JPG
    les 112 pièces + l'assemblage des
    pièces communes Gundam / 112 pieces +
    the assembly of the common pieces Gundam
    montage-02.JPG
    détail du bouclier avec l'aimant /
    Detail of the shield with the magnet
    montage-03.JPG
    Tous les accessoires des jambes /
    All the accessories of legs
    montage-04.JPG
    montage-05.JPG
    Pièces composants la faux-laser double
    / Pieces constituents doubles forgery-laser
    montage-06.JPG
    Pièces du bras avec poignets pivotants
    (non indiqués sur les plans mais même construction
    que pour la fixation du bras sur le torse !)
    Pieces of the arm with swivelling wrists (not indicated on plans
    but the same construction as for the
    fixation of the arm on the trunk!)
    montage-07.JPG
    Pièces du torse ! ( le renfort du torse
    n'est pas dans les plans de renforts !)
    / Pieces of the trunk! (The reinforcement of
    the trunk is not in the plans of reinforcements!)
    montage-08.JPG
    Pièces de la tête /
    Pieces of the head
    montage-09.JPG
    Pièces sur l'arrière du torse
    / Pieces on the back of the trunk
    montage-10.JPG
    montage-11.JPG
    montage-12.JPG
    Pièces des ailes côté gauche
    / Pieces of wings left-hand side
    montage-13.JPG
    pièces des ailes côté droit
    / Pieces of wings right-hand side
    .

     2ére partie : assemblage des pièces ( environ 3h pour tout l'assemblage ) / 2nd part : assembly of pieces (approximately 3 hours for all the assembly)

    montage-14.JPG
    éléments du bouclier et des bras /
    Elements of the shield and the arms
    montage-15.JPG
    poignet pivotants à la superglue et assemblage
    du bouclier avec aimant et rondelle métallique
    / Wrist swivelling in the superglue and the assembly
    of the shield with magnet and metallic slice
    montage-16.JPG
    éléments de jambes et pieds
    / Elements of legs and feet
    montage-17.JPG
    genouillères et "semelles"
    / Kneepads and "soles"

    montage-18.JPG
    éléments de la tête /
    Elements of the head

    montage-19.JPG
    tête assemblée et supports d'aile
    avec "brouilleurs"
    / Assembled head and supports of
    wing with "scramblers"
    montage-20.JPG
    éléments des ailes / Elements of wings
    montage-21.JPG
    décoration des ailes avants /
    Decoration of wings fronts
    montage-22.JPG
    renforts et propulseurs sur les ailes avants
    / Reinforcements and propellers
    on wings fronts
    montage-23.JPG
    premier pré-assemblage
    / First pre-assembly
    montage-24.JPG
    assemblages des bras
    / Assemblies of arms
    montage-25.JPG
     pose des ailes arrières
    / Installation of wings rear
    montage-26.JPG
    pose des ailes avants et des bras + faux
    / Forgery put wings fronts and arms +
    montage-27.JPG
    4 éléments de la ceinture avant
    assemblage finale
    / 4 elements of the belt before
    assembly finale

    montage-28.JPG
    pose du fil de fer en travers du torse pour
    supportage des ailes
    / Installation of the wire across
    the trunk for supportage of the wings


    Un petit trou est fait dans chaque aile !
    le fil de fer sort du torse de chaque côte,
    passe derrière les 2 ailes puis par le perçage
    fait plus haut et est masqué dans le fil de fer !
    Si jamais ce fil de fer dépasse, le recouper
    avec une pince coupante
    A small hole is made in every wing!
    The wire goes out of the trunk of every coast,
    passes behind 2 wings then by the drilling made
    higher and is masked in the wire!
    If ever this wire exceeds, to recut him
     with a sharp crowbar

    maquette assemblée ! / Assembled model !

    montage-29.JPG
    le dernier modèle
    montage-30.JPG
    montage-34.JPG
    les 2 bras relevés 
    montage-36.JPG
  • Astuce 13 : prises de photos

    Je vous donne mes trucs pour réaliser de bonnes photos de vos maquettes !

    Idéalement, il faut faire des photos en journée ( la lumière naturelles est forte et régulière) mais on reste tributaire de la météo de la journée !
    Je fais mes photos dans ma cuisine avec une lumière forte et disponible !
    Cela me dispense d'utiliser un flash qui mettrait trop en avant la maquette et ne permettrait pas de la voir en globalité !
    je réalise mes photos à, au moins, 1m de distance de la maquette avec un fond bleu et une échelle de mesure !

    Mes photos sont prises en qualité moyenne avec un appareil  de 6 millions de pixels !
    J'obtiens des photos de environ 1.2 Mo ,qui sont trés lourdes. Dans ce cas, je recadre mes photos et j'en profite pour les réduire pour obtenir de sphotos d' environ 200 Ko !
    Cette taille de photo est suffisante pour voir des détails de la maquette sans être trop lourdes !

    Bonne séance de prise photo !

    Et merci de me les envoyés (avec vos seuls prénoms et âges) pour les mettre sur mon site !

    I give you my tips to make good photos of your artwork!

    Ideally, you should take photos during the day (natural light is strong and regular) but it still depends on the weather of the day,
    I make my pictures in my kitchen with a bright light and available! This makes it unnecessary to use a flash that would put too much into the model before and would not see the whole, I make my photos at least 1m away from the model with a background blue and a scale measuring

    My photos are taken at medium quality with an automatic six million pixels! I get pictures of about 1.2 Mb, which is very heavy. In this case, I crop my photos and I want to reduce them to get sphotos about 200 KB! The image size is sufficient to see details of the model without being too heavy!

    Good picture taking session!

    And thank you to sent (with your own names and ages) to put them on my site!